Archive for 2008

Mt. Kuju (九重山)

April 27, 2008

Mt. Kuju is not only a majestic volcanic wonderland filled with luscious greenery, steaming gas vents, and serene lakes – it’s also the highest peak on the island of Kyushu.

The hike: From the parking lot, take the trail that starts to the left of the souvenir shop. It should take about 20 minutes to reach the Kuju ridge line up the concrete-lined path. If you’ve come in early summer, then you should find a sea of beautiful azalea in bloom and literally hundreds of people. The next 40 minutes to Ogigahana (扇ヶ鼻) is relatively easy going, where you’ll find a 4-way junction. You can either climb to the top of Ogigahana, head left to the summit of Mt. Hosho (星生山) or continue straight towards Mt. Kuju. The steam vents just behind Mt. Hosho are wonderful, and a reminder that you’re on an active volcano! After another half hour or so, you’ll reach the saddle just below the peak of Kuju, where you’ll find a small emergency hut. There are lots of different trails that branch off in all directions, so I recommend climbing over to Naka-dake first (中岳) first, and hitting Mt. Kuju on your way back to Mi-no-koshi. Naka-dake is the tallest peak in Kyushu, and reachable in about 40 minutes. You’ll pass by some fabulous volcanic lakes, which make for a great place to relax and enjoy your lunch (if the weather is nice). After reaching the summit of Naka-dake, you can loop back to the saddle below Kuju. Head up to the peak and then all the way back to the parking lot or continue traversing the ridgeline of Mt. Kuju via Hokke-in hot spring (法華院温泉), which has a nice campground.

When to go: This hike can be done year round if you’ve got some crampons. The peak does get its fair share of winter snow, so make sure the road to the mountain pass is plowed and open before venturing out. The azaleas bloom in early to late May, which brings huge crowds. Autumn is also a great time to visit and winter is seeing increasing crowds as of late, due to the winter hiking boom in Japan. Click here to see the winter scenery and be careful of white-out conditions.

Access: From Hakata station (博多), take a JR “Yufuin no mori” limited express train and get off at Bungonakamura station (豊後中村駅). The train takes about 2 hours and costs 4290 yen. A local train is half the price but takes a whopping 4-1/2 hours. From Nakamura station, take a bus bound for Makinoto-toge (牧ノ戸峠). Buses only run on weekends from late May to late October. Click here to access the schedule. Click on “時刻表”, “ローカル時刻表”, and then “森町〜牧ノ戸線” to download the .pdf file. Another more convenient option might be to take the bus that runs from Beppu to Kumamoto, which stops along the way at Makinoto-toge. For example, if you take the overnight Osaka to Beppu ferry, there’s a direct bus leaving directly from the ferry terminal at 7:07am, arriving at Makinoto at 9:26am. This bus does not run in the winter however, which means between December and March you’ll need to take a bus from Beppu Bus Center (別交通センター) at 8am. Click here for that bus schedule. If coming from Kumamoto, the bus stops at Mt. Aso first before completing the 3-1/2 hour ride to the trailhead. Click here for the bus from the ferry terminal to Makinoto-toge. Sorry if it’s confusing but there are 2 different bus companies that provide bus services.

Level of difficulty: 2 out of 5 (elevation change ~500m).

Distance: 9.6km (3 to 4 hours)

Mt. Tsurugi (剣山)

April 26, 2008

Last updated: November 16, 2021

Mt. Tsurugi (san), not to be confused with Mt. Tsurugi (dake) in the Kita Alps, is the 2nd tallest mountain in Western Japan, and well worth a visit if you find yourself in Tokushima Prefecture. Apart from the chair lift and a couple of buildings/antenna on the summit, the peak is wonderful, with a splendid sub-alpine forest and plenty of breathtaking views.

The hike: From the chair lift entrance, hike downhill for about 50 meters on Route 438 (don’t go through the tunnel) past a couple of restaurants to find a shrine gate on your right with a signpost for Tsurugi Tozanguchi (剣山登山口). Climb the concrete stairs under the shrine gate (and don’t forget to check out the temple just to the left in the grassy park for its collection of Buddhist statues). At the top of the stairs turn right and walk past the shrine buildings to find a shimenawa rope strung between two cedar trees and a wooden signpost reading Tsurugisan Sanchō 4000 m (剣山山頂へ 4,000m). Just before the signpost fill up your water bottles at the stainless steel sink and walk under the rope and past the Fudō Myō-ō statue and small shrine sanctuary on your left. Walk past a concrete water reservoir with rubber water pipes strung about and climb the crest of the hill to a larger shrine building on your left. Through a gap in the trees you can see Mt Tsurugi if you walk up to the building itself. Continue climbing on a gentle slope to reach a corrugated metal tunnel running directly under the chairlift. Pass through the tunnel and follow the well-worn path as it switchbacks and runs mostly parallel to the lift. You may want to bring some headphones to drown out the loudspeaker announcements emanating from the adjacent chair lift. The route doubles as a nature walk, with plenty of trees signposted in katakana, so amuse yourself by learning some Japanese tree names if you’d like. After 10 minutes you’ll see signpost indicating Nishijima Eki 400m (西島駅 400m), or 400 horizontal meters to the top of the chair lift. Continue climbing for a couple of hundred meters through a narrow section of trail to reach a rock formation with a corrugated metal building housing a buddhist sanctuary. Feel free to climb up on the side trail to view the statues, or simply ignore and continue on the main trail to your left and ascend around the rock to reach a junction above. Ignore this and keep to the main trail, which soon breaks out of the trees to reveal the first vistas of the summit plateau in front of you and the pyramidal peak of Jirōgyū to the right. There are a couple of flattened clearings among the bamboo grass which double as campsites. If camping here then bring plenty of water to sustain you and be warned that the toilets at the chair lift station have seen better days. Stick to the main path to ascend past the campsites to reach the a big junction near the top of the chairlift. There is a huge signboard with a detailed map of the summit area. Take a photo as it will prove handy as there are many different paths to choose from. There are two different options. Those short of time should turn left and take the trail just next to the chair lift, which will take you to the summit in about 40 minutes. Otherwise, follow my recommended loop below:

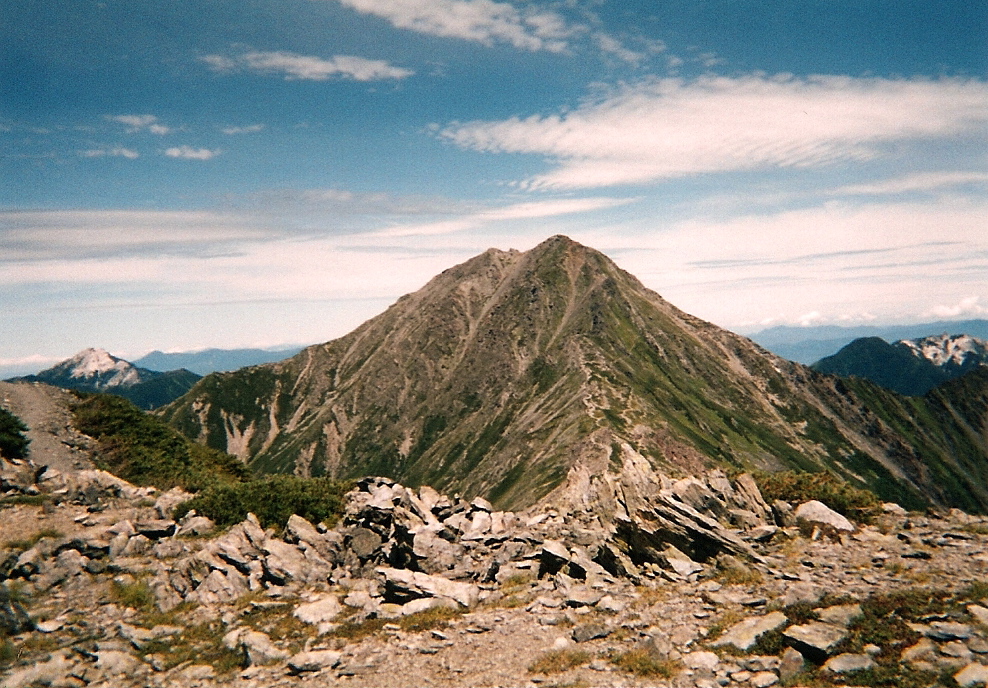
This is the beginning of the loop hike. You’ll climb via the shrine Torii path and finish on the trail just below. Pass through the wooden Torii gate marked in yellow paint as 四国つるぎ山. Climb a short distance and ignore the path on your left (which leads to a longer loop trail for Shugendō practitioners) and keep to the main track. After passing through a second wooden Torii gate, the route passes through a lush forest with intermittent vistas to your right. Keep an eye out for wildflowers lining the path including purple monkshood flowers in late August. The trail traverses along the side of the mountain before reaching Otsurugi shrine (大剣神社) at the base of its namesake rock formation. This ‘spearlike’ crag was used in ancient times by Shugendō monks, who chanted mantras under this rock formation. A trail left leads to Katanakake-no-matsu (刀掛の松), a large pine tree that sits along the main path converging from the chair lift. The path to the right passes right by the shrine before reaching a water source that is among the 100 best water sources in Japan. Unless you’re thirsty, ignore this path and stick to the main route, which starts switchbacking through a forest of Erman’s birch (dakekanba) that is usually found growing in the subalpine forests of Japan’s higher mountains. The trail turns east and traverses around the back side of the mountain towards the summit. You’ll soon see the blue roof of one of the mountain huts above you and just before reaching the mountain hut a path converges from the left. After reaching the buildings, admire the views towards the northeast, including views of Daisen on days with good visibility. Take the narrow trail between the mountain hut and shrine office to reach the summit plateau, which is lined with wooden walkways to help protect the vegetation. Gone are the days of the concrete paths and the restoration work has helped the greenery return to what was once a neglected mountain top. A wooden walkway leads left to a platform and ridge trail to Ni-no-mori and alternative loop around the mountain. The platform is a great place to take a break as the true summit area is narrow and cramped. After admiring the views return to to the junction. You can take either wooden walkway as both converge on the summit. The building just to the left is an eco toilet facility and a welcome replacement over the foul-smelling concrete restroom that used to sit on the summit. Take the right fork and climb the final few steps to the summit. The walkway splits right at the summit, with the triangulation point sitting between, wrapped in a shimenawa rope. After posing for summit photos, continue on the path to the south along the main ridge. You’ll see an attractive-looking peak jutting out just in front of you – that is Jirōgyū, your second target peak of the day. Drop down through the bamboo grass along the well-traveled path to descend to a junction. Ignore the first junction you reach (this will be your descent path after climbing Jirōgyū so you can drop off extra stuff here if you have a heavy pack). Continue on the undulating track to reach the bottom of the pass and start of the steep climb to the summit. Ignore the track to the right that bypasses the summit (unless you need water, as there’s a source on that track) and keep to the main ridge. It’s a 20-minute climb to the top depending on your speed, where there are spectacular views back towards Tsurugi and further afield to Miune and the rest of the main traverse route of the mountain range to the west. After enjoying the views retrace your steps back to the second junction and take the track to your left marked in Japanese for Mi-no-koshi (見の越へ 2770). The path is a lovely, relatively flat track that skirts under the side of Tsurugi before joining the main trail at the top of the chair lift. Lined by wildflowers and hemmed by hardwoods, the track is easily the most beautiful on the peak and pleasant way to round out your hike. Ignore all of the trails splitting off to the right – they all lead back to the summit of Tsurugi. Instead, continue straight, past an unmarked water source and wooden rest shelter to reach the top of the chair lift in about 50 minutes. From there, simply turn left and retrace your steps back to the parking lot.

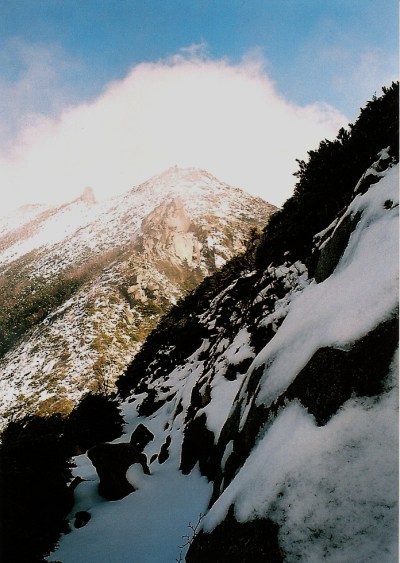
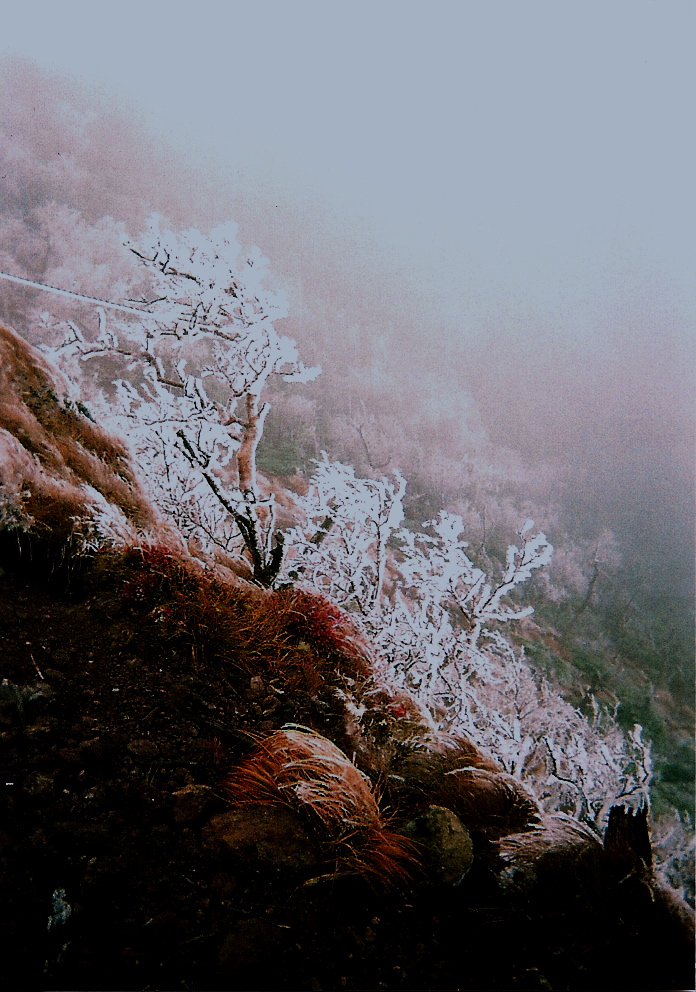
When to go: This hike can be done year round if you’ve got your own transport. Winter is probably the best time for experienced mountaineers, since the lift won’t be running and the mountain hut will be closed. Click here to see the winter scenery. Otherwise, aim to go between April and November. Be warned that the peak is extremely popular during the autumn season, so schedule your visit on a quieter weekday if possible.

Access: Public transport access is limited, so a car is essential for enjoying this hike at your own pace. The trailhead starts at Mi-no-koshi (見の越) at the junction Routes 438 and 439 at the entrance to Iya Valley. Hitchhiking from Sadamitsu Station (貞光駅) certainly is possible if you walk over to Route 438 and ask the driver to take you to Tsurugisan. Otherwise, there is seasonal microbus service from both Sadamitsu and Anabuki stations on the JR Tokushima line. Click here to download the most recently updated PDF file. Here is English information about the bus from Sadamitsu station,

Map: Click here and scroll down to part 3 (主な配布場所). There you will find two pdf file downloads. Click on 広域登山道マップ(英語版).pdf to download the English version of the map.

Level of difficulty: 3 out of 5 (elevation change 535m). If you take the chair lift then you’ll save 200 meters of vertical elevation gain and will be hiking with a lighter wallet.

Total Round-trip Distance: 9km (4-1/2 to 7 hours)

Mt. Amagi (天城山)

April 24, 2008

Mt. Amagi is the highest point on the Izu Peninsula, offering beautiful virgin forests and a great view of Mt. Fuji.

The hike: From the bus stop, walk down the road a short way, and enter the forest on your left. They’ll be signs marking the trail. The actual mountain isn’t called Amagi, so you have to follow the signposts to Mt. Banzaburo (万三郎岳). The path is flat for the first 10 minutes or so, and then you’ll descend to a small creek and start climbing up the other side. There’s a trail branching off to the right that also leads up to Mt. Banzaburo, but it was closed at the time of writing. I hiked in the fall and I think it was closed because of hunters, but it would make for an interesting loop if the trail is open in other seasons. Anyway, your first target for the day is Mt. Banjiro (万二郎岳). It should take about an hour from the parking lot to the summit. Along the way, you’ll pass by the golf course, so be on the lookout for stray golf balls. From the top of Mt. Banjiro, the trail descends to a saddle, where you should have a wonderful view of Mt. Fuji. On the descent, you’ll pass through a tunnel of Japanese andromeda shrubs, which is one of the highlights of this hike. I think they bloom in early summer, which would be a great time to come. Anyway, the climb up to Mt. Banzaburo should take 40 minutes or so from the saddle. You have a few options from here. You could continue on the trail and do a traverse of the entire mountain range. It should take about 3 or 3-1/2 hours to reach Amagi-toge (天城峠), where you can catch a bus to Shuzenji station (修善時駅). Or you could retrace your steps back to the parking lot. Better yet, you can take the trail leading off to the right for the aforementioned loop (if it’s open). Click here to see a report of a Japanese hiker who did the loop just mentioned.

When to go: This hike can be done year round, but be prepared for snow in the winter. Avoid weekends if you want to dodge the crowds.

Access: From Tokyo station, take the JR Limited Express ‘Odoriko’ train to Ito station (伊東駅). The train takes about 90 minutes, but will cost you around 4000 yen. A local train is half the price, but takes 2 hours and 15 minutes. From Ito station, take a bus bound for Amagi-kogen Golf Course (天城高原ゴルフ場). There are different bus times depending on the season, so make sure you check the schedule before departing Tokyo. Click here for the bus schedule.

Level of difficulty: 1 out of 5 (elevation change ~400m)

Mt. Hakkyō (八経ヶ岳)

April 23, 2008

Last updated: March 12 , 2025

Mt. Hakkyō (aka Mt. Hakken) is the highest point of the Omine mountain range, and the tallest peak in the Kansai area. It’s also situated along an ancient Okugakemichi pilgrimage route, offering some of the most unspoiled scenery in western Japan.

The hike:

From the trailhead, take the well-marked path on your right just before the route 309 tunnel. The route follows the left bank of the stream before crossing a cute wooden bridge, where the steep climb up the spur to the ridge commences. It’ll take an hour along an easy-to-follow path to reach the Deai (出会) junction on the main pilgrimage route. There’s a stone marker here indicating that it is a World Heritage site, and the flat area makes for a good place to rest and catch your breath. Turn right and follow the gentle slope up a short climb and descent, followed by another climb through an area of trees toppled from the Sept. 2018 typhoon. The track has recently been cleared of debris and at the top of the next rise you’ll reach Benten-no-mori (弁天の森) at an elevation of 1600m. There used to be a lodging here but now there’s nothing more than a flat place to take a break. Follow the signs to Misen (弥山) and lose altitude quickly down a broad track for 30 minutes to a pass placated with a large statue of En-no-gyōja. Rest here if necessary before the long, steep climb up to Misen. The path starts off on a gentle ascent before reaching a series of wooden stairs. It should take about 30 minutes of tough climbing to regain the ridge line, where it’s another 20 minutes on a narrow path and over a metal stair/ladder to arrive at Misen hut (弥山小屋). Most people overnight here by either staying at the large hut or camping in a broad meadow on an unmarked trail just before the hut. A path continues past the hut to a fork. Head straight to Tengawa or turn right for the short climb to the summit of Mt. Misen, which houses the mountain deity and affords stunning views across a col to the summit of Mt. Hakkyō. To get to the high point, retrace your steps back to the hut and veer right on the path at a stone marker reading 八剣山•前鬼 (Hakkenzan, Zenki). Drop steeply on a heavily eroded path to a col and then climb through two deer-proof gates erected to protect the Siebold’s magnolia flowers. It should take about 15 minutes to reach the summit, punctuated by a huge weathered-signpost in Japanese for 八経ヶ岳. Enjoy the splendid panoramic views on the rare occasion the peak isn’t enshrouded in cloud/mist. Retrace your steps back to the trailhead or turn left at Misen hut for an alternative finish at Tenkawa (a 5-hour descent along a steep trail).

When to go: This hike can be done all year round, but be prepared for lots of snow in the winter. Click here to see what you can expect in January. Please note that route 309 closes from mid-December to mid-April because of snow, so winter hikers will need to take the longer trail from Tenkawa village.

Access: From Abenobashi station (阿倍野橋駅)in Tennoji (天王時), take a Kintetsu train bound for Yoshino (吉野) and get off at Shimoichikuchi station (下市口). From there, take a bus bound for Dorogawa Onsen (泥川温泉) and get off at the Tenkawa-kawai (天川川合) bus stop. You have three options. Take a taxi for 30 minutes to the trailhead, hitch there, or start your hike from here. If you want to hitch, make sure you’re on route 309 and ask your ride to let you off just before you enter the tunnel. Click here for the bus schedule. The lack of buses from Shimoichiguchi make this almost  impossible to do as a day trip, but it definitely can be done if you are up to the challenge. If coming by car please note that there is now a 1000-yen parking fee at the western tunnel entrance parking lot.

Digital Map in English (Avenza App): Click here

Level of difficulty: 3.5 out of 5 (elevation change ~900m)

Mt. Kinpu (金峰山)

April 22, 2008

Last updated: Feb 20, 2025

Mt. Kinpū, straddling the Nagano-Yamanashi prefectural border, is a majestic peak with superb panoramic views of the surrounding countryside (including Mt. Fuji) and a quaint shrine on the rocky summit.

The hike: From the bus stop, head into the forest across from the hut. The trail is very clearly marked and well trodden. After climbing for about 45 minutes or so, you’ll reach a hut and junction. This hut is called Fujimidairakoya (富士見平小屋). There’s a water source just below the hut (you should have seen it on your way up to the hut). This is the branch off to Mt. Mizugaki, so drop your pack off for the 2 hour detour, or keep plodding along toward Mt. Kinpu. You should reach Dainichi hut (大日小屋) in about an hour. There’s another water source here, as well as a few campsites nearby. Keep climbing up until you reach Dainichi boulder (大日岩), a huge rock formation. You’ll see a trail branching off to the left, but ignore it and head for the summit. The trail will become considerably rockier and steeper from this point onwards. The ridgeline should be reached in about 45 minutes, where you’ve got a somewhat precarious traverse over to the top. If there’s any snow on the ground then be very careful about breaking through unstable layers and watch out for the huge drops on the right. If you look over to the left the Mt. Kinpu hut should come into view. There’s a spur trail off to the left, and also another one at the summit, so I’d recommend going to the top first if you plan on staying there. The views from the top are brilliant, with lots of huge rock formations to climb around or hide in. You have 3 options from the summit. You can descend to the left for 10 minutes to Mt. Kinpu hut (金峰小屋), take the trail on the right for about an hour to Omuro hut (御室小屋), or head on the trail in front of you for 2 hours to Ōdarumi hut (大弛小屋). If doing the 3-day traverse over to Mt. Kobushi, then I’d recommend staying or camping at Ōdarumi, but if you’re climbing only this peak then I’d stay at the Mt. Kinpu hut and head back to Mizugaki the following day. There is no public transport at Ōdarumi, so you’d have to gamble with hitchhiking on a seldom traveled road.

When to go: This hike can be all year round if you’ve got the right equipment in winter. Otherwise, aim to go between late April and late November. I did this hike in late November and was hiking through snow most of the way. Click here for some wonderful New Year’s photos from a Japanese hiker.

Access: From Nirasaki station (韮崎駅), take a bus bound for Masutomi Hot Spring (増富温泉). From there, change to a bus bound for Mizugakisansō (瑞牆山荘) and get off at the last stop. There may be a direct bus to the trailhead, depending on the season. Please check at Nirasaki station. Click here for the bus schedule. A much closer (and easier approach would be from Ōdarumitouge (大弛峠). Thanks to the Hyakumeizan boom there is now a bus running from Enzan station. Click here for the bus schedule. The bus is by reservation only and runs on the weekends. Please book at least one day in advance.

Level of difficulty: 3 out of 5 (elevation change 1089m)

Kisen Alps (紀泉アルプス)

April 21, 2008

The Kisen Alps are a series of rolling peaks located on the Osaka-Wakayama prefectural border. Despite their close proximity to the big city, the mountains are relatively unspoiled and completely natural, without a single cedar tree in sight.

The hike: Go through the unmanned ticket gates, and turn right on the small paved road in front of the station. Turn right at the next street, where you’ll cross a small river and the railroad tracks. Follow the signs to Kisen Alps (記泉アルプス), turning left at the sign, and then right up a small dirt road. This road eventually becomes the trailhead, as you pass through a very funky entrance gate. The path climbs rather steeply at first, paralleling a large expressway. The traffic noise is pretty loud, but you’ll soon leave that all behind and enter a magical wonderland of beautiful flora. I have no idea why this area was spared of the post-war deforestation, but I’m so happy it was. As you hike, imagine how beautiful this country must’ve been hundreds of years ago, when every single forest looked just like this! Keep your eyes out for snakes and wild boar, as there are quite a few in this area. After about 30 minutes of climbing, you’ll reach the ridgeline and a trail junction. Head to the right for about 20 meters to reach a wonderful clearing with excellent views of Kansai airport and Osaka bay. Take some photos and head back to the junction. The trail follows the entire mountain ridge, and your target is the high point called Unzenbou (雲仙峰). There’s a considerable amount of up and down between here and the top, but it’s not too difficult. There are lots of places to take breaks and enjoy the outstanding scenery. You should reach the peak in about 2 hours or so. Just below the top, you’ll come across a 3-way junction with beautiful bilingual signposts. Yep, you’ve officially entered Wakayama prefecture, where they seem to have more money in their budget for trail maintenance. Continue on to the top of Unzenbou. There’s not much of a view from here, so after taking a break continue down the other side. In about 10 minutes, you’ll come across yet another trail junction, with magnificent views of Wakayama city and the Pacific Ocean. Turn left at the junction and you’ll reach a well-maintained public park with lots of benches and a gazebo. This is a great place for a picnic or a nap on a pleasant day. From here, trails split off in all directions, and you’ve got lots of options. I’d recommend following the signs to Kii station (紀伊駅). It should take about 90 minutes or so from the park to the station, and there are lots of different trails you have to take, so follow the signs carefully. Just before the trail dumps you out on a road, you’ll pass through a bamboo forest that is downright spooky at dusk. From Kii station, you can catch a JR train back to Tennoji.

When to go: This hike can be done year round, but I’ve been told that autumn is the best time to see the virgin forests in all their glory. The mountains do get some snow in the winter, but it usually melts relatively quickly.

Access: From Tennoji station (天王時駅) take a train on the JR Wakayama line and get off at Yamanakadani (山中渓駅). An express train should take about 45 minutes or so. Please note that this is an unmanned station (hint, hint).

Level of difficulty: 2 out of 5 (elevation change ~200m)

Kita-dake (北岳)

April 20, 2008

This blog post was written back in 2008. For the latest information about this hike (including color photos and maps), please consider purchasing my guidebook to the Japan Alps. 

Kita-dake is the 2nd highest peak in Japan and has one of the best vantage points for viewing Mt. Fuji anywhere around.

The hike: From the huge parking lot at Hirogawara, walk a little back towards the main road and then turn left. You’ll see a pedestrian suspension bridge crossing the river, and this is where the trail starts. Cross the bridge and follow the path for about 20 minutes. You’ll come to a junction and you have 2 choices. Both trails lead to Kita-dake, but I recommend taking the one on the right towards Shiraneoike hut (白根御池小屋). It’ll take about 2-1/2 hours or moderate climbing to reach this hut. There’s a campground here, as well as a water source. Take a break here, because the real climb is about to start. Take the trail that goes past the campground, and begin your steep climb up to the ridge line. Most maps allocate 3 hours for reaching the ridge, but if you’re traveling light or in good shape then you can do it in half the time. Once you hit the ridge, turn left and hike for another half hour until reaching Kita-dake kata-no-koya (北岳肩ノ小屋). This hut is perched on a saddle just below the summit, and there’s a campground and water source here. You’re over 3000m now, so make sure you bring plenty of warm clothing even in the summer. I camped here in August and it definitely hovered around the freezing mark at night. The next day, rise early to watch the sunrise from the second highest peak in Japan. It should take about 45 minutes or so to reach the top. The views pretty much speak for themselves, and you can easily see why this mountain has become so popular for Japanese hikers. Continue down the other side of the rocky peak until reaching a junction. You can continue on to Ai-no-dake if you’d like, or you can take a left at the junction for an alternative route back to Hirogawara. Hike about 45 minutes and then take another left at the next junction. It should take about 2-1/2 hours to descend back to Hirogawara. I must admit that I’ve never done this trail, so I can’t attest to the condition/difficulty, but the maps say that snow remains until early August and that it’s quite rocky.

When to go: This hike can be done from around Golden Week to early November. The road to Hirogawara is closed in the winter, so it’ll be pretty difficult to get here unless you hike a long way to the trailhead. That being said, there are exceptions!

Access: From Kofu station (甲府駅), take a bus bound for Hirogawara (広河原). Click here for the bus schedule in Japanese.

Level of difficulty: 5 out of 5 (elevation change 1673m)

Mt. Tsukuba (筑波山)

April 19, 2008

Mt. Tsukuba is one of the easiest of the venerable Hyakumeizan to climb, and surprisingly close to Tokyo. The mountain is extremely over-developed, so consider giving it a miss unless you’re really intent on climbing all of the 100 famous peaks.

The hike: From the bus stop, walk up the hill towards the cable car station. The trail starts just before the station and parallels the tracks for most of the way. Despite the low elevation change, the trail is actually surprisingly steep and a nice little workout. It should take around 2 hours of moderate climbing to reach the top of the cable car station and ugly buildings/towers on the saddle. From here, you’ve got two options. You can climb to the top of Mt. Nantai (男体山) in about 10 minutes. The view towards the peaks of Nikko is excellent, and if the weather is good you should also be staring at Mt. Fuji in the distance. If you don’t fancy this detour, then head up to the high point of Tsukuba, called Mt. Nyotai (女体山). The path is very, very easy and there’s a concrete shrine on top (as well as some rock formations). Head down the other side of the summit, and you’ll see the top of the gondola station soon (why oh why did they have to build both a gondola and cable car – are Japanese people really that lazy?). Continue down the spine of the mountain, past some nice rock formations, and you’ll come to a trail junction. You have 2 options. You can keep going on the same path down to the parking lot at the bottom of the gondola, or turn right for a nice loop trail that’ll take you back to the start of the hike.

When to go: This hike can be easily done year round. Avoid weekends if you want to skip the crowds.

Access: From Akihabara station (秋葉原駅), take a train on the Tsukuba express line and get off at the terminus, Tsukuba station (筑波駅). An express train takes only 45 minutes and costs 1150 yen. Click here for information in English. From there, take a shuttle bus bound for Tsukuba shrine (筑波神社入口). The bus costs 700 yen. There are 2 buses each hour, each leaving at the top of the hour and half past the hour. Click here for the complete schedule in Japanese.

Map: Click here

Level of difficulty: 2 out of 5 (elevation change 636m)

Mt. Nantai (男体山)

April 19, 2008

Mt. Nantai is the Mt. Fuji of the Nikko area. Its easy access makes it one of the most popular hikes in the Kanto area, so be prepared for crowds during weekends and national holidays.

The hike: From the bus stop, head up the stairs to the shrine. The trail starts directly behind the shrine, and you’re supposed to pay 300 yen for the privilege of climbing to the summit, but I just hiked without paying and no one stopped me (but the deities got revenge by dumping freezing rain on me!) The path is very well-trodden and oh so steep. It’s less than 5km from the shrine to the summit, but you’re climbing over 1200 vertical meters! During the first hour or so, you’ll cross over a forest road several times, and part of the path actually follows the road for a short while. Once you leave the road, it’s no turning back and there are very few places to rest. You’ll come across 2 different emergency huts, neither of which are in very good condition. The course is very rocky, so use care on the descent, especially if the rocks are wet. Every year, people have to be airlifted out due to nasty falls. Anyway, after what seems like an eternity, you’ll finally reach the summit ridge above the tree line. The last 20 minutes of hiking is through reddish-brown volcanic strata, bringing images of Mt. Fuji to mind. There’s a shrine and emergency hut on the summit itself, but no water source, so unless you fancy lugging up a ton of water, you should accept this as a day trip. The hut has definitely seen better days, and can fit about 2 or 3 people comfortably. If the weather is good, then you’ll have an excellent birds-eye view of Lake Chuzenji. Either head back the same way you came, or traverse down the other side of the mountain. I’m told the trail on the back side isn’t used very much and is much, much longer (you’ll have to hike on a forest road for about 8 or 9km in order to get back to civilization).

When to go: This hike can be done between late April and early December. A winter hike is also possible, depending on the year. The peak is prone to avalanches during periods of heavy snowfall, so use caution and common sense if climbing in the winter.

Access: From Nikko station (日光駅), take a bus bound for Yumoto Hot Spring (湯元温泉) and get off at the Futarasan Jinjamae (二荒山神社前) bus stop. Click here for the bus schedule.

Live web cam: Click here

Level of difficulty: 4 out of 5 (elevation change 1212m)

Mt. Ontake (御嶽)

April 18, 2008

Last updated: Feb 19, 2025

Special note: On January 17, 2025, the volcano warning was raised to Level 2, meaning that the summit plateau is now off limits to hikers.

Clocking in at over 3000, Mt. Ontake is the nation’s tallest active volcano and 8th tallest mountain. Popular with Shinto pilgrims, the peaks offers outstanding panoramic views, pungent volcanic steam vents, and picturesque turquoise lakes.

The hike: From the bus stop at Tanohara, hike through the Shrine torii down into a flat meadow. If the weather is clear then you’ll see the massive volcano towering just above you. The path starts climbing on the other side of the meadow. The trail is well-marked and easy to follow, and you’ll pass by countless shrines and statues on your way to the summit. It should take an hour or so to reach the first emergency hut at the 6th stagepoint (六合目) Keep climbing higher and higher, and after another 90 minutes or so, you should reach a rather big shrine and hut on the summit ridge line. You’ll see the smoldering steam vents just in front of you, as well as the summit shrine. You’ve got another half an hour of climbing before reaching the summit, so keep going. The narrow summit is quite over-developed, with 2 different mountain huts and a shrine along with a concrete bunker to duck into should the mountain decide to burb. Go back the way you came, or consider descending to the small turquoise lake on the other side of the summit. This area is called Ni-no-ike (二ノ池), and you’ll find a couple of huts here, which are only open from July to September.  The closest hut is called Ni-no-ike Sansō (ニノ池山荘) while the other place is Ni-no-ike Hyutte (ニノ池ヒュッテ). Both huts require advanced reservations.  From here, you can descend to the gondola in about 2 hours or so. Just follow the signs to Ontake Ropeway (御岳ロープウェイ).

When to go: This hike can be done year round if you’ve got the right equipment and experience. Otherwise, aim to go during the summer when the huts are open. Ever since the 2014 eruption, hikers have been asked to wear a helmet and to prepare for any volcanic eruptions. Snow remains on the peak until early July usually. Click here to see the scenery in early May.

Access: From Kiso-Fukushima station (木曽福島駅), take a bus bound for Tanohara (田ノ原) and get off at the last stop. There are only 2 buses a day, weekends only from early June to mid October,  so plan accordingly. Click here to see the bus schedule. Alternatively, you can take the Ontake Ropeway, which will whisk you up to 2100m in just a few minutes. Take a Ontake Ropeway (御岳ロープウェイ) bound bus and get off at the gondola. Again, there are only 3 buses a day, so click here to find out the schedule. Scroll down to 観光路線 御岳ロープウェイ線 and select 夏山シーズン for the summer schedule and 秋山シーズン for the fall schedule. 

Live web cam: Click here and here

Level of difficulty: 3 out of 5 (elevation change 937m)