Last updated: Feb 20, 2025
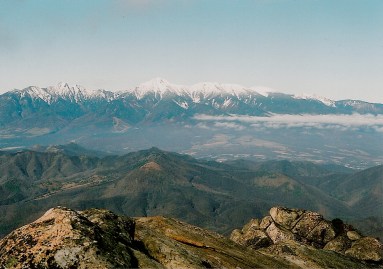
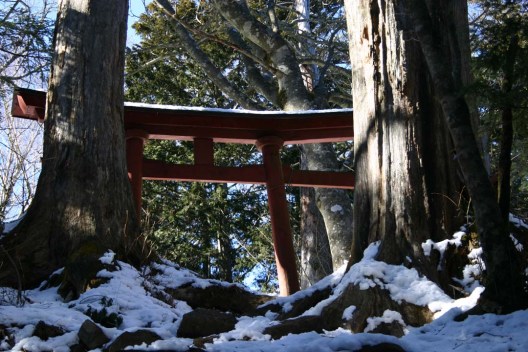
Mt. Kinpū, straddling the Nagano-Yamanashi prefectural border, is a majestic peak with superb panoramic views of the surrounding countryside (including Mt. Fuji) and a quaint shrine on the rocky summit.
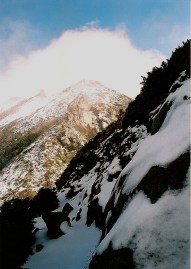
The hike: From the bus stop, head into the forest across from the hut. The trail is very clearly marked and well trodden. After climbing for about 45 minutes or so, you’ll reach a hut and junction. This hut is called Fujimidairakoya (富士見平小屋). There’s a water source just below the hut (you should have seen it on your way up to the hut). This is the branch off to Mt. Mizugaki, so drop your pack off for the 2 hour detour, or keep plodding along toward Mt. Kinpu. You should reach Dainichi hut (大日小屋) in about an hour. There’s another water source here, as well as a few campsites nearby. Keep climbing up until you reach Dainichi boulder (大日岩), a huge rock formation. You’ll see a trail branching off to the left, but ignore it and head for the summit. The trail will become considerably rockier and steeper from this point onwards. The ridgeline should be reached in about 45 minutes, where you’ve got a somewhat precarious traverse over to the top. If there’s any snow on the ground then be very careful about breaking through unstable layers and watch out for the huge drops on the right. If you look over to the left the Mt. Kinpu hut should come into view. There’s a spur trail off to the left, and also another one at the summit, so I’d recommend going to the top first if you plan on staying there. The views from the top are brilliant, with lots of huge rock formations to climb around or hide in. You have 3 options from the summit. You can descend to the left for 10 minutes to Mt. Kinpu hut (金峰小屋), take the trail on the right for about an hour to Omuro hut (御室小屋), or head on the trail in front of you for 2 hours to Ōdarumi hut (大弛小屋). If doing the 3-day traverse over to Mt. Kobushi, then I’d recommend staying or camping at Ōdarumi, but if you’re climbing only this peak then I’d stay at the Mt. Kinpu hut and head back to Mizugaki the following day. There is no public transport at Ōdarumi, so you’d have to gamble with hitchhiking on a seldom traveled road.
When to go: This hike can be all year round if you’ve got the right equipment in winter. Otherwise, aim to go between late April and late November. I did this hike in late November and was hiking through snow most of the way. Click here for some wonderful New Year’s photos from a Japanese hiker.
Access: From Nirasaki station (韮崎駅), take a bus bound for Masutomi Hot Spring (増富温泉). From there, change to a bus bound for Mizugakisansō (瑞牆山荘) and get off at the last stop. There may be a direct bus to the trailhead, depending on the season. Please check at Nirasaki station. Click here for the bus schedule. A much closer (and easier approach would be from Ōdarumitouge (大弛峠). Thanks to the Hyakumeizan boom there is now a bus running from Enzan station. Click here for the bus schedule. The bus is by reservation only and runs on the weekends. Please book at least one day in advance.
Level of difficulty: 3 out of 5 (elevation change 1089m)