Archive for the ‘Nagano hikes (長野県)’ category

Mt. Ontake (御嶽)

April 18, 2008

Special note: On September 27, 2014, Mt. Ontake erupted unexpectedly, causing fatalities and covering the mountain with ash. The peak will be closed to hikers until further notice.


Clocking in at over 3000, Mt. Ontake is the nation’s tallest active volcano and 8th tallest mountain. Popular with Shinto pilgrims, the peaks offers outstanding panoramic views, pungent volcanic steam vents, and picturesque turquoise lakes.

The hike: From the bus stop at Tanohara, hike through the Shrine torii down into a flat meadow. If the weather is clear then you’ll see the massive volcano towering just above you. The path starts climbing on the other side of the meadow. The trail is well-marked and easy to follow, and you’ll pass by countless shrines and statues on your way to the summit. It should take an hour or so to reach the first emergency hut at the 6th stagepoint (六合目) Keep climbing higher and higher, and after another 90 minutes or so, you should reach a rather big shrine and hut on the summit ridge line. You’ll see the smoldering steam vents just in front of you, as well as the summit shrine. You’ve got another half an hour of climbing before reaching the summit, so keep going. The narrow summit is quite over-developed, with 2 different mountain huts and a shrine. In fact, the very top is covered in concrete! Go back the way you came, or consider descending to the small turquoise lake on the other side of the summit. This area is called Ni-no-ike (二ノ池), and you’ll find a couple of huts here, which are only open from July to September. The ‘new’ hut has a hot spring bath you can use! Click here for the web site. From here, you can descend to the gondola in about 2 hours or so. Just follow the signs to Ontake Ropeway (御岳ロープウェイ).

When to go: This hike can be done year round if you’ve got the right equipment and experience. Otherwise, aim to go during the summer when the huts are open. I climbed in early June and there was still a fair amount of snow on top and the huts were completely closed. Click here to see the scenery in early May.

Access: From Kiso-Fukushima station (木曽福島駅), take a bus bound for Tanohara (田ノ原) and get off at the last stop. There are only 3 buses a day, so plan accordingly. Click here to see the bus schedule. Alternatively, you can take the Ontake Ropeway, which will whisk you up to 2100m in just a few minutes. Take a Ontake Ropeway (御岳ロープウェイ) bound bus and get off at the gondola. Again, there are only 3 buses a day, so click here to find out the schedule. Please note that the bus only runs every day between July 18th and August 30th and weekends only in early July, September, and October.

Live web cam: Click here and here

Level of difficulty: 3 out of 5 (elevation change 937m)

Mt. Yari (槍ヶ岳)

April 14, 2008

This blog post was written back in 2008. For the latest information about this hike (including color photos and maps), please consider purchasing my guidebook to the Japan Alps. 

Mt. Yari is one of the most famous peaks in the Kita Alps, and on the ‘must climb’ list of just about every Japanese hiker. Its remote access means that it’s impossible to do as a day trip, unless you fancy hiking over 40km in one day!

The hike: From Kamikochi bus terminal, take the trail that heads toward Kappabashi, but instead of crossing the bridge, stay on the same side of the river. You can basically follow the signposts toward Yari-ga-take (槍ヶ岳). It’s 22km one way from Kamikochi to the summit of Mt. Yari. Most guidebooks say to allow 2 days to get there, but if you get an early start (around 6am) you can make it in one day. The elevation change is only 1600m, and the first 14km or so is pretty flat. Anyway, your first landmark will be Myoujinkan (明神館), a famous hotel about an hour from the bus terminal. After that, you’ll come to Tokuzawa lodge and campground (徳沢ロッヂ). Continue following the river until you reach Yokoo-sansou (横尾山荘). This is the halfway point distance-wise to Mt. Yari. From here, the trail starts climbing a little, reaching Yarisawa lodge (槍沢ロッヂ) in about an hour. This would be a good place to stay if you’ve gotten a late start, but if you’ve brought a tent then continue for another half hour or so to the campsite. This site is behind a lodge that was destroyed by an avalanche, and there are plenty of places to pitch your tent, lots of water, and toilets. Before deciding whether or not to camp here, consider that you’ve got about 4 more hours of hiking before reaching the hut just below the top of Mt. Yari. The path is easy to follow and will climb up the cirque toward the ridge line. If the weather is good then you should start seeing the spear-like peak of the summit. There are tons of switchbacks and paint marks on the rocks. The climb seems like it takes forever, but eventually you’ll end up on the saddle just below the summit. This is where you’ll find Yari-sanso (槍ヶ岳山荘). You can pay lots of money to stay in the hut, or pitch your tent a short distance away. Please note that the campground is completely exposed on the ridge and you may not be able to pitch a tent if the winds are strong. Drop your pack at the hut, and prepare for the final climb to the summit. There are lots of chains and ladders, but just follow the crowds and arrows and you’ll be on top in no time. The views are exhilarating, so bring your camera if the cloud isn’t in. Descend back to the hut. The next day, you have 4 options. You can either descend the way you came all the way back to Kamikochi, do the daikiretto (大キレット) ridge walk over to Kita-hotaka, continue on the trail next to the hut over to Sugoroku hut (双六小屋), or take the trail away from the campgound down to Yaridaira (槍平小屋) and Shin-hotaka hot spring.

When to go: This hike can be done from early May to early November. The earlier you go, the more snow there will be, so bring crampons if climbing before the rainy season or anytime in late fall.

Access: From either Takayama (高山) or Matusmoto (松本) stations, take a bus bound for Kamikochi (上高地). There are also direct night buses from Tokyo and Osaka, depending on the season. Click here for the bus from Matsumoto to Kamikochi. From Takayama you’ll have to change buses at Hirayu Hot Spring.

Live web cam: Click here

Level of difficulty: 5 out of 5 (elevation change 1675m)

Mt. Azumaya (四阿山)

March 20, 2008

Mt. Azumaya is a dormant volcano overlooking nearby Mt. Asama. It’s one of the few places where you can see cherry blossoms in May, and the panoramic views of the Kita Alps are second to none when the cloud isn’t in.

Mt. Azumaya

The hike: From the bus stop, hike up the road toward Dabosu dairy farm (ダボス牧場). The trail starts from the farm, where you’ll see tons of cows in the summer. There are 2 different ways up the mountain, so I’ll describe a loop hike. Follow the signposts straight ahead to Mt. Neko (根子岳). It should take around 2 hours of moderate hiking to reach the summit. If the weather is clear then you’ll be completely surrounded by the Japan Alps! It really is one of the best views of the Alps anywhere in Japan. From the top of Mt. Neko, you can see the peak of Mt. Azumaya to the east. You’ve got to drop about 200m of altitude, down to a scenic valley that’ll have lingering snow in May. The descent is steep and rocky but gradually flattens out. From the low point, it’s a 300m vertical ascent to the summit. It should take about 90 minutes to traverse between the 2 peaks. Along the way, you’ll reach a trail junction, but head left to reach the top. The summit area is small and rocky, but the views of Mt. Asama are wonderful. Retrace your steps to the junction, but instead of going back to Mt. Neko, continue straight ahead to Mt. Naka-azumaya (中四阿). From here, keep descending for about 90 minutes and you’ll eventually reach the pastures again. Take a right when you hit the road in front of the cows, and you’ll be back at the parking lot. Reward yourself with delicious ice cream made from the milk at the farm!

When to go: This hike can be done year round if you take the helicopter to the top of Mt. Neko (根子岳)! (no joke on the heli-skiiing). Otherwise, aim for an ascent bewteen April and November. I did this hike in May and there was still a little snow in the valley between Mt. Neko and Mt. Azumaya. Click here for a report of a person who skied to the top in March.

Access: From Nagano station, take either a local train or a Shinkansen to Ueda station (上田駅). The local train takes about 40 minutes, while the Shinkansen takes a whopping 10 minutes. Alternatively, you can take the Nagano Shinkansen from Tokyo and get off at Ueda. From Ueda station, take a bus bound for Sugadaira (菅平) and get off at the Sugadaira-kogen bus stop (菅平高原). Click here for the bus schedule. If you’ve got a car, then you can drive to the actual trailhead, which is a one hour walk from the bus stop.

Level of difficulty: 2 out of 5 (elevation change ~900m)

Mt. Yake (焼岳)

March 12, 2008

This blog post was written back in 2008. For the latest information about this hike (including color photos and maps), please consider purchasing my guidebook to the Japan Alps. 

Mt. Yakedake is an active volcano separating Kamikochi from Shin-Hotaka Hot Spring. The summit is still smoldering and is marked by a small, majestic crater lake.

Mt. Yake

The hike:

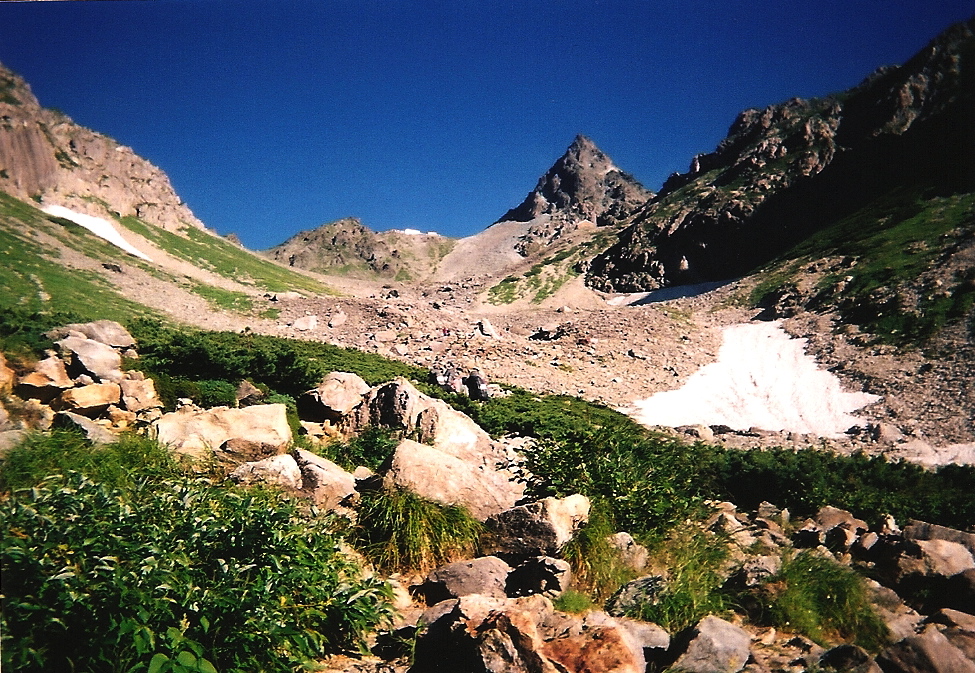
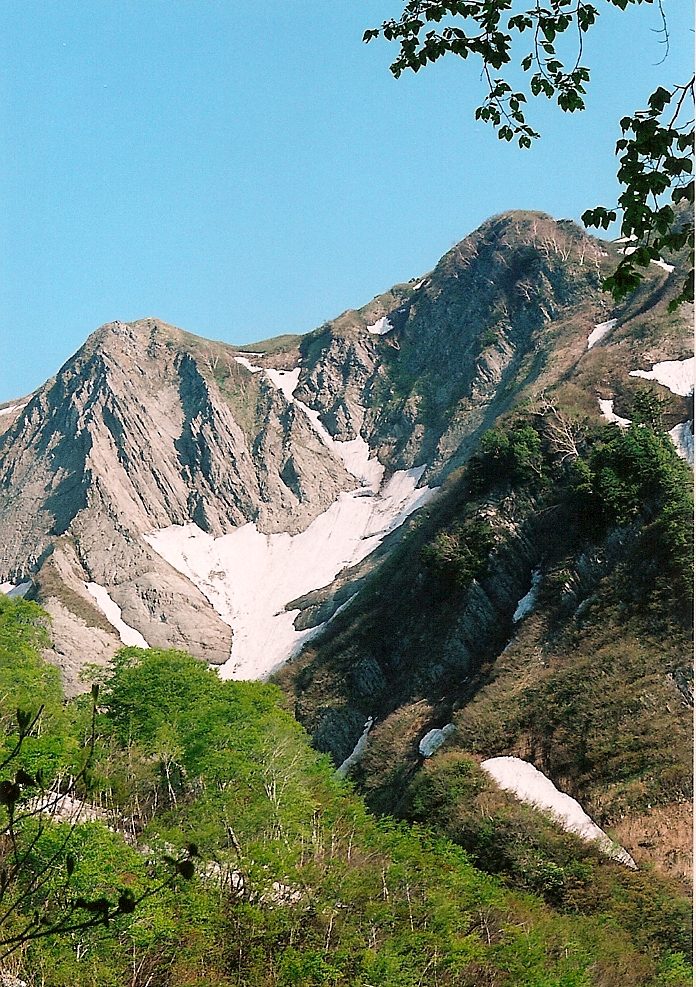
Nakanoyu approach: From the parking lot on the road behind Nakanoyu hotel, enter the dense forest and climb up, up, and up some more. The hike is quite steep, and after about an hour or so you’ll come to a trail junction. The trail on the right leads down to Nakanoyu Hot Spring (which is closed as of the summer of 2012). The trail flattens out for a short time while the views start to open up. You can see the top of Mt. Yake directly in front of you, though it will still take some time and effort to reach it. Continue plodding along toward the summit. The trail will become rockier and rockier, but you’ll reach the crater rim in about 90 minutes, depending on your speed. When you reach the summit area, the trail will curve to the right and then take a sharp left toward the high point. You’ll have to climb up quite a few rocks to get to the top, but the trail is marked with paint marks and arrows. Don’t get too close to the rocks spewing poisonous gases, no matter how tempting they look. The top is flat and has room for about a dozen people. If the weather is good, then you’ll see the peaks of the Kita Alps completely surrounding you, as well as Mt. Norikura and Ondake to the south. Continue back the way you came or consider hiking down into Kamikochi (described below). Another option would be to stay on the ridge line and climb Mt. Nishi-Hotaka, although you’ll need to stay in one of the huts along the way and the trail is not used much.

Kamikochi approach: If you’re doing this as a day hike and not staying in Kamikochi, then you might find it faster to get off at Taisho-ike bus stop, since it’s closer to the trailhead. Otherwise, at the bus terminal head left to the river bank and take the trail going left, away from Kappabashi bridge (though it’s ok to cross the bridge and walk on the other side of the river if you prefer). The path will follow the bank of the river until reaching a road. Turn right on the paved road, crossing two bridges (Tashirobashi 田代橋 and Hotakabashi 穂高橋). Once you cross the river stay on the road for about 20 meters until it meets up with another paved road. You’ll see a trail with a wooden gate right in front of you. This is the trail up to Nishihotaka, so don’t take this trail. Instead, turn left and head away from Kamikochi on the paved road and you’ll see the trailhead for Mt. Yake on your right after about 10 minutes. Turn right here and enter the dense forest. The first part of the hike is quite flat as you traverse your way over to the main gully. The trail will start to become steeper the longer you climb, so pace yourself and drink plenty of fluids. After about 45 minutes of hiking you’ll reach an area that has some log steps and short steel ladders to help you up the exposed tree roots. Beyond this there is one area that involves a traverse on a steel bridge with steep drops on your left. After this the trail opens up a bit and traverses along the base of some rock cliffs. You may be wondering how to navigate this section, but if you look ahead you’ll see an aluminum ladder rising vertically up the rock faces. This is the most dangerous part of the hike, and if you’re scared of heights then do not attempt this section and turn back. Otherwise, take a deep breath, grab onto the ladder, and hoist yourself up. This area can be a bit of a bottleneck on the weekends during the popular hiking months, especially when you’ve got large groups trying to ascend/descend at the same time. At the top of the ladder you’ll navigate past a rock area using chains and the trail will reach an open meadow with a lot of wildflowers and views of Mt. Yake in front of you. Take the switchbacks up to the ridge, where you’ll find Mt. Yake hut. The hut is open from the beginning of June until the end of the October and costs 7100 yen with 2 meals. There is no water source here (the hut will gladly sell you either bottled water or rain water gathered from the roof). It’s much better to bring enough water from Kamikochi so you won’t have to buy overpriced drinks. The hut also sells instant noodles for 500 yen (they’ll provide the noodles and hot water, and you can sit inside the hut to enjoy it if the weather is really bad). Anyway, from the hut the trail turns left and climbs up to a lookout point after 10 minutes. Here you’ll find some steam vents rising through the rocks. They’re natural heaters and you can sit and enjoy the hot volcanic steam rising from deep within the earth. Take a break here, as the real hike is about to begin. If the weather is clear then you’ll see Mt. Yake rising directly in front of you. Drop down to the saddle and start the long, tough climb towards the top. If the cloud is in then take great care, as it’s easy to veer off the trail. The best thing to do is to follow other people and stick carefully to the paint marks on the rocks. It should take around an hour and fifteen minutes to reach the summit. From here, you can either descend via the Nakanoyu route (though you’d need your own transport or try your luck hitching). It’s better to retrace your steps back the way you came. It should take anywhere between 4 to 6 hours to complete the hike. If you’ve got extra time then stop by Kamikochi Onsen hotel for a hot bath (though the bath closes at 3pm so keep an eye on the time).

When to go: This hike can be safely done from late April to mid November. A winter ascent is not impossible with the proper equipment. Click here for a group who climbed in January 2004.

Access: There are 2 main approaches to the summit, so take your pick of trails. Remember that private cars are not allowed into Kamikochi, but the other trailheads are accessible by car. You can get to Kamikochi by bus from either Takayama (高山) or Matsumoto (松本) stations, but need to first take a train to Shin-shimashima station if coming from Matsumoto. In addition, there are direct overnight buses from Tokyo and Osaka to Kamikochi. Check the Alpico Group website (in Japanese) for more information.

Level of difficulty: 4 out of 5 (elevation change ~900m)

This slideshow requires JavaScript.

Mt. Kirigamine (霧ヶ峰)

March 2, 2008

Mt. Kirigamine is the only Hyakumeizan that can be combined with a day on the slopes, as the top of the mountain is a 30 second walk from the top of the ski lifts!

Mt. Kurumayama

The hike: From the parking lot, head up to the ski resort. Follow the lift going up the left side of the mountain. Unfortunately, you’ll have to climb on the groomed runs, as the ski patrol don’t like you climbing off piste. Once you get to the top of this lift, cut over to the right and follow the other lift going higher up the mountain. Watch out for skiers and boarders as you cut across and also when you’re climbing through the resort. The top is at the top of this next lift. If the weather is good it’ll be impossible to miss, but because this mountains is called “fog peak” be prepared to ask someone if you can’t figure out where to go. Just behind the top of the highest lift is a meteorological observatory and a signpost marking the top of Kurumayama (車山). Isn’t is fitting that the top of “car mountain” should be accessible by car in the summer! If the weather is good, you’ll have outstanding views of Mt. Fuji, Mt. Tateshina, Yatsu-ga-dake, the Minami Alps, and Utsukushigahara. If the weather is foggy like it was when I climbed, then you’ll enjoy getting off this mountain as quickly as possible! I’ve heard there are some nice wildflowers and side trails to take a date on in the summer, but it’s also when this mountain is the most crowded. Take my advice and enjoy this peak in the winter, when few venture past the top of the lifts.

When to go: This hike can be done year round, but bring crampons during the winter so you can easily navigate through the ski resort.

Access: During the winter, there are direct night buses from Tokyo to Kuramayam-kougen ski resort (車山スキー場). In other seasons, catch a bus from Chino station (茅野駅). Click here for the bus schedule.

Live web cam: Click here

Map:

Level of difficulty: 1 out of 5 (elevation change 365m) This hike is a 0 out of 5 if you take the ski lift.

Mt. Norikura (乗鞍岳)

March 1, 2008

This blog post was written back in 2008. For the latest information about this hike (including color photos and maps), please consider purchasing my guidebook to the Japan Alps. 

Mt. Norikura is a massive volcanic edifice located between Kamikochi and Mt. Ondake on the Nagano-Gifu border. Famed for summer skiiing, the peak affords awe-inspiring views of the Japan Alps.

Mt. Norikura

The hike: From the ugly, overdeveloped parking lot at Tatami-daira, take the trail to Fujimidake (富士見岳). It should take about 20 minutes or so to reach the top, depending on how well you’ve adjusted to the altitude. The views are stunning, especially looking toward the Kita Alps! From the top, continue on the same trail until you hit a small, paved service road. Hike along the road (I know, I wish it weren’t so overdeveloped either!) until you reach a hut called Katanogoya (肩の小屋). From this hut to the high point of Kengamine (剣ケ峰), it’s a pleasant, well-maintained alpine trail. It should take about an hour or so from the hut to the top. The views are incredible, and if you came on the weekend in nice weather, you’ll be sharing them with heaps of others! Continue back the way you came, or consider descending all the way to Norikura-kogen to save some money.

When to go: The roads to Tatami-daira are closed from November to May, so you’ve basically limited to this time period unless you’d like to try a winter hike. Click here for a report in Japanese of a guy who climbed in March!

Access: Private cars are not allowed to the trailhead at Tatamidaira (畳平), so you have to take a bus from either Norikura-kogen (乗鞍高原)or Hirayu-onsen (平湯温泉). Please note that the buses start running from July 1st to October 31st on the Norikura-kogen side, but from May 15th to October 31st on the Hirayu side. Click here for the Norikura-kogen bus and here for the Hirayu bus. Bicycles are allowed on the road, so that would be another option. Or you could start hiking from Norikura-kogen, a trail which pretty much parallels the road but requires a 1500m elevation change. You can get to Norikura-kogen by bus from Shin-shimashima station, which is about an hour by train from Matsumoto station.

Live web cam: Click here

Level of difficulty: 1 out of 5 (elevation change 416m)

Mt. Amakazari (雨飾山)

February 26, 2008

Mt. Amakazari is a majestically rocky peak located northeast of Hakuba on the Niigata-Nagano border. The mountain is famous for beech trees and fall foliage.

Mt. Amakazari

The hike: From the bus stop, you’ve got a 90-minute hike on a paved road before you reach the trailhead. Head up the road toward Amakazarisou (雨飾荘). This is a nice hut with its own hot spring bath, so consider staying here if you want a more leisurely weekend on the mountains. Continue on the forest road, following the signs to the trailhead. It’s impossible to get lost, and if there are any vehicles on this road, then try to hitch to the trailhead. After about an hour, the forest road will split, but turn right for another 10 minutes and you’ll be in the huge parking lot. There’s another hut here, but if you bring a sleeping bag you can stay in the rest house (休憩場) for free! This is what I did – I took the very last train to Minamiotari, then a taxi, and hiked in the dark along the road. I arrived at the trailhead at 1am and slept on the floor of the building between the toilets. Anyway, the trail starts to the left of the rest house. At first the trail is really flat, and winds its way through a spectacular marshland. Imagine Oze with half the crowds! The Mizubasho plants are stunning in the spring. After passing this wonderful area, the trail starts climbing through virgin beech forest. After about 2 hours of hiking, you’ll reach Arasugesawa (荒菅沢). This is one of the most beautiful cols in Japan (see picture), and you’ll have to descend into the col before climbing up the other side. Be careful in the spring because they’ll be a lot of snow in this area. Cross the small river, and follow the paint marks up the spine of the mountain. The views will start opening up as you get higher. The climb is pretty steep, gaining close to 500m of elevation in less than 1km. Eventually, you’ll reach the summit plateau, where a trail will branch off to the right. Ignore this and continue to the left. You’ll reach Sasadaira (笹平) in about 5 minutes. Another trail leads to the right, which is an alternative way off the mountain. Ignore this for now, and head straight, toward the knobby summit of Amakazari. It should take about 30 minutes or so to reach the rocky top. The views toward Mt. Shirouma are stunning, and you’ll be able to see Mt. Takazuma and Mt. Hiuchi as well. Take a well deserved break and lots of photos. From here retrace your steps back to Sasadaira. Now you’ve got 2 options. Take the same trail all the way back or turn left and head toward Amakazari-onsen (雨飾温泉). There is no public transport from the onsen, so you’ll have to hitch or ask a fellow hiker along the way to give you a lift. Luckily, I met a man on the summit who had a car and offered to give me a lift all the way to Toyama station! The trail descends rather steeply at first, and if you’re hiking before the rainy season then you’ve got a massive snow field awaiting you. After a half hour or so, you’ll reach Nakanoike (中ノ池) a small pond that was buried under snow when I went. From here the snow fields end and your shoes can start to dry out. The trail is easy to follow, and you should arrive at the hot spring in about 2 hours or so. The hut is really nice and a bath costs around 500 yen. There’s both an indoor and outdoor bath, but they’re separated, with the outdoor bath hidden in a garden in the front. You’ll have to walk outside naked, so bring a towel big enough to cover your family jewels.

When to go: This mountain gets a ton of snow in the winter and is heavily prone to avalanches. A spring hike is feasible in April if you’ve got an ice axe and crampons. Otherwise, aim for a hike between late May and November. The fall colors are really famous here, so try to avoid the weekends in October unless you want a human traffic jam.

Access: From Hakuba station, take a local train 4 stops north and get off at MinamiOtari station (南小谷駅). Then, take a bus bound for Amakazari-Kogen (雨飾高原) and get off at the last stop. You can also take a taxi from the station for about 5000 yen or so. Click here for the bus schedule.

Level of difficulty: 3 out of 5 (elevation change 1103m)

Mt. Asama (浅間山)

February 24, 2008

Mt. Asama is an active volcano that last erupted in the fall of 2004. Although the summit is officially closed to hikers, the poisonous gases have subsided enough to allow access to Mt. Maekake (前掛山), a short distance from the crater rim.

The summit of Mt. Maekake

The hike: From the bus stop, head up the hill a little toward Asama-sansou (浅間山荘), a spacious hut with a nice hot spring bath (good for after the hike). Walk past the hut on the forest road, and you’ll come to a giant signpost with a map of Asama. This map will tell you the current volcanic activity of Asama, and how far you can officially go. Initially the trail follows the forest road and you’ll come to your first shrine torii called (一ノ鳥居) after about an hour or so. The trail splits here, and you have 2 options. You can go right and check out a waterfall called Fudoutaki (不動滝), or continue going straight. Both paths meet up a little later in the hike, so take one on the ascent and the other on the way down. I took the waterfall course on the decent, so I’ll describe the other trail here. The trail winds its way through a forest with low lying bamboo grass. The beautiful volcanic rock formations of the surrounding peaks will soon come into view. Continue climbing up and you’ll soon reach another torii (二ノ鳥居). The waterfall trail pops out just before this point. Keep heading up toward the valley between the rocky peaks and you’ll come to a rather interesting place called Kamoshika-daira (カモシカ平), home to numerous kamoshika (Japanese mountain goats). This is probably your best chance in Japan to spot these elusive creatures, but unfortunately I couldn’t find any. Eventually you’ll come to a beautiful mountain hut called Kazankan (火山館). There’s a water source here and the owner lives here all year round. There are some picnic tables out front, so relax here and enjoy the serenity. It should take about 2 hours or so from the bus stop to this hut. After regaining your energy, head up the trail to the right of the hut and you’ll soon enter a vast plateau. The hiking here is really easy, but the big climb is what awaits you. A trail will branch to the left toward Mt. Korofu (黒斑山) and another one toward J-Band, but ignore them both and continue straight. The huge conical edifice of Asama will soon come into view. It looks deceptively close and short, but in fact the tough slog is seemingly never-ending. The trail is easy to follow if the snow isn’t too deep. After about 90 minutes of uphill climbing, you’ll come to two emergency huts that were badly damaged in the 2004 eruption. They look a bit like bombed out shacks, with twisted metal framework and partially collapsed roofs. The true summit lies directly in front of you, marked with “Do Not Enter” signs. If you’d like to reach the top of the active crater, then good luck. Breathing poisonous gases wasn’t on my ‘to do’ list, so I opted for the much safer peak of Mt. Maekake (前掛山). Walk toward the emergency hut remains, and start climbing the ridge on the right. It’s slow going in the snow, and try not to get blown off the mountain if it’s windy. The summit of Maekake should be reached in about 20 minutes or so. The views are incredible and you can watch the steam rising from Asama from here. Congratulate yourself and pray that Asama doesn’t belch while you’re standing here. Fly down off the mountain the same way you came, or take a detour through J-Band and Kurofu if you’ve got the energy. Remember that a nice bath is awaiting you at the parking lot!

When to go: This hike can be done year round if you’ve got an ice axe and crampons. Asama usually doesn’t get as much snow as the surrounding peaks, melting around the middle of March or so. I did this hike on Christmas day in stunning weather.

Access: From Tokyo station, take the Nagano shinkansen to Karuizawa station, and change to the private Shinano line. Take a train toward Ueda (上田) and get off at Komoro station (小諸駅). From there, take a bus to Asama-sansou (浅間山荘). If you stay at Asama-sansou then they’ll pick you up at Komoro station (with a reservation in advance).

Live web cam: Click here

Level of difficulty: 3 out of 5 (elevation change 1114m)

Mt. Houou (鳳凰山)

February 23, 2008

This blog post was written back in 2008. For the latest information about this hike (including color photos and maps), please consider purchasing my guidebook to the Japan Alps. 

Mt. Houou is one of the most beautiful yet most overlooked of the Minami Alps peaks. The rock formations are stunning, and the views out to Mt. Fuji are breathtaking to say the least.

The top of Mt. Kannon

The hike: First of all, this is almost impossible to do as a day hike unless you get a really, really early start, so plan on camping/staying at a hut along the way. From the trailhead, follow the signs to Yashajintouge (夜叉神峠). It should take around 45 minutes to hike up there. The views are great if the weather is good. There’s a hut and campground here, but don’t quit hiking quite so early. There’s a 3-way junction here, so hang a left toward Yakushi-dake (薬師岳). Most Japanese maps list the peak as 6.5 hours away, but if you’re in good shape and carrying light, you can do it in a little as 4 hours. Luckily, there are 2 huts along the way in case you got a late start or are a slow hiker. The first hut you’ll come to is MinamiOmuro-goya (南御室小屋). There’s a campground and water source here. If you continue another 90 minutes or so you’ll reach Yakushidake-goya (薬師岳小屋), just below the peak. This is a fantastic place to stay if you’d like to catch the sunrise. If you’ve made really good time and aren’t too tired, then why not continue another hour or so to Houou-goya (鳳凰小屋). This is where I stayed, but I approached from Hirogawara instead of Yashajintouge. No matter where you end up staying, you’re in for a treat of a sunrise in the morning. Mt. Houou has 3 main peaks – Yakushi, Kannon, and Jizou, all named after Shinto Gods. The highest peak is Kannon (観音岳), while the obelisk shaped Jizou (地蔵岳) is the symbol of the mountain, appearing in most photographs. If you stayed at Yakushi hut, then climb up to the top of Yakushi, ignoring the trail coming in from the right side. The ridge is pretty easy to walk on, and the limestone rock formations look a lot like snow. Mt. Kannon is the highest point. Admire the incredible view of Mt. Fuji directly in front of you, and the panorama of the Minami Alps directly behind. Continue for another hour or so (again, ignore the trail coming off the right) until reaching Jizou, where a choice has to be made. You could go right and exit the mountain in about 4-1/2 to 5 hours, or you could take a left and follow the ridge toward Mt. Kai Koma-ga-dake, which makes for a good traverse. If you head this way, then there’s an escape route off to the left in about an hour or so. This place is called Hakuhoutouge (白鳳峠). Going left here will take you to Hirogawara in about 3 hours or so. There are plenty of buses from Hirogawara back to Kofu.

When to go: If you’re relying on public transport, then do this hike between late April and November. If you’ve got your own car, then you can attempt this hike in the winter (with the proper equipment of course). Mt. Houou doesn’t get as much snow as neighboring Kita-dake, so it should be approachable in March depending on the amount of snowfall. Double check to make sure the road Yashajintouge is open before you drive all the way there.

Access: From Kofu station, take a bus bound for Hirogawara (the trailhead for the Kita-dake hike), but instead of going all the way there, get off at Yashajintouge (夜叉神峠). I think the first bus from Kofu is 9:30am but don’t quote me on that. If you’ve taken a night bus from Osaka or Tokyo, then double check the bus schedule when arriving at Kofu. Click here for bus information in Japanese. If you descend to Hirogawara, then double check the bus schedule, because the buses are limited in number outside of the peak July/August hiking season (the road is closed to regular cars, so it’s impossible to hitchhike).

Level of difficulty: 4 out of 5 (elevation change 1450m)

Mt. Utsukushigahara (美ヶ原)

February 23, 2008

Utsukushigahara is the only Hyakumeizan that you can “climb” in sandals. Though not very exciting in summer, winter transforms the place into a truly beautiful plateau. My friends and I have nicknamed this place Utskushikunaikara (美しくない原), meaning “ugly plain”.

Utsukushihakara

The hike: From either bus stop, follow the sign (and crowds) to the summit area, called Ougatou (王ケ頭), easily recognizable with all of the radio towers and antennae. The entire path is paved and quite overdeveloped, but if you’re climbing the Hyakumeizan you’ve got to come here to check it off your list. That’s why I recommend coming in the winter. The cows are gone, and the snow piles up over the fences, so you can roam anywhere. Plus, it’s deserted, there’s no avalanche danger, and it’s relatively flat. A good place to have a snowball war, practice making snow caves, and brush up on those snowshoeing skills. There’s a smaller, lesser known peak called Ougahana (王ケ鼻), which is about 20 minutes west of the high point. Follow the signs. If you go here, you have an outstanding panorama of the Kita Alps, no ugly towers, and much fewer people.

When to go: This hike can be done year round if you’ve got your own transport in the winter. Summer is crowded with tacky tourists, who come to view the cows. Go on a clear day so you can see the panoramic views.

Access: From Matsumoto station, take a bus bound for Utsukushigahara Open-Air Museum (美ヶ原高原美術館) and get off at Yamamotogoya (山本小屋). From there, it’s about an hour to the top. Click here for the schedule. Alternatively, from Ueda station, take a bus to Yamamotogoya (山本小屋). There’s one bus a day, departing Ueda station at 9:05am. Click here for that schedule. In winter there’s no public transport unless you stay at the expensive hotel on the summit, which offers shuttle service from Matsumoto station. Click here for the hotel website.

Level of difficulty: 0 out of 5 (elevation change 129m)