Posted tagged ‘Tohoku hikes (東北)’

Hachimantai (八幡平)

October 18, 2008

Rather than viewing Hachimantai as a mountain, think of it as a series of rolling marshlands, with excellent views out to its volcanic neighbor, Mt. Iwate. Avoid the weekends if you want to escape the crowds.

The hike: From the bus stop, follow the trail up to the summit of Mt. Chausu, which has excellent views across the valley to Mt. Iwate and over to Mt. Chokai on a clear day. The 200m vertical ascent should take about 20 minutes or so. There’s a hut near the summit which I think is free to stay in. Continue on the main trail towards Kuroyachi Shitsugen (黒谷地湿原), a wonderful marshland area. The trail is relatively flat and very easy to follow. You’ll reach a trail junction, with a trail branching off to the left. Ignore this trail because it leads back down to the road. If you’re in need of drinking water however, walk a short distance on this trail and you’ll find 熊の泉, the bear’s spring. Anyway, keep traversing west towards the summit of Hachimantai, and you’ll reach another trail junction marked 安比岳分岐 (Appidake-bunki). The trail to the right leads to the summit of Mt. Appi, which will take about a half an hour to reach. You can actually take this trail, soak at Appi hot spring, and return to Mt. Chausu by turning right at the only trail junction you find. This would make for an interesting detour if you’re staying at Chausu hut. Otherwise, just ignore this trail and head towards 源太森 (Genta-mori), which has nice views over the marshlands. Stay on the same path, and a little further along you’ll come across yet another trail junction. You can actually go either way. but I recommend staying straight, on the northern edge of the lake until reaching Ryoun Hut (陵雲荘). This is another mountain hut which I also think is free to stay in (most people just use Hachimantai as a day hike area except in the winter when they stay in the huts). Soon after passing the hut you’ll find yet another trail junction (Hachimantai does not have a lack of hiking options!) Stay to the right for the easy stroll up to the summit. This is the only mountain in Japan that has a wooden viewing platform built right on top of the summit – otherwise you’d have no views! From the top, turn left and follow the paved path past a couple of small lakes until reaching the massive parking lot. Enjoy some curry and rice in the huge rest house while waiting for the bus back to Morioka. Alternatively, you can easily hitchhike back to the city on the road.

When to go: This hike can be done from Golden Week to early November, when the road to the summit is open. Alternatively, a winter snowshoe trek is also possible via Hachimantai Ski Resort. A trail leads off towards Mt. Chausu from the top of the final chairlift.

Access: From bus stop #3 of the east exit of Morioka (盛岡) station, take a bus bound for Hachimantai (八幡平) and get off at Chausuguchi (茶臼口). As of 2011, there are 3 buses a day, running from Golden Week until the beginning of November. Click here for the schedule.

Map: Click here

Level of difficulty: 1 out of 5 (elevation change ~250m).

Mt. Iide (飯豊山)

July 23, 2008

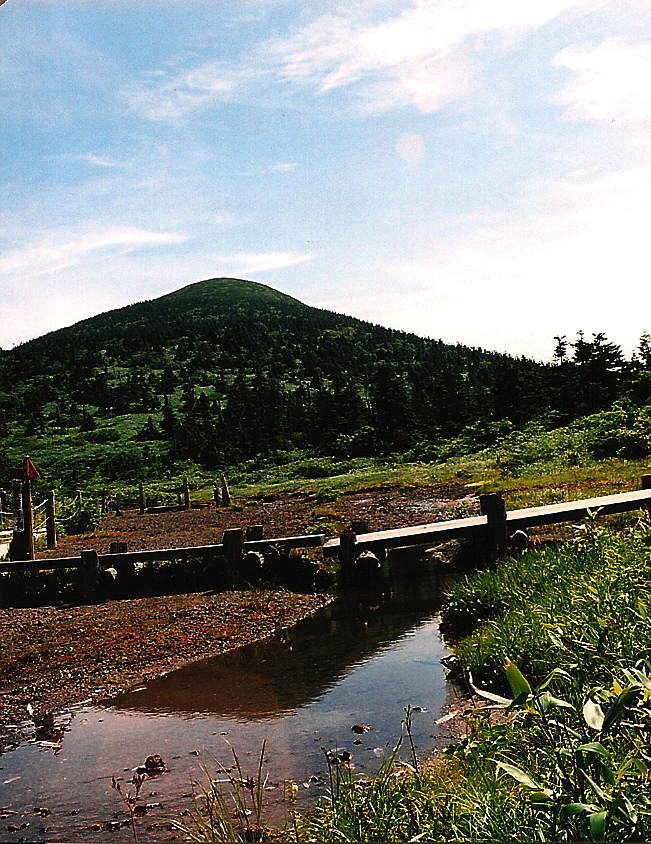
Mt. Iide is without a doubt the best multi-day hike in the Tohoku region. The stunning scenery and abundance of mountain huts attract a large number of hikers in the summer months.

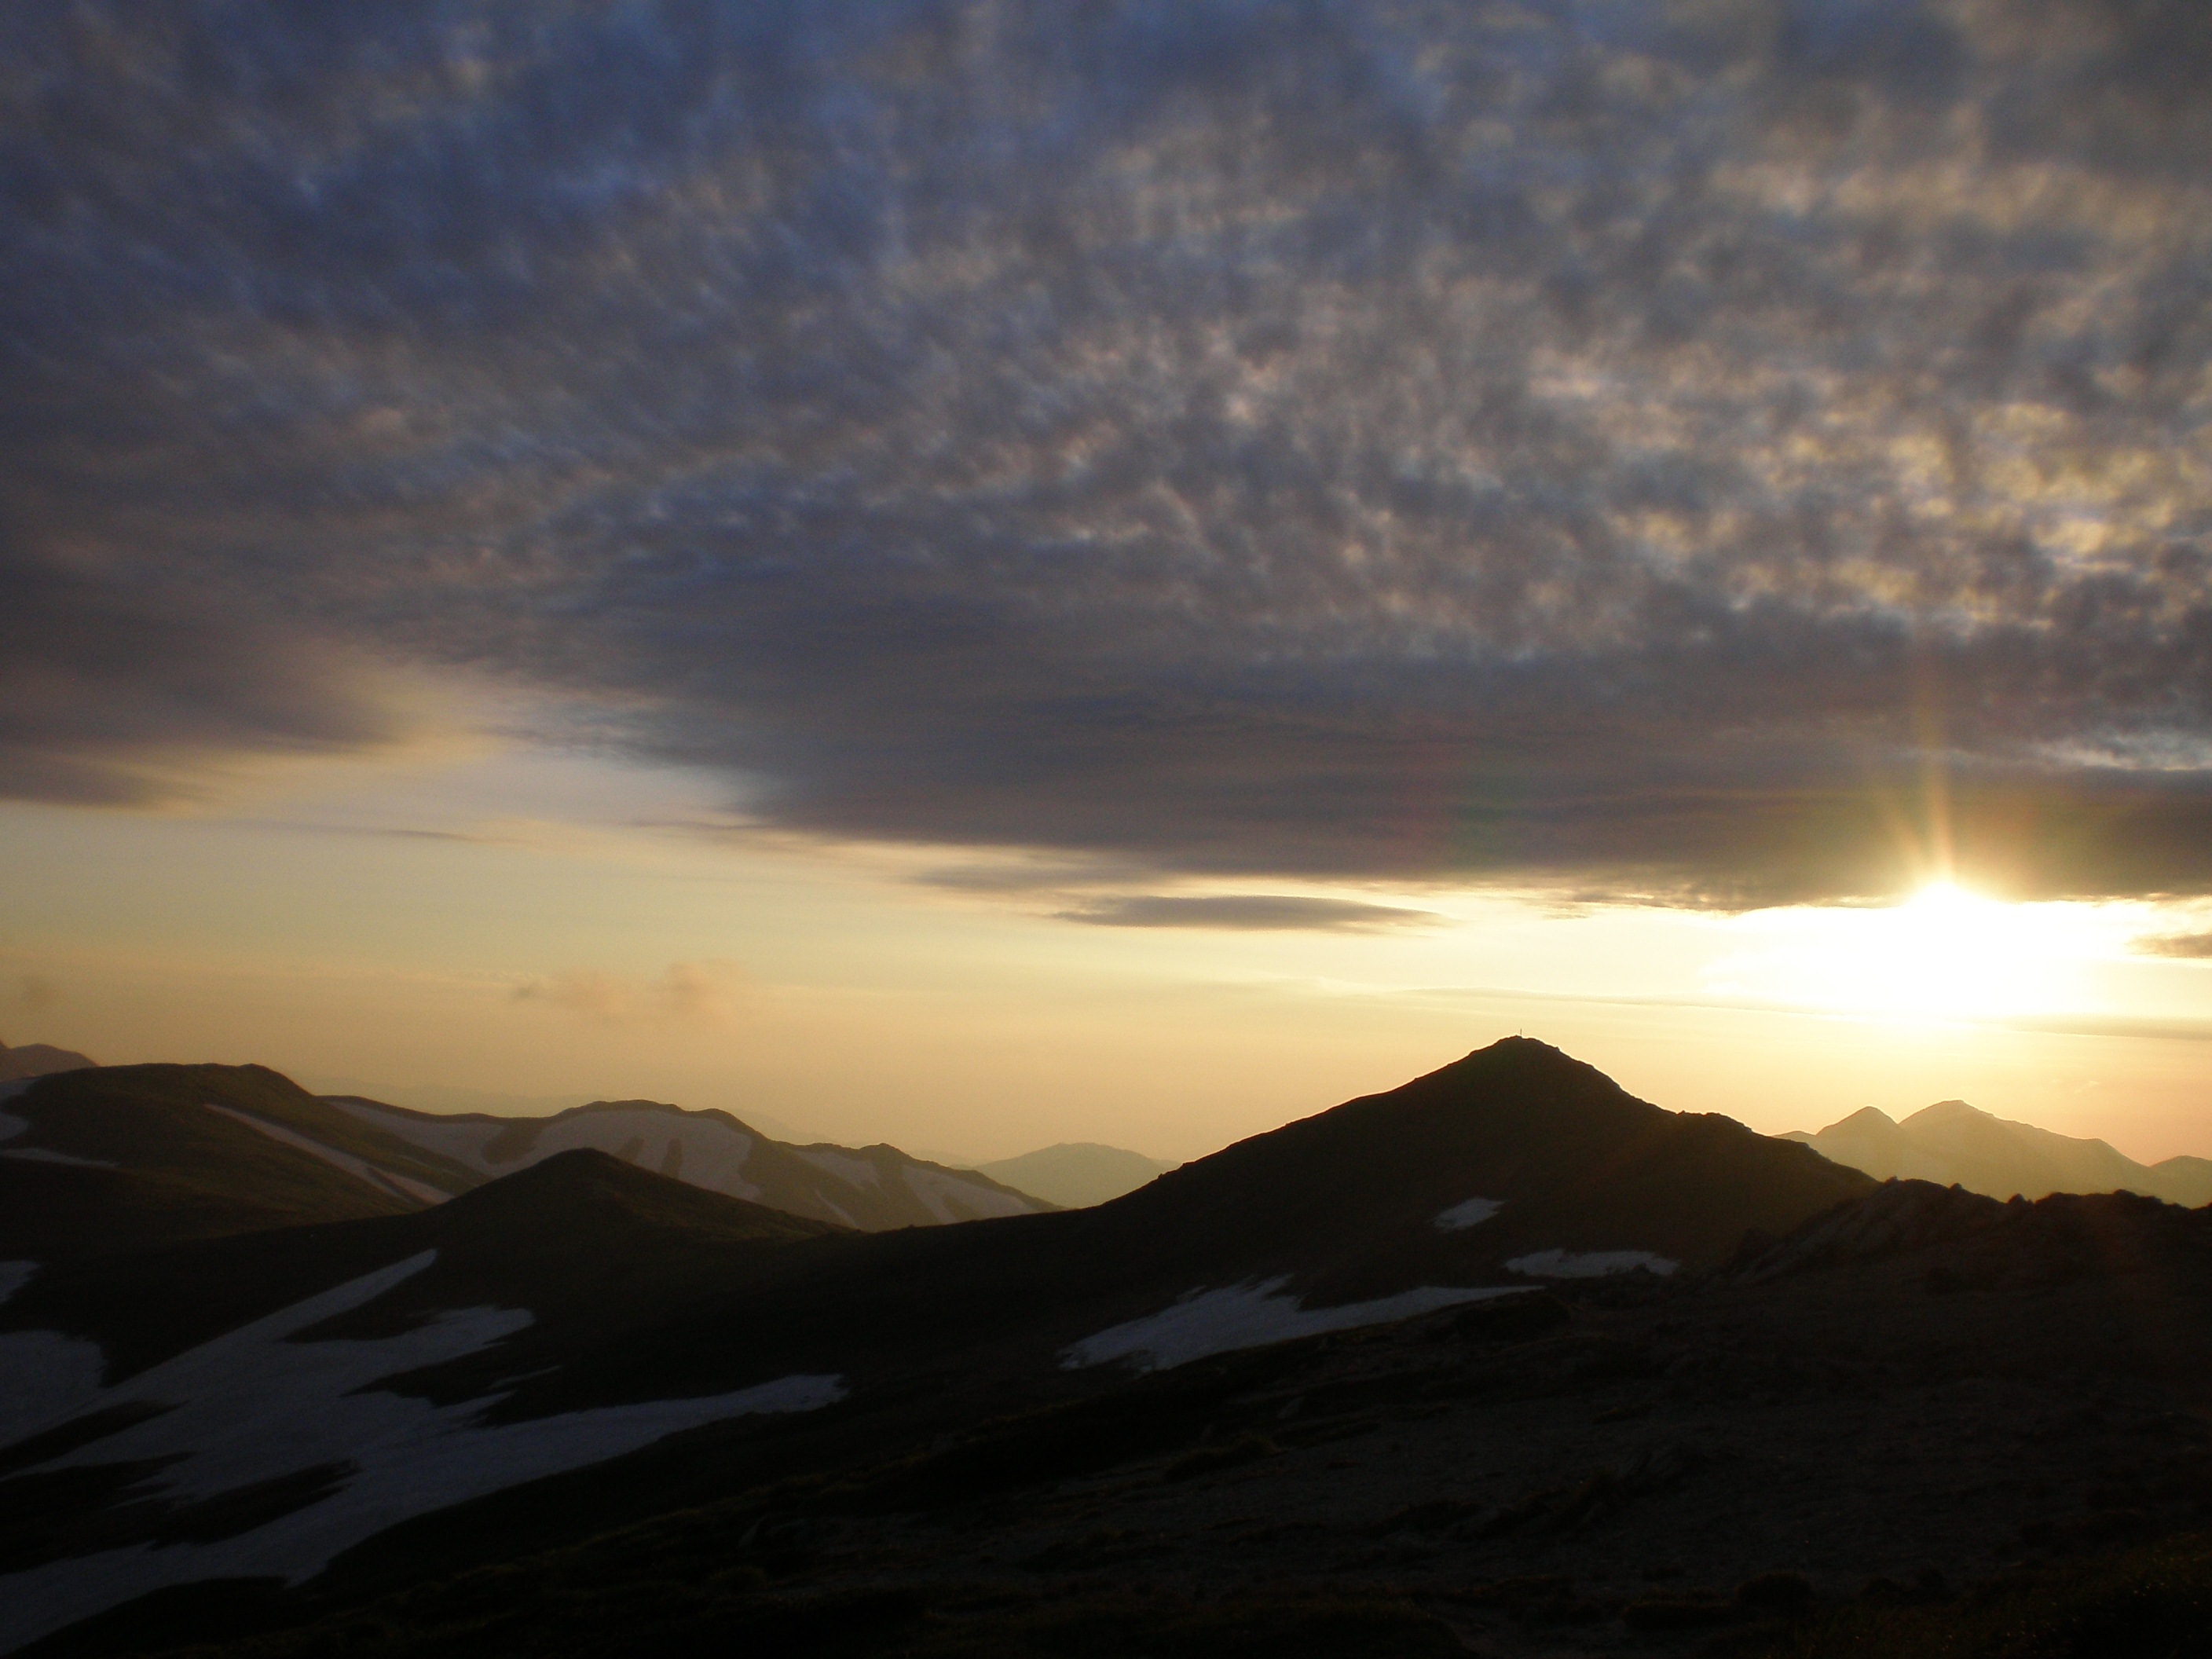
The hike: From the bus stop, hike through the small town and onto a gravel forest road. If you’ve hired a taxi then it’ll take you directly to the trailhead, saving this 30-minute walk. At the end of the road there’s a campground and small hut with hiking information. The trail is clearly marked and starts off as an extension of the road you’ve been hiking on. Soon enough it’ll branch off to the right, and this is where the real hike starts. It’s one heck of a climb, with a 1200 vertical meter elevation gain before reaching the ridge line! The maps say it’ll take 5 hours to reach the first hut of the day (at Mikuni-dake), but if you’re in shape you can do it in about 2 hours or so. The trail is very well-trodden, with lots of tree roots to climb up and over. The forest is all virgin beech, and the greenery is stunning. You’ll reach a water source at a place called Nakajugori (中十五里), but it’s not a reliable source of water (it’s a 5 minute hike down a spur trail to the right, and the water was just barely trickling out in mid-July). It’s better to fill up your bottles at the trailhead. A bit further on, after passing Sasa-daira (笹平), you’ll see an unmarked trail branching off to the right. Ignore this trail, as it’s an alternative way up the mountain and continue climbing toward the left. In another 10 minutes or so, you’ll reach another trail junction. You can either head right to climb to the summit of Mt. Jizo (地蔵山), or take the easier spur trail to the left. I’d recommend taking the left trail, because it passes right by a nice water source gushing with refreshing water. You can also see the ridge line of Mt. Iide rising up on your left. Soon after passing by the spring, you’ll meet up with the trail coming from Mt. Jizo. Turn left and follow the rocky ridge line towards Mt. Mikuni (三国岳). This trail is easy to find in clear weather, but could be a bit tricky if the fog is in, as there are no paint marks on the rocks. My advice is to follow the rocks that have scuff marks on them. This is not a place that you want to fall, but if you keep climbing then you’ll eventually pop out on the summit ridge, and they’ll be a hut awaiting you! If you’re set on a 3-night, 4-day hike, then check into the hut and enjoy the scenery. None of the huts on Mt. Iide have food or blankets, so you’ve got to bring a sleeping bag, stove, and food. The only downside with staying at Mikuni is that there’s no reliable water source, so if you’ve got extra time or energy, it’s better to push on for another 90 minutes to Kiriai hut (切合小屋), which has plenty of water. The ridge line between Mikuni and Kiriai is tricky, with a few chains in places, but the closer you get to Kiriai the easier it gets. You should also see your first set of snow fields. Just before the hut you’ll see a trail coming in on the right. This is another alternative way up the mountain, and very popular with people because it’s the shortest route up. If you’re a sucker for punishment, then you can continue another 90 minutes or so to Honzan hut (本山小屋). The trail will climb through a long snow field, and then drop steeply on the other side to a saddle, where you’ll find a Jizo statue. Then it’s a long, endless slog up to the hut. Most people take 2 days to reach this hut, but I made it in only 5-1/2 hours from Kiriai to this point. The hut manager is very friendly, and a place on the floor costs 2000 yen. All of the huts on Mt. Iide charge similar prices, but all have places to pitch your tent as well. From Honzan hut, it’s a 20-minute hike to the top of Mt. Iide, which is far as most hikers go. However, part of the beauty of this mountain is to traverse the entire length. It’s only 34.5km from end to end, and can be done in 3 days without a problem. Anyway, continue past the top of Mt. Iide, towards Mt. Dainichi (大日岳), the highest peak in the entire range. If the weather has been good then you’ve probably been staring at it ever since arriving at Mikuni! It should take about an hour or so to reach the trail junction at Onishi hut (御西小屋). You can leave your pack outside of the hut for the up-and-back assault of Mt. Dainichi. The maps say to allow 2 hours to reach the summit, but you can easily make it up and back in that time if you’re fit. You’ll have to cross a small snow field along the way, so take extra care if the snow is icy. The scenery is outstanding, as the Fuji-esque silhouette of Mt. Bandai stretches out in front of you. You can also see the peaks of Nikko National Park on a clear day, as well as Mt. Asahi, Gassan, and Mt. Chokai. Mt. Sado and the Sea of Japan will also greet you to the west. Head back down to the hut, where it’s time to make a decision. The next hut is 3 hours away, on a relatively flat ridge line. Keep pushing on if it’s early or you aren’t too worn out. There are a lot of snow fields to cross in this next section, so if you’re not confident then consider bringing a pair of light crampons to help boost your confidence. Climbing is no problem. but descending can be a bit slippery depending on snow conditions. Also, the track is a little difficult to follow in foggy weather, but luckily it’s well worn, so when in doubt always look for the footprints in the snow. You’ll pass by a few magnificent alpine lakes before reaching the summit of Mt. Eboshi (烏帽子岳). From here it’s a big descent to Kairagi hut (海花皮小屋). There’s plenty of delicious fresh water here, so take a break and check into the clean, beautiful hut if you’ve chosen this as your place to spend the second (or third) night. There’s a trail leading straight down the valley directly in front of the hut, but this is for climbing only (it’s one of the famous cirque climbs in Japan, up a very long and steep snow field). The next big climb is to the summit of Mt. Kitamata (北股岳), where you’ll find a small shrine. This is the highest peak in the northern section of the Mt. Iide mountain range. From here, it’s a relatively easy traverse over to Mt. Monnai (門内岳). Here you’ll find the final hut on the traverse. Check-in here, or push along for the 4-hour knee knocking descent down to Iide hut (飯豊山荘), with it’s lovely hot spring bath! To get there, continue on the ridge for about 20 minutes and you’ll find a trail junction. Turn right and follow the trail, down 1400 vertical meters. It’s quite steep, but there are plenty of tree roots to grab onto. There’s a water source about halfway down the descent. Take the short spur trail on the left in order to reach it. Remember the bus schedule before you set off for Iide hut. If catching the afternoon bus, then head down early enough too enjoy a 500 yen bath. It’s also possible to stay at the hut for 1700 yen (including use of the hot spring) if you tell them you’ve got your own sleeping bag and food. It’s also possible to continue along the ridge line all the way to Mt. Eburisashi (朳差岳) one of the 200 famous mountains of Japan. As it’s a 10km traverse from Monnai, you’ll need an extra day to reach it. Also, there’s no bus service from Oku-tainai (奥胎内) at the end of the hike, so you’ll have to fork over 9000 yen for a taxi.

When to go: This hike can be done during July and August only, when the buses are running. If you’ve got your own transport then you can do it in June or September. This mountain gets a ton of snow in the winter, so it’s better to avoid unless you’re training for Mt. Everest or something.

Access: From Niitsu (新津) station, take a train on the Banetsu-sai (磐越西) line bound for Aizu-wakamatsu (会津若松) and get off at Yamato (山都) station. From there, take a bus bound for Kawairi (川入) and get off at the last stop. There are only 2 buses a day, so it might be better to shell out 6000 yen for a taxi if you miss the 8:40am bus. Click here for the schedule. At the end of the hike, take a bus from outside of Iide-sanso (飯豊山荘) bound for the hospital (病院前) and get off at Oguni (小国) station. Again, there are only 2 buses a day, so make sure you’re off the mountain by 9am to catch the morning bus, or you’ve got to wait around (at the hot spring) all day. Click here for the schedule. The morning bus is timed perfectly for you to catch the 10:14am train to Yonezawa, which is again perfectly timed to transfer to the 11:40am Shinkansen to Tokyo.

Level of difficulty: 4 out of 5 (elevation change ~1722m).

Mt. Zao (蔵王山)

July 16, 2008

Mt. Zao is one of the most popular ski resorts in Japan, and home of the famous ‘snow monsters’. In summer, it’s an easy stroll via a picturesque volcanic lake, and the hot springs at the base of the mountain are an added bonus to help rejuvenate tired muscles.

The hike: There’s no doubt about it. The ease of access will bring huge swaths of crowds in the summer months, but with a little timing you can have some peace and solitude. My advice would be to arrive at Katta-toge in the early evening and stay at the stone emergency hut at the summit of Mt. Katta (刈田岳). The hut is unmanned and completely free to stay in. Bring your own water and be prepared for a 10 minute walk to use the toilets at the parking lot. This way, you can wake up at the break of dawn and enjoy a wonderful stroll without a soul in sight. From the huge parking lot, follow the well-marked trail towards Mt. Kumano (熊野岳). Along the way, you’ll pass by a stunning volcanic lake on your right, named Okama (御釜). The emerald green colors are breathtakingly beautiful (or so I’m told – I was unfortunate because the lake was completely hidden in thick fog!) Click here to get an idea of the scenery in good weather. Continue on the same trail for a gentle climb, taking a left at the only junction you’ll find. You’ll be on the summit of Mt. Kumano in about 20 minutes, where the views are stunning in nice weather. Yamagata city stretches out directly below you, framed in the distance by Mt. Iide, Mt. Asahi, and Gassan. From the summit, you can either retrace your steps back to Katta-toge, or descend down to Zao Onsen via the long ski resort. I recommend the latter option as the only bus from Katta-toge doesn’t leave until 1pm. The path through the ski resort is well-marked, and just before you take the final descent toward the very bottom of the lift, look for a bridge branching off to the right, which will take you to the ‘big bath’ (大露天風呂), a fantastic outdoor bath with milky white water. Unfortunately it’s not open in the winter, because there were problems with peeping Toms from the ski runs above. It’s definitely one of the highlights of Zao hot spring, so don’t miss this chance! Click here for more info.

When to go: This hike can be done year round if you’ve got some snowshoes. In fact, I’d recommend combining this hike with a weekend on the ski slopes. If the weather is good, then you can take the gondola up to JIzo-sancho (地蔵山頂) and hike for one hour via a route marked with huge poles to the summit of Mt. Kumano (熊野岳). Otherwise, you can opt for an easy stroll from the trailhead at Katta-toge.

Access: From Yamagata (山形) station, take a bus bound for Zao Onsen (蔵王温泉) and get off at the Zao Onsen bus terminal (蔵王温泉ターミナル). The bus takes about 30 minutes and leaves once an hour. Click here for the schedule. There’s only one bus a day going directly to the trailhead at Katta-toge (刈田峠). It leaves Yamagata station at 9:30am. If you miss this bus, then just take a bus to Zao Onsen and hitchhike from there (or start your hike from there for the 1000m vertical ascent to the summit).

Level of difficulty: 1 out of 5 (elevation change ~200m).

Gassan (月山)

May 30, 2008

Gassan is highest peak in the Dewa Sanzan trio of religious mountains, nestled snugly between Mt. Chokai and Mt. Asahi in Yamagata Prefecture. Known for white clad pilgrims and summer skiing, the peak offers alpine vegetation and scenery without climbing to air thinning altitudes.

The hike: From the parking lot, follow the signs (and crowds) towards Gassan shrine (月山神社). The path is well trodden and easy to follow. You’ll reach a mountain hut in about 90 minutes or so, at the base of Mt. Omowashi. The trail starts to get a little steeper from this point, but overall it’s a relatively easy and enjoyable ascent. It should take another hour or so to reach the summit area, which is pretty overdeveloped. There’s a huge shrine on the summit, which you’ll have to pay to enter. The true high point, however, is on a group of unmarked rocks directly behind the summit, and it won’t cost you a thing to sidestep the shrine and enjoy your lunch away from the crowds. There’s a big hut a short descent from the shrine, appropriately named ‘Summit hut’ (山上小屋). The hut is only open from late June to late September, and doesn’t have any drinking water for non-staying guests. Continue past the hut, and turn right at the next two junctions, where you’ll drop to a huge saddle. This is where you’ll see summer skiers. At the saddle, you’ll find a two-way junction. You can either turn left to reach the top of the chairlift, or continue straight towards Mt. Yudono (湯殿山). I recommend heading straight, unless the weather has turned foul or it’s getting late. You’ll reach a junction in about 20 minutes, but ignore it and stay on the ridge line. Another half hour or so along the trail and you’ll be standing at the base of Mt. Yudono. There’s a water source and a free emergency hut here, as well as a 2-way junction. Turn right to drop to Yudono shrine, or take a right to descend to Shizu (志津) campground. Unfortunately, there’s no trail up to the summit of Mt. Yudono, so you’ll have to be content with staring at it from the hut. The drop to Yudono shrine is pretty big, but you’ll be rewarded with a foot bath on the shrine grounds. If you’re headed in the direction of Mt. Asahi, however, I recommend turning left and descending to Shizu. It should take about 90 minutes of enjoyable hiking to reach a nature museum and the campground. Be extremely careful crossing the numerous wooden bridges if it’s wet. I went sliding off one into a creek about a meter below the trail! The campground surrounds a scenic lake, and each site costs 500 yen (register at the hut). If you continue walking down route 112 for about 1/2 an hour, you’ll find Shizu hot spring. Another half hour or so beyond that, and you’ll be sitting in a huge auto campground. Whatever you do, don’t descend this far, because they’ll try to charge you 3500 yen for a place to pitch your tent! Luckily the staff gave me a ride all the way back up the road to the cheaper and more scenic Shizu campground. There are buses back to civilization from the campground, but unfortunately I couldn’t find any on-line information. Hitching is also a definite possibility.

When to go: The buses from the Mt. Haguro side only run from July 1st to August 24th, but you can definitely go earlier than this if you’ve got your own transport. The peak gets meters upon meters of snow in the winter, and stays around most of the summer. Click here to see the conditions during Golden Week.

Access: From Niigata (新潟) station, take the JR limited express ‘Inaho’ to Tsuruoka (鶴岡) station. From there, take a bus bound for Gassan-hachigome (月山八合目) and get off at the last stop. The bus makes a 15-minute ‘pit stop’ at the top of Mt. Haguro (羽黒山頂), allowing enough time to offer a quick prayer to the mountain deities. Click here for the bus schedule.

Level of difficulty: 2 out of 5 (elevation change 824m).

Mt. Hiuchi (燧岳)

May 11, 2008

Mt. Hiuchi is officially the tallest peak in the Tohoku region (although it’s just barely in Tohoku) and the crown jewel of Oze National Park. The reflections in Oze numa are mesmerizing and the views from the rocky summit spectacular.

mthiuchi1

The hike: From the parking lot at Numayamatoge (沼山峠), head into the forest across from the big hut and follow the red paint marks on the trees to the summit of Numayamatoge, which should take about 20 minutes or so. From the top of the mountain pass, you’ll see the big lake stretching out in front of you, and Mt. Hiuchi towering above to the right. Descend into the marshlands, where the trail will eventually take you to a small village with lots of huts. Check into Chozogoya (長蔵小屋), the oldest mountain hut in Japan. It makes for a wonderful place to stay, and you’ll enjoy the hot spring bath after the climb to the summit. From the hut, head back towards the way you just came from, but instead of going to Numayama, turn left and follow the forest trail that winds its way around the lake. After about 20 minutes you’ll reach a trail junction. Turn right to head up to Mt. Hiuchi. The trail starts off relatively flat, making its way through a dense forest before climbing up the spine of the volcano. The trail becomes steeper and steeper, and the views will start to open up. After about 90 minutes or so, you’ll start to see wonderful views over the lake out to Mt. Okushirane on your left, and nice vistas out to Aizu-komagatake to your right. You should also see the summit towering above you. Keep climbing up until you reach a rather large saddle just below the peak of Mt. Minobuchi (ミノブチ岳). This is the first of the 5 peaks of Mt. Hiuchi, so turn right and continue climbing up the steep, rocky spine to the second summit, named Manaitagura (俎嵓). Take a break and admire the incredible views out to Mt. Fuji on a clear day. The true summit is a rocky peak by the name of Shibayasugura (柴安嵓). Drop to the saddle between the peaks and up to the high point. It’s an easy enough climb in the summer, but absolutely terrifying during April and May when it’s a near vertical climb up a snow bank, so bring an ice axe and crampons if climbing in early summer. Pat yourself on the back for a job well done. You can traverse down to Jujiro (十字路) from here and turn left to head back to Chozo hut, or retrace your steps back to Manaitagura. If you’re only up for the day, then you can descend down to Mi-ike (or start/finish your hike there). I recommend heading back to Chozo hut so you can enjoy the mirror-like reflections in the lake and the wonderful food and bath.

When to go: This hike can be done from early June to late October, when the buses to Numayamatoge are running. If you climb Hiuchi via the Mi-ike (御池) trail, then you can climb from mid-April to late November, when the buses to Mi-ike are running. The paved forest road from Mi-ike to Numayamatoge is closed to private cars, and the road doesn’t open until May 15th. If you’re climbing during Golden Week, then you can either hike up the road for 10km to Numayama (which is what I did), or plan your climb from Mi-ike.

Access: From Shinjuku station, there are direct buses to Numayamatoge (沼山峠), the shortest and easiest access route to Oze numa. Click here for the schedule and prices (in Japanese). You can also get into Oze via Oshimizu (大清水) or Hatomachitoge (鳩待峠), but it’ll take a lot longer and a lot more effort to reach Mt. Hiuchi.

Live web cam: Click here

Level of difficulty: 4 out of 5 (elevation change ~700m).

Mt. Iwaki (岩木山)

May 8, 2008

Mt. Iwaki is a pointy peak towering over Hirosaki city in Aomori Prefecture. The summit affords outstanding panoramic views, and sports two free mountain huts.

The hike: From the parking lot, head up the trail to the left of the chairlift station (yes, you can take a ski lift practically to the top!). You should reach the summit ridge in about 40 minutes or so. Turn left and descend through a rocky area to an emergency hut. You can stay here for free, but the hut on the top is more spacious and offers much better views. You’ll see a small lake just below you, as well as a trail descending down off the mountain towards Iwaki shrine (岩木山神社). If you’re staying on the mountain, you’ll need to descend about 20 minutes in order to fill up your water bottles, since there’s no water on the mountain (you could also just bring 3 or 4 liters from the parking lot and save yourself some time/energy). Anyway, it should take about a half an hour to reach the true summit of Mt. Iwaki. There’s an awful lot of boulder scrambling, which feel a bit like climbing in the Alps. If the weather is good, then you’ll have one of the best panoramic views in the Tohoku region. I climbed in August and had the entire summit to myself, so I decided to stay in the hut on top. If the weather is clear then you can see all the way to Hokkaido in the north, the sea of Japan to the west, Hirosaki and Aomori cities to the east, and the endless layering of the Shirakami mountains to the south and southwest. If you’re not staying the night, then head back to the first emergency hut, and consider descending 1500 vertical meters to Iwaki shrine or just head back to the parking lot.

When to go: This hike can be done from Golden Week to early November. A winter ascent is risky due to the avalanche danger near the summit. Be prepared for a lot of snow if you go before the rainy season.

Access: From Hirosaki station (弘前駅), take a bus bound for Iwakisan-hachigome (岩木山八合目) and get off at the last stop. The bus departs from bus stop #6, but I’m not sure of the frequency of the direct buses, so it might be faster to take a bus to Dake-onsen (嶽温泉) and change to a shuttle bus. The tourist information center just inside Hirosaki station is excellent, so they’ll be able to give you the exact schedule in English. Click here for the shuttle bus schedule. You can also try your luck at hitching. I didn’t arrive at Dake Onsen until 4:15pm, and I was able to hitch just before the toll road closed at 4:30pm. Click here for the bus from Hirosaki station to Dake-Onsen.

Live web cam: Click here

Level of difficulty: 2 out of 5 (elevation change ~400m).

Aizu-komagatake (会津駒ヶ岳)

May 7, 2008

Aizu-komagatake is a spendid series of rolling green hills and tranquil marshlands, with magnificent panoramic views and an abundance of wildflowers.

The hike: From the bus stop, head up the paved forest road across the street. There’ll be a large white sign indicating 会津駒登山口, as well as a toilet. Hike up the paved road for about 20 minutes until reaching the trailhead proper (you can’t miss the wooden staircase leading into the forest). The trail wastes no time in gaining altitude, and if you’re hiking in April or May then the entire trail will be covered in snow. Even in the snow, the trail is very clearly marked with red ribbons tied to the trees. After about 90 minutes of climbing, you’ll reach a natural mineral spring, which apparently has really great water. It’ll be buried and impossible to find if you’re hiking before the rainy season. Fill up your bottles here, because the hut at the top doesn’t have any water. Keep climbing up and up through the dense forest until it starts to thin out. The summit ridge should start to come into view on your right, as well as nice views out to Mt. Hiuchi toward the left. Eventually you’ll reach the ridgeline, where you’ll find Komanogoya (駒ノ小屋) a small but nice hut. It costs 3000 yen to stay here and it’s run by a lovely husband and wife team who used to work at the Yari-ga-take hut in the Kita Alps. There are no meals served, but they do have futon, so bring your stove and food. There’s no water, but you can melt snow if you’re hiking before July. From the hut, turn right and continue up the path to the true summit, marked by a very tall signpost. It’s hard to believe, but this signpost gets completely buried under snow in the winter! After taking in the views, consider a side trip out to Chuumon-dake (中門岳), where you’ll find a scenic lake and loads of wildflowers. Retrace your steps back to the hut, and either return down the same way you came, or traverse the entire ridge down to Mi-ike (御池), the starting point of the Mt. Hiuchi (燧岳) climb. This traverse should not be attempted before the rainy season due to the snow crevices and the fact that there are no markings to help guide you through the snow.

When to go: This hike can be done from Golden Week to early November. A winter hike is also possible if you’re prepared for the massive amount of snow. I hiked in Golden Week and there was still over 2 meters of snow remaining. There are a few minshuku just a short distance from the trailhead, where I recommend staying so you can get a fresh, early start and can also try out the local delicacy: deep-fried salamander.

Access: From Asakusa station in Tokyo, take a limited express train on the Tobu Line (東武) bound for Kinukawa-Onsen (鬼怒川温泉). From there, change to a local train and get off at Aizukogen-ozeguchi (会津高原尾瀬口) station. If you want to save money, you can take a kaisoku train from Asakusa, but it will take much longer. From Aizukogen-ozeguchi station, take an Aizu bus bound for Hinoemata (檜枝岐) and get off at Komagatake-tozanguchi (駒ヶ岳登山口). There are at least 4 buses a day, departing at 9:30am, 10:50am, 12:30pm and 3:00pm, with more during the summer hiking season. If you take the limited express at noon, you’ll arrive just in time to make the 3pm bus. The bus takes about an hour and 20 minutes to reach the trailhead and costs 2200 yen. Click here for the bus schedule.

Level of difficulty: 3 out of 5 (elevation change 1203m).

Mt. Hakkoda (八甲田山)

April 28, 2008

Mt. Hakkoda is one of the premiere ski resorts in the Tohoku region, with meters upon meters of fresh powder and an endless army of ‘ice monsters’. The rest of the year it’s a hikers dream, with wonderful fertile volcanic cones, spectacular marshlands, and breathtaking panoramic views.

The hike: From the Sukayu onsen bus stop, take the trail at the end of the parking lot (closer to the toilets) towards Sennin-tai (仙人岱). The path initally climbs through a dense forest, and then opens up and turns into a wonderful volcanic valley, with lots of colorful rock formations and pungent sulfur fumes. It should take about 45 minutes to reach the top of the volcanic plateau, where the trail will flatten out significantly. At Sennin-tai, you’ll find an emergency hut and water source, so fill up your bottles. Take the trail to the left towards Odake (大岳). There may still be some remaining snow in this area and lots of wildflowers. You should reach the top of Odake in about an hour, and the views are wonderful. Mt. Iwaki will be staring at you across the valley, and on a clear day you’ll see Aomori city to the north, and the Pacific Ocean to the northeast. Continue on the same trail down to a saddle and emergency hut. From here, you can either climb up to Mt. Akakura (赤倉岳) or turn left to descend back to Sukayu Onsen. I was keen for a bath, so I skipped Akakura and flew down to the hot spring. The path to Sukayu is well-marked, with lots of wooden planks to protect the wild flowers. The marshlands definitely warrant a leisurely stroll, so take your time and enjoy the serenity.

When to go: This hike can be done from Golden Week to early November. A winter ascent is also possible whenever avalanche danger is low and the weather is favorable. In the winter of 2007, 2 people were killed and a dozen injured in an avalanche on Mt. Hakkoda, so please don’t climb without a beacon and proper avalanche training.

Access: From Aomori station (青森駅), take a JR bus bound for Lake Towada (十和田湖) and get off at Sukayu Hot Spring (酸ケ湯温泉). The bus takes around an hour and costs 1300 yen. Click here for the bus schedule.

Level of difficulty: 2 out of 5 (elevation change ~694m).

Mt. Chōkai (鳥海山)

March 29, 2008

Last updated: Sept. 11, 2019

Mt. Chokai is a phenomenally beautiful volcanic peak nestled snugly on the border of Akita and Yamagata prefectures. The wildflowers blossom out of control, alpine lakes pop up all around, and the snow sticks around through all seasons, making this one of the best hikes in Japan.

Mt. Chokai

The hike: From the parking lot at Hokodate, drop your pack off at the Hokodate Sanso (鉾立山荘). The owner is really friendly, and it only costs about 1200 yen to stay here. It’s much better than staying in the cramped, expensive hut near the summit. The mountain doesn’t have any water sources, so make sure you bring plenty with you before approaching the hike (there’s a Max Value supermarket about a 10-minute walk north of the station) there aren’t any reliable sources on the mountain. The huts will gladly sell you water for ridiculous prices (500 yen for 500ml). The trail starts off rather gently, with a great view of an amazing gorge adjacent to Hokodate. Just after starting, you’ll see a mountain hut on your left. This is called Shinonome hut (東雲荘) and it’s owned by the TDK corporation. It’s possible to stay here but you’ll want to double check that the hut is actually open before starting your hike.  Anyway, ignore this hut and keep climbing the concrete steps and you’ll reach a lookout platform that has two picnic benches at the top of a series of concrete steps, where you’ll get a view straight down into the gorge.  From here, the concrete turns into a broad rock path that resembles an ancient Roman byway. After about 45 minutes of steady climbing, the angle will ease a bit and you should see your first traces of snow. You’ll also find some running streams to fill up your water, but I’d definitely filter it before drinking because of the popularity of the area. Your first big landmark is the flatlands of Sai no kawara (賽の河原). Here you’ll find a signpost indicating that   Ohama (御浜) is only 1.5km away. If you look up you can pretty much trace the outline of the trail to Ohama hut sitting on the edge of the plateau. There’s a small shrine just before the hut and just behind the hut there’s a scenic crater lake. There’s a toilet here and you can also stay overnight in the hut (advance reservations recommended, as it gets full pretty quickly during the busy season). The summit of Mt. Chokai will come into view just left of the lake, and it still looks so far away. Continue past the hut to the left for another half hour, and you’ll come to a junction. Ignore the spur on the right and continue straight, towards the peak. After another 30 minutes or so you’ll come to another junction, where a choice has to be made. You can either go left or right. The right spur is the ridge trail, with amazing views over to the summit. The left spur is the more direct route. I’ll describe a loop hike, climbing the left and descending via the ridge. Take the left trail, which cuts through a rather long snow field before climbing up the other side. The path becomes quite rocky, so just follow the paint marks and the crowds if you came on the weekend. You should reach the hut just below the summit in around 90 minutes or so. You could stay here, but the lack of water doesn’t make it very inviting. The hut does offer meals though (not sure if water is included in the price though) Continue behind the hut to the top of Mt. Chokai, called Shin-san (新山). There are lots of huge rock formations to traverse through, and chains make the trickier sections more manageable. The true summit only has room for only 3 people at a time, so be prepared to queue up, especially on weekends and during Obon.  Traverse up and over the summit and head down the other side, where you’ll find yet another snow field. Cross this and head up the other ridge over to Mt. Shichikou (七高山). This is the twin peak of Shin-san, which explains Chokai’s double hump appearance from a distance. After taking a quick rest, turn around and follow the signs to Mt. Gyouja (行者岳). Keep following the ridge, and ignore the trail coming in from the left. You should reach the summit of Mt. Monju (文珠岳) in about 20 minutes after the junction. After 20 more minutes, you’ll be back at the trail junction you first encountered, completing the loop hike of the summit. From here, you can retrace your steps all the way back to Hokodate.

When to go: This hike can be done from late April to early November, when the road to the trailhead (Chokai Blue Line) is open. If you go in late April, be prepared for meters upon meters of fresh snow. Click here to get an idea of the climbing conditions during Golden Week. Please note that bus service is extremely limited as of 2019.

Access: Starting in 2014, the bus to Hokodate runs by reservation only. You must make a reservation one day in advance by calling 0184-43-6608 or by filling out the on-line form (in Japanese) here. The bus costs 3000 yen one-way and is nothing more than a small, blue shuttle van when only a few people reserve. 99% of hikers now drive to the trailhead, so there’s a real danger that the bus will be discontinued altogether.  The bus starts from Kisakata station (象潟駅) and heads to Ōbirasansō (大平山荘), stopping at Hokodate (鉾立) along the way.  The bus runs every day from July and August, and then on weekends only throughout September until the end of October. There’s also a direct night bus from Tokyo station to Kisakata. 

Live web cam: Click here

Level of difficulty: 4 out of 5 (elevation change 1146m)

Mt. Bandai (磐梯山)

March 25, 2008

Mt. Bandai is an active volcano located on the shores of Lake Inawashiro in Fukushima Prefecture. The views are splendid, the rock formations colorful, and the volcanic scenery picturesque.

Mt. Bandai

The hike: From the bottom of the lifts, follow the tozan michi (登山道) signs toward Mt. Bandai. Initally, the trail will climb on the left-hand side of the ski resort. There aren’t any switchbacks here. You’ll basically be hiking through the grassy ski fields. After about an hour of steep slogging, you’ll reach the ridge line, which turns to the right. It’s rocky at first, but it will flatten out as you approach the top of Mt. Akahani (赤埴山). There’s a short spur trail to the summit on the right-hand side. Head up here for a break if you’d like, or continue to the majestically splendid Numanotaira (沼ノ平) for a more scenic rest. This flat area features some beautiful marshes, alpine flowers, and stinky sulfurous gases. It should take about a half hour of easy hiking to reach the ridge line of Mt. Bandai. This is where the real hike begins, as the peak becomes very rocky. Follow the paint marks carefully if the cloud is in, because the drops to the right are huge. Eventually you’ll reach a series of 2 mountain huts, 2 water sources, and a trail junction. Take a break here, fill up your bottles, and prepare for the final ascent, which will take about 20 minutes or so. The views from the rocky summit are superb if the weather co-operates. Head back down to the junction and either head back the same way you came, all the way back to Inawashiro station, or take the trail to the left for a shorter, alternative way off the mountain.

When to go: This hike can be done between late April and early November. Although not impossible, a winter ascent is only for the really advanced climbers willing to deal with the frequent avalanches, because this peak gets a ton of snow in the winter. Click here for a report of a hiker who scaled during Golden Week to get an idea of the amount of snow.

Access: From Koriyama station (郡山駅), take a train on the JR Banetsu-sai Line (JR磐越西線) to Inawashiro station (猪苗代駅). From there, it’s a 1 hour walk to the trailhead at Inawashiro Ski Resort. (猪苗代スキー場) Alternatively, you can take a taxi for around 2000 yen that takes about 15 minutes.

Live web cam: Click here

Level of difficulty: 3 out of 5 (elevation change ~1200m)