Posted tagged ‘hiking’

Mt. Ena (恵那山)

February 24, 2008

Last updated: Feb 21, 2025

Mt. Ena is a long, round, hump-shaped peak located on the border of Nagano and Gifu Prefectures. It’s easily accessible from Nagoya city, and the views along the way are outstanding.

The view from Mt. Ena

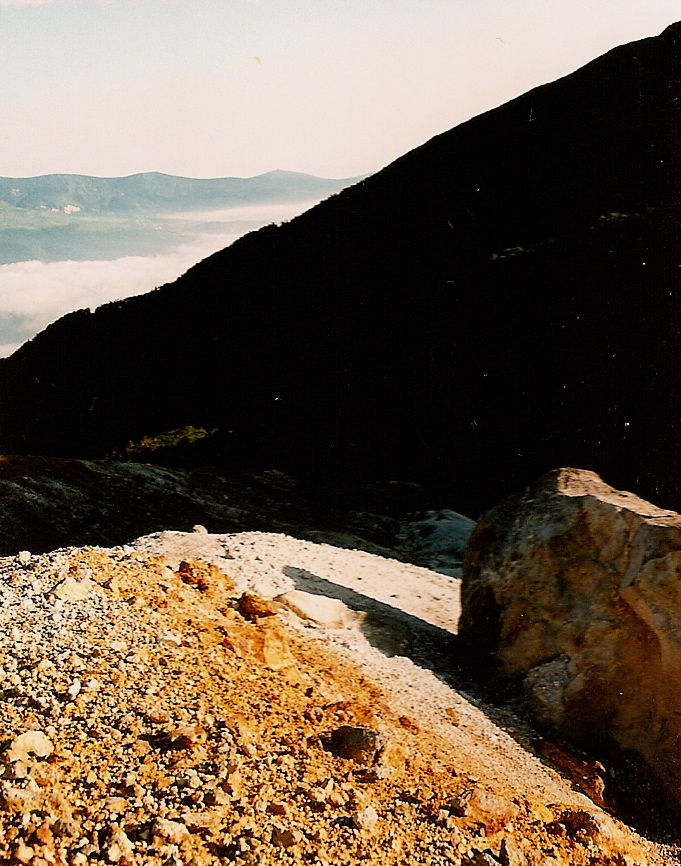
The hike: From the small parking lot at Misakatōge (神坂峠), there are two trails, but you want to take the one towards Ōbanyama (大判山). It should take you about 90 minutes to reach this peak, which has excellent panoramic views of the Minami and Chuo Alps, as well as Mt. Ondake. You can also see Mt. Ena in front of you. From the peak, the trail curves toward the right and goes down! You’ll lose about 100m of altitude before the trail flattens out and follows the contour of the mountain. The trail will start climbing again, and won’t let up until the summit ridge. It should take about 2 hours or so to reach the Ena ridgeline, as the final climb is quite steep and rough going if there’s any snow or ice. Once you reach the ridge, the trail will veer off to the left and become very flat and easy. In about 20 minutes or so, you’ll come to a mountain hut named Enasan-sanchō-goya (恵那山山頂小屋). The area is heavily wooded, but if you climb the rock behind the hut you’ll be rewarded with terrific views of the Minami Alps and Mt. Fuji. The true summit is another 10 minutes or so past the hut, and there’s a small shrine at the top, but no view. The hut itself is unmanned and free to stay in, but there’s no water source so bring plenty of water with you if you’re planning an overnight stay. In fact, there are no water sources at all on this hike (not even at the trailhead), so stock up at the train station before setting out. After resting at the top, head back the way you came.

When to go: This mountain gets its fair share of snow in the winter, and  the forest road to the trailhead isn’t plowed, which means a winter assault may be difficult. The snow should melt sometime in March though. I did this hike in October and was hiking through fresh snow.

Access: From Nagoya station. Take the JR Limited Express “Shinano” train bound for Nagano and get off at Nakatsugawa station (中津川駅). If you’d like to save money, then take a local train. From the station, there is NO bus service to the trailhead. You’ve either got to take a taxi (that’ll cost around 7000 yen) or try your luck hitching. The trail starts at Misakatōge (神坂峠). I was lucky enough to go with a friend who had a car. If you’ve got a few days off, you could try walking to the trailhead and camping there, before starting your hike the following day.

Digital Map in English (Avenza App): Click here

Level of difficulty: 2 out of 5 (elevation change 622m)

Mt. Tateshina (蓼科山)

February 22, 2008

Last updated: Feb 19, 2025

Mt. Tateshina is a knobby, dormant volcano rising northwest of Yatsu-ga-dake and features a bald rocky summit and wonderful panoramic views of the Kita Alps.

the rocky summit of Mt. Tateshina

The hike: From the bus stop, enter the forest from the right side of the road (if looking uphill). The trail starts off flat, and then climbs through a lot of bamboo grass before flattening out after about 20 minutes. This looks like bear country, and I half expected to see a mom and cubs foraging through the snow, but no such luck. The top of Mt. Tateshina should shortly come into view as you approach the climb. The trail is very clearly marked and climbs straight up an old rain gully. If the weather is sunny then the trail should be relatively dry and easy, but I’m sure it becomes a river during a rain storm, so be careful. If you’re hiking before early May there’ll probably be a bit of lingering snow, so bring some light crampons for the decent. If it’s mid winter then you’ve got a tough climb and should consider approaching from the other side of the peak. Anyway, after about 2 hours or climbing, you’ll come to the summit boulders. It looks a lot like alpine territory up here, deplete of trees and lots of paint marks on the rocks. The trail curves around the right side of the summit, and you’ll see a mountain hut in front of you. The summit is off on a spur trail to the left. The entire peak is filled with huge rocks, so it’s a matter of scrambling across boulders once you’re up there. There’s a shrine in the center of the peak, as well as a lookout area behind that. If the weather is good then you’ll have an expansive view of Mt. Yatsu, Mt. Fuji, the Minami Alps, Kita Alps, the peaks of Chichibu-Tama-Kai National Park, and Mt. Asama. You can come back the way you came, or head over to the mountain hut, where you’ll find a connecting trail heading down the other side of the mountain. After about 20 minutes of steep decending, you’ll reach another hut called the Tateshina Sansō (蓼科山荘). This is a relatively nice hut, but was buried under a meter of snow when I went there. The trail splits in 3 from the hut, but you want to go left, taking the trail that leads away from the front door, toward nanagōme-ichinotorii(七合目ーの鳥居). The trail is easy to follow and goes through a lovely forest. After about an hour or so, you’ll come to the parking lot. I’m not sure if there’s bus service from here, but if you keep following the trail down, it will spit you out at the Shirakaba Int’l Ski Resort (白樺国際スキー場). In the winter, this is the best approach for the climb, as you can take the lift up and start your climb from there. This approach is much easier (and safer) than the initial approach described here.

When to go: This hike can be done year round if you’ve got an ice axe and crampons. If not, then shoot for a hike somewhere between April and early December. I’ve done this hike twice – once in May and once in early March.

Access: I’ve described 2 routes here. The first is accessible from Chino (茅野) station by bus….sort of. From Chino, take a bus bound for Kita Yatsugatake Ropeway (北八ヶ岳ロープウェイ) and get off at Alpaca Tateshina Kogen Iriguchi (アルピコ蓼科⾼原別荘⼊⼝). From there it’s a 1-hour walk on the paved Venus Line road to the trailhead. Click here for the schedule.  You could also hike over to Tateshina from the top of Kita Yatsugatake Ropeway in about 7 hours.

Digital Map in English (Avenza App): Click here

Live web cam: Click here

Level of difficulty: 2 out of 5 (elevation change: 890m)

Mt. Iwate (岩手山)

February 21, 2008

Last updated: Feb 6, 2025

Special note: Iwate is currently experiencing increased volcanic activity and is currently closed to hikers. Click here for more information. 

Mt. Iwate is a conically shaped active volcano, towering over Morioka city and offers one of the best panoramic views in the entire Tohoku area.

the view from Mt. Iwate

The hike: This is a long, long hike (about 21km round trip) so it’s imperative that you get an early start. Luckily there’s a incredible park near the trailhead at Kenmin no mori (県民の森). Officially camping is prohibited in the lush park but it’s much more inviting than the nearby campground, so just put up your tent behind the bushes or set up/break down at night. Anyway, the trailhead is NOT behind the park, so do not follow the dirt forest road toward Mt. Iwate or you’ll lose precious time like I did. Instead, walk down the hill a little to the right of the park (if facing the mountain) and walk up a paved road that leads to the trailhead. You should find it on your right-hand side after about 15 minutes or so. The maps in town are so confusing, so be careful. Anyway, this trail is called the nanataki course (七滝コース), and you’ll find the waterfall of the same name in about an hour. Now, this trail was officially closed to hikers in the summer of 2006 due to volcanic activity, but the trail is very clearly marked, so it looks like a lot of people ignore the signs and climb. After about 1-1/2 to 2 hours of hiking through the forest, the vegetation will start to thin out and you will find the first signs of volcanic activity. The ground will start to turn a lime green and you’ll notice a small, hot stream flowing down the mountain. Unfortunately the stream is too small to bath in, but you can soak your feet if you like. Follow this stream toward the right side and you’ll soon encounter steam vents puffing out volcanic gases. Make sure you stay on the trail and beware of loose rocks. Climbing is not much of a problem, but if you come back down this way be very careful on the decent. Anyway, as you climb higher, you’ll reach a junction where this trail meets the Matsukawa trail. You have two options. You can go right to take a ridge trail, or head left and follow a beautiful river. Take the left course and work your way toward the Mt. Iwate crater. The vegetation can be quite thick here, and if there’s any morning dew then you’ll get completely soaked from head to toe. After about 90 minutes of slogging, you’ll come to an emergency hut and a set of benches. This is at the base of the crater. Take a break and prepare yourself for the final ascent. If you’re running short of water then head down the trail away from the crater and there’s a second hut and water source there. The final climb is tough. You’ve just spent the last 4 or 5 hours climbing about 1400 vertical meters, and now the final 100m or so is on loose scree. For every step you take, you’ll lose about 2 or 3. Don’t give up yet though, because once you make it to the crater rim things become much easier. The high point is to your left, but consider walking all the way around the rim if the weather is good. The crater itself has stopped hissing and steaming, but the rock formations and gradation are wonderful. Take plenty of pictures and if you’re lucky, take in the panorama. On a clear day you can see Mt. Hayachine, Mt. Chokai, Gassan, Mt. Hachimantai, and Mt. Akita Koma ga Take. If you’re feeling exhausted, then you have two free emergency huts to choose from, as well as two alternate ways off the mountain. I went back exactly the way I came, because I left my huge backpack at the trailhead and carried only a small bum bag, water, and a camera on the hike.

When to go: This hike can be done from late April to early November, but the earlier you go, the more snow you’ll encounter. Because of the distance involved, summer is probably the best season because you’ll be blessed with plenty of daylight hours.

Access: There are only 2 trails accessible by public transport. If you’ve got a car, then you can consider approaching from the other, more popular side of the mountain. I hitchhiked from neighboring Mt. Hachimantai and ended up at Hachimantai Onsen (八幡平温泉郷). The Matsukawa trail from Matsukawa Onsen also looks promising. Both hot springs are accessible by bus from Morioka station. The most popular trail is called the Yakebashiri (焼走り) trail, reachable by taxi from Oobuke (大更) station near Morioka. Click here for the bus schedule to Matsukawa Onsen.

Map: Click here

Live web camera: Click here

Level of difficulty: 5 out of 5 (elevation change: ~1500m)

Mt. Adatara (安達太良山)

February 14, 2008

Last updated: Feb 17, 2025

Mt. Adatara is an active volcano located across the valley from Mt. Bandai and is just a stone’s throw from Fukushima city. Beautiful rock formations and a lovely hut to boot.

adatop

The hike: From the ski resort parking lot, head toward the right hand group of buildings and start walking up the far right ski slope. The trail will branch off to the right and follow the ski resort for a short time before reaching a forest road. The trail crosses the road several times before heading up to a ridge and flattening out somewhat. All of this should take about 45 minutes or so. Continue following the gentle trail for another 15 or 20 minutes until you come to a junction. If you head left you follow a different ridge, but instead continue straight ahead for another half hour and you’ll come to the Kurogane Hut (くろがね小屋)This hut is open all year round and is an amazing place to stay in the winter. Plus, it has a hot spring bath! If you’re only coming for a day trip then take a quick break at the hut before starting the real climb to the summit. From the hut, the trail starts climbing rather steeply through rugged volcanic tundra. It should take anywhere from 45 minutes to an hour to reach the summit. If the fog is in then keep an eye out for all of the paint marks on the rocks. Whiteout conditions in winter can be quite dangerous, so go with a group and bring bamboo poles to mark your path. The rocky summit offers spectacular views of the surrounding scenery: Mt. Bandai directly in front of you, Mt. Iide to the northeast, and Mt. Azuma, which is connected to this mountain by a long trail. (It could make for an interesting trek). Anyway, enjoy your lunch with hoards of other hikers who probably came up from the ski gondola on the other side of the mountain. If the weather is good and you’ve got time, you can hike to Mt. Tetsuzan, the true high point of the volcano, and there is a free emergency hut just beyond the summit of Tetsuzan. From the summit, follow the signs to Mt. Yakushi (薬師岳)and the ski resort. This side of the mountain is much easier (and more popular) than the route mentioned here, but makes for a nice look hike. You should reach the top of the ski resort in about 45 minutes from the top. If you’re too tired, then take the gondola down, but otherwise follow the path down back to the parking lot. In winter, you can glissade down the slopes in record time. This hike can also be done in reverse, and you could also use the gondola to cut out 400m of elevation gain.

When to go: This hike can be done year round, but be prepared for meters of snow in the winter (bring snowshoes or crampons). The fall colors in mid to late September bring the crowds.

Access: From Fukushima station, take a local JR train and get off at Nihonmatsu (二本松) station. From there take a bus to Adatara Kogen Ski Resort. Be sure to check the bus schedule (call 0243-23-0123 in Japanese), as some buses only go part of the way to Dake Onsen. It’s a quick 20 minute taxi ride or possible hitch from the Onsen, or you could shell out about 5000 yen for a taxi ride from Nihonmatsu all the way to the trailhead.  Click here for more information about the bus. In the summer of 2024, there was one bus a day to the trailhead, leaving from Nihonmatsu at 8:15am. Here is a flyer from last summer. The 2025 schedule hasn’t been released yet, so contact the bus company directly to inquire.

Map: Click here

Level of difficulty: 2 out of 5 (elevation change: 760m)

Mt. Kaimon (開聞岳)

February 12, 2008

Mt. Kaimon is a perfectly conical dormant volcano rising straight from the sea on the southern point of Kagoshima prefecture, and features a unique trail devoid of a single switchback.

The summit of Mt. Kaimon

The hike: From the trailhead, follow the trail straight through a somewhat dense forest. The trail is well trodden and there’s only one way to the top, so it’s pretty difficult to get lost. You should reach the 5th stage (五合目) in about 30 to 45 minutes. From here the fun begins, as the trail follows the contour of the mountain in a full circle, without ever doing any switchbacks. There’s no other trail like it in Japan. You will have wonderful views of the surrounding coastline and the crystal clear waters. The trail is quite rocky, so make sure to wear a sturdy pair of shoes. Continue winding your way around the mountain for about 90 mintues or so until the exposed, rocky summit comes into view. In wet weather this final section can be very slippery, so take care. Once on the top, enjoy the amazing panoramic view. On a clear day you can see all the way to Yakushima! After a well deserved break, head back the way you came, and watch out for the crowds if you got an early start.

When to go: You can pretty much do this hike all year round, although it may be a little icy on top during the winter, so bring a light pair of crampons just in case.

Access: From Kagoshima station, take either a local or kaisoku train on the JR line to Yamakawa (山川)station. From there you can transfer to the IbusukiMakurazaki Line (指宿枕崎線) to Kaimon Station (開門駅). Be warned that trains are NOT frequent, so it might be better to either fork out 3000 yen for the 20 minute taxi ride or try your luck hitching. If you’re taking the train, the trailhead is a 30 minute walk due south of the station (just walk toward the towering peak in front of you).

Level of difficulty: 2 out of 5 (elevation change: 764m)

This slideshow requires JavaScript.


Mt. Takazuma (高妻山)

February 10, 2008

Mt. Takazuma, the tallest peak in the Togakushi (戸隠) range, offers amazing views of Mt. Myoko and the Northern Alps. It’s also one of the only peaks in Japan where cattle can be seen grazing in the foothills.

summit of Mt. Takazuma

The hike:
From the bus stop, walk past the campground and through the cow pasture. The trail follows a small mountain stream and then climbs steeply up to the mountain ridge, where you will find an emergency hut in fairly good condition. It should take about 1-1/2 to 2 hours to reach this hut. From there, turn right and head toward Mt. Gojizo (五地蔵岳). The pyramid-shaped peak of Takazuma will come into view on your left. Follow the trail for about 40 minutes until you reach 八丁ダルミ。There is a lot of up and down before reaching this point. Takazuma will be directly in front of you, and it’s a steep, relentless climb for about an hour, but you’ll be rewarded with outstanding views. Bring a lunch and your camera. The top is very rocky but there are lots of places to sit and enjoy the scenery before going back the way you came. The entire hike should take between 6 and 8 hours.

When to go: I went in May and there was still lots of snow, so bring an ice axe and crampons. All of the snow usually melts by late June, and the fall colors are also beautiful. The first snow usually comes in early November.

Access: Take a Togakushi bound bus from Nagano station and get off at Togokushikyampujo (戸隠キャンプ場)The bus takes about an hour and the first one leaves Nagano at 7:00AM. (Nicely timed for the night buses from Osaka and Tokyo) Click here for the bus schedule.

Map: Click here

Level of difficulty: 4 out of 5 (elevation change: 1183m)

This slideshow requires JavaScript.