Posted tagged ‘hiking’

Mt. Arashima (荒島岳)

March 13, 2008

Last updated: Feb. 3, 2025

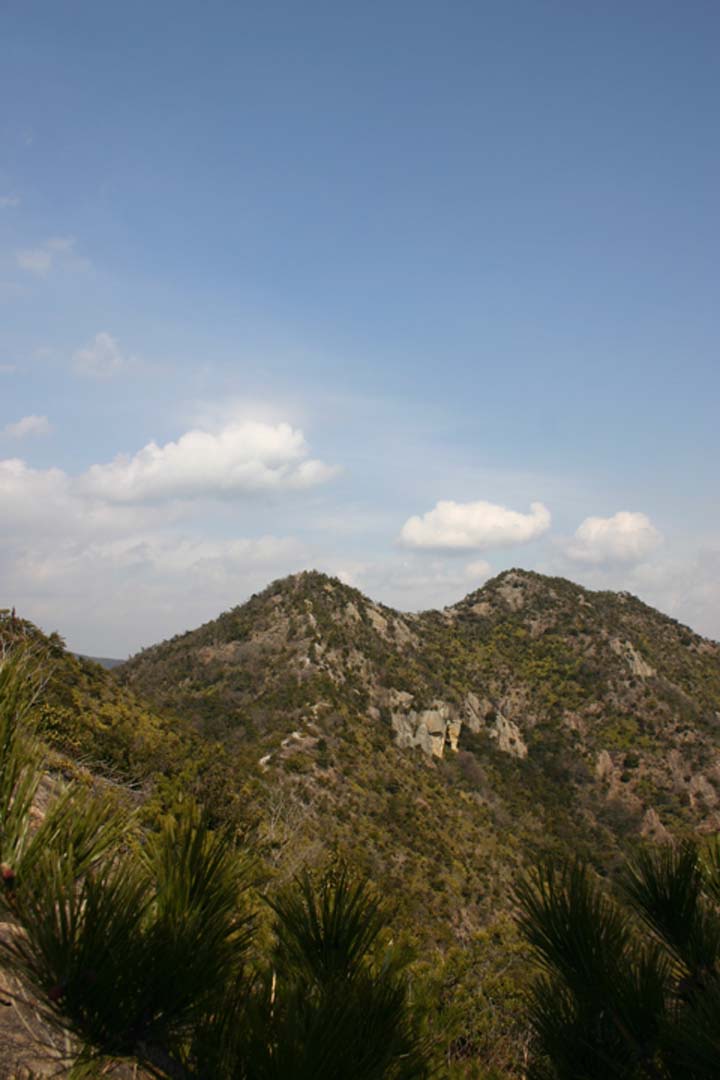
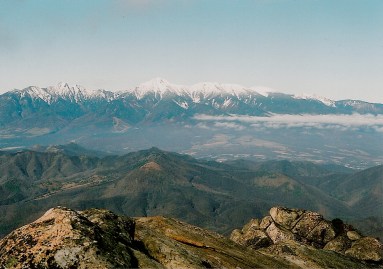
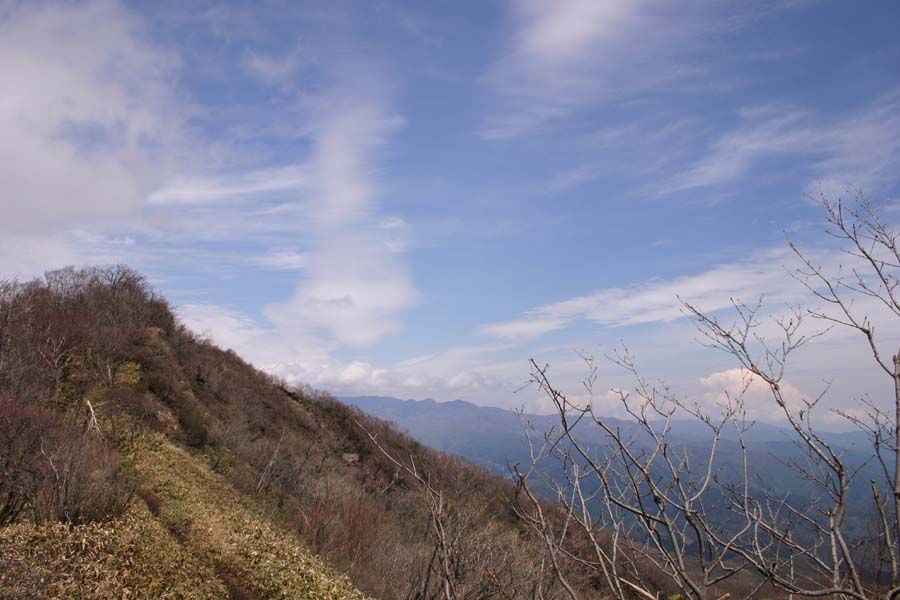
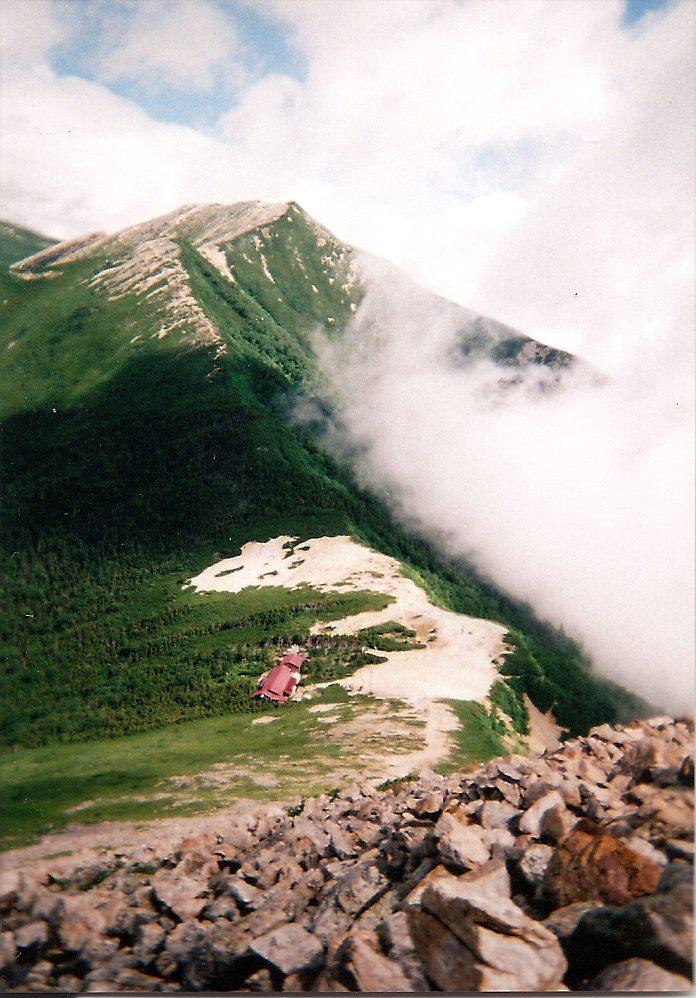
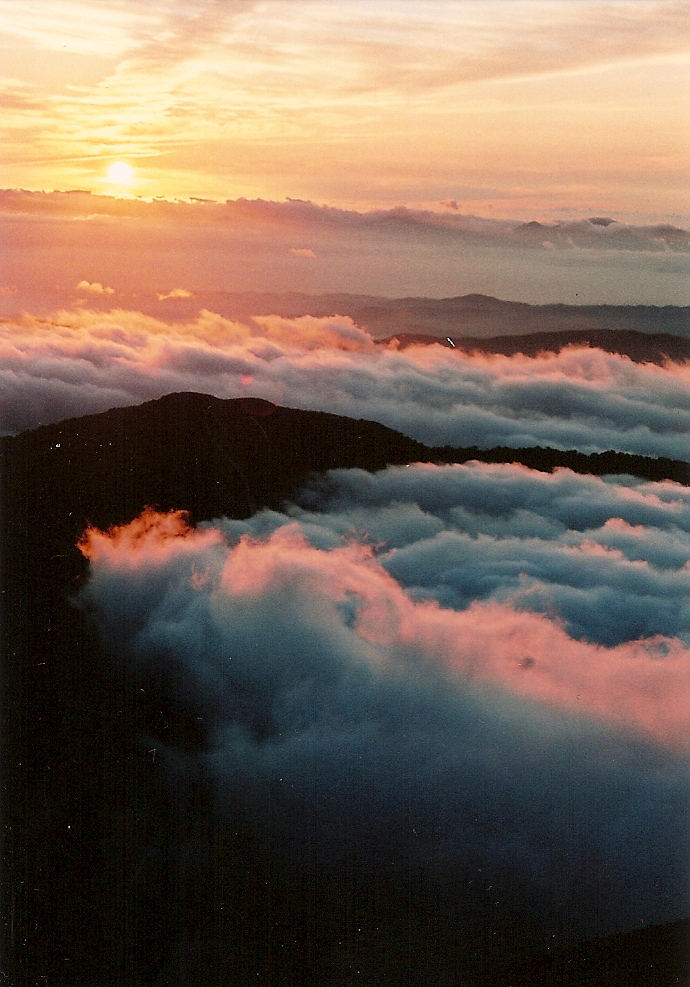
Mt. Arashima is a beautiful peak towering over Ono city in Fukui Prefecture. The summit yields glorious panoramic views of Hakusan, the Japan Alps, and the peaks of the northern Kansai region.

Mt. Arashima

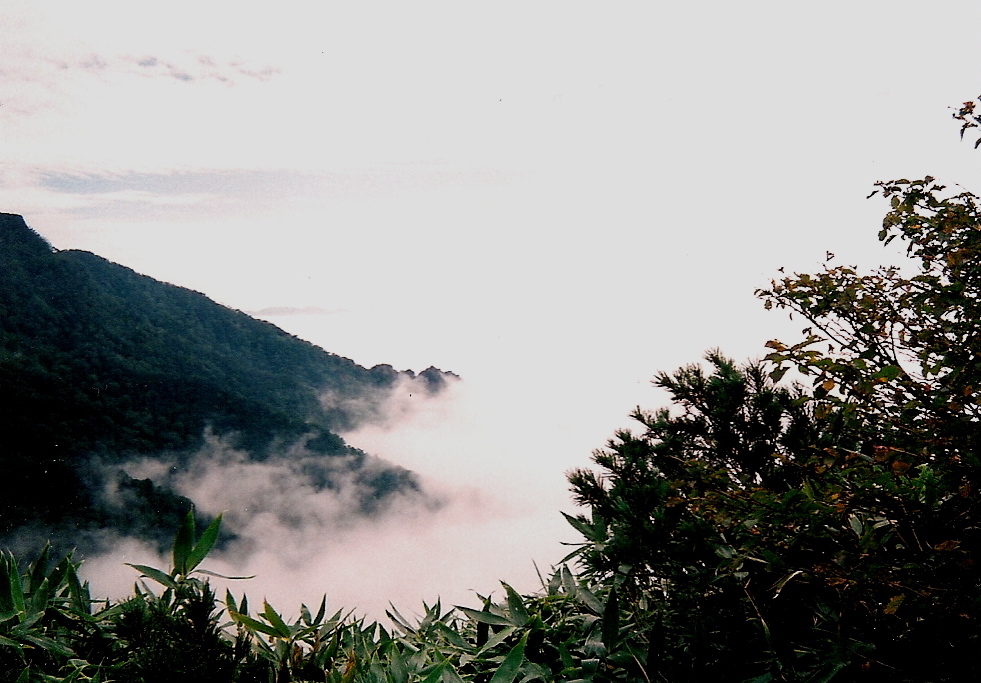
The hike: Exit the train station and turn left on the road just in front of you. Walk for about 20 minutes until reaching the parking lot of Kadohara Ski Resort (勝原スキー場). There’s no water on this hike, so make sure you fill up before setting off. The trail runs straight through the ski fields and then curves to the right just past the top of the first lift. After about 40 minutes or so, you’ll reach the top of the ski resort, and the trail will enter the forest. The forest is beautiful, covered with virgin Beech trees which turn yellow in the autumn. The path is well marked but is anything but flat. It’ll take around an hour & a half of relentless climbing to reach Shakunage-daira (シャクナゲ平), which is known in English as “rhododendron plateau”. Have some fun teaching the Japanese hikers how to pronounce the English for this plant during your ascent. Anyway, the trail splits in 3 different directions. If you take the trail to the right, you can climb to the top of Mt. Ko-Arashima (小荒島岳), which has breathtaking views out to the real Mt. Arashima. If you’re short of time or just can’t be bothered, then ignore this trail and hang a left toward the towering peak. It should take around an hour or so to reach the flat summit and if the weather is good then you’ll be rewarded with spectacular views of Hakusan. After taking a well-deserved break, head back the way you came and consider hitchhiking back to Fukui or just wait for the infrequent train to come.

When to go: This hike can be done year round if you’ve got the proper equipment (and experience) for winter hiking. Otherwise, aim to go between April and November. Click here for a recent winter mountaineering report. It’s a tough winter hike and experience is required.

Access: From Osaka or Kyoto stations, take a JR Limited Express “Thunderbird” train bound for Tsuruga and change for the Hokuriku Shinkansen to Fukui station. From there, change to the JR Etsumihoku Line (越美北線) and get off at Kadohara station (勝原駅). The train takes about an hour and is very infrequent. Aim to board an early morning train so you won’t run out of daylight on the hike.

Digital Map (Avenza App): Click here

Level of difficulty: 4 out of 5 (elevation change 1263m)

Harima Alps (播磨アルプス)

March 11, 2008

The Harima Alps are a series of small rock formations on the border of Himeji and Kakogawa cities in Hyogo Prefecture. While not very Alpine in nature, the hike does feature some really nice species of native pine trees, wild boar, desert-like vegetation, and not a single cedar tree!

Harima alps

The hike: Head through the ticket gate at Sone station and turn right. Follow the road to the next intersection and turn left. Walk a few blocks, passing a small lake on the right, and you’ll come to a rather busy road. This is called Highway 2. Turn right and walk along highway 2 for about 1km or so. You’ll pass a couple of convenience stores on the right-hand side, so stock up on supplies (there’s no water on the hike). The mountains on your left side are the “Alps” and that’s what you’ll be traversing for the next 5 hours or so. Keep walking along highway 2 until coming to a small shrine on the left-hand side. The trail is directly behind this shrine. The path climbs steeply through a dense forest. Be on the lookout for wild boar in this area. A golf driving range will come into view on your right. Keep climbing up to the ridge line. You’ll know you hit the ridge when you find a gigantic electric tower standing right in the middle of the trail. This is a good place for a short break. The path continues straight ahead (ignore both of the trails branching off to the left and right). Basically, you’ll want to follow the contours of the ridge and the signs to Mt. Takamikura (高御位山). It should take an hour or so to reach the shrine and splendid rock formations here. If it’s a clear day without too much smog, you’ll be able to see Kobe & Osaka cities, Akashi Bridge, Himeji, Osaka bay, Awaji Island, and the peaks of northern Hyogo Pref. If you look straight down you’ll see a lot of small lakes used to irrigate the surrounding fields. There are a ton of escape routes to choose from, but your main goal should be to make it back to Sone station by traversing all of the peaks between this mountain and the station! The next peak along the ridge is called Takanosu (鷹ノ巣山). Ignore all of the small trails branching off the ridge. As long as you follow the signs you’ll be ok. Mt. Takanosu is actually 2 twin peaks, and both of them should be reached in about 45 min. or so. From here, the next target is an unnamed peak with a large microwave antenna on top (it looks like a billboard). Between here and the unnamed peak, you’ll probably hear some gunfire down in the valley. If you look down over the right side of the ridge, you’ll see a very large shooting range! Anyway, head up to the antenna. There’s a very promising looking trail heading off to the right, but stay to the left and head down a very steep rock formation. At the bottom of this rock, you’ll find a concrete bunker and a vast network of trails branching off in all directions. You’ll also find a sign leading to Kashima Shrine (鹿嶋神社). Feel free to descend to the shrine to have a look around, but you’ll have to climb back up to the ridge to complete the traverse. Continue on the same ridge line, and climb the steep mountain in front of you. This peak is called Ootani (大谷山). Keep going to the next small peak, where you’ll find a huge cave in the middle of the trail! This is the site of an ancient burial mound currently under excavation. From this hole, continue going straight and you’ll drop off the mountain very steeply and end up back in civilization. When you hit a small road, turn left and you’ll be back at highway 2. Turn left on highway 2 and cross over the overhead pedestrian bridge. Turn right at the next big street. This is the same street you took to get to highway 2 at the start of the hike. Turn right at the next intersection and you’ll be back at Sone station. This hike can be done in reverse but the trailhead is very difficult to find!

When to go: This hike can be done year round, but there’s a lot of climbing and descending on steep rock formations, so avoid this hike in wet weather.

Access: From either Osaka, Kyoto, or Sannomiya stations, take the JR Shikaisoku (新快速) train bound for Himeji (姫路). Get off at Kakogawa station (加古川) and change to a local train bound for Himeji. The stop closest to the trailhead is called Sone (曽根駅).

Level of difficulty: 2 out of 5 (elevation change 200m)

Mt. Mizugaki (瑞牆山)

March 11, 2008

Last updated: Feb 20, 2025

Mt. Mizugaki wins the auspicious distinction of having the most difficult kanji of all the Hyakumeizan. The peak features unique rock formations and superb views of the surrounding mountainous landscape.

Mt. Mizugaki

The hike: From the bus stop, head into the forest across from the hut. The trail is very clearly marked and well trodden. After climbing for about 45 minutes or so, you’ll reach a hut and junction. This hut is called Fujimidairakoya (富士見平小屋). There’s a water source just below the hut (you should have seen it on your way up to the hut). Fill up here because there’s no water on Mt. Mizugaki. Take the trail running to the left of the hut. The signs should be marked in Hiragana (みずがき) because very few Japanese people can even read the kanji for Mizugaki. The trail initally loses altitude before coming to a small ravine. You’ll see the rock formations directly in front of you. Take a break at this flat spot, because it’s your last chance to rest. From here to the top of Mt. Mizugaki, the trail climbs rather steeply straight up the mountain. There aren’t too many switchbacks on this hamstring workout of a hike. Just look for the paint marks & colored tape hanging on the trees. It should take an hour or so to reach the summit plateau. I climbed in late November and there was some ice up here, so be careful. Anyway, the views from the top are phenomenal. You see Mt. Kinpu directly in front of you, followed by Mt. Fuji, the entire Minami Alps, and Yatsu-ga-take. There’ s trail junction somewhere on the peak leading to Kuromori (黒森), but it’s better to retrace your steps to Fujimi hut. You have several options once you return. Head back down the mountain, camp here, or continue to traverse over to neighboring Mt. Kinpu. Both can be done in one day if you get an early start. I did a 3-day trek climbing Mt. Mizugaki, Mt. Kinpu and Mt. Kobushi all in one go. I highly recommend it.

When to go: This hike can be done year round, but watch out for ice & snow in the winter.

Access: From Nirasaki station (韮崎駅), take a bus bound for Masutomi Hot Spring (増富温泉). From there, change to a bus bound for Mizugakisansou (瑞牆山荘) and get off at the last stop. There may be a direct bus to the trailhead, depending on the season. Please check at Nirasaki station. Click here for the schedule.  Alternatively, you can take a taxi directly to the trailhead, but it’ll run you about 9000 yen or so.

Level of difficulty: 3 out of 5 (elevation change 720m)

Mt. Kai-Komagatake (甲斐駒ヶ岳)

March 8, 2008

This blog post was written back in 2008. For the latest information about this hike (including color photos and maps), please consider purchasing my guidebook to the Japan Alps. 

Mt. Kai-komagatake is a glorious ‘horse shaped’ peak located across the valley from Japan’s 2nd highest peak, Kitadake. The views are wonderful when the weather is good and the sandstone rock formations are intriguing.

Mt. Kai-komagatake

The hike: From the bus stop, take the trail that starts to the right of the mountain hut Choueisou (長衛荘). The path zig-zags through a forest for the first hour or so, flattening out a little once you hit the ridge line. You’ll see the rocky peak stretching out in front of you. It looks so far away but just take it one step at a time. In another hour, you’ll reach Komatsumine (駒津峰). The trail splits, but take the left fork (it should be obvious because the right fork goes down off the mountain). Slog on for another 20 to 30 minutes and you’ll see yet another junction. You have 2 options – the ‘expert’ course lying straight ahead or the ‘beginner’ course branching off to the right. Both trails lead to the top. I decided to climb the ‘expert’ and descend via the ‘beginner’. The ‘expert’ course is rocky and kind of steep, but not as bad as I thought it was going to be. In any case, it’s a much shorter course, but takes about the same time as the ‘beginner’ because of all the climbing involved. The top of the peak is rocky and exposed: not a place you want to be in a thunderstorm. If the weather is good you’ll have a breathtaking view of the rest of the Minami Alps, and Mt. Fuji rising to the left of Kitadake. Yatsu-ga-dake will be behind you, and the Chuo & Kita Alps to the north. Head down the beginner path and soon you’ll be back at Komatsumine. From here you have 2 options. You can either go back the way you came, or take the left fork to Sensui-toge (仙水峠). From this mountain pass, turn right and you’ll soon come across a mountain hut and campground. Another 20 minutes down the path and you’ll find yet another hut and the road back to Kitazawa-toge.

When to go: This hike can be done anytime the road to Kitazawa-toge is open. I’m not sure of the exact dates, but probably from Golden Week to early November. If you want to try an alternative approach, you can try a winter ascent via Kuroto ridge just like these people did on New Year’s Day! You’ll need winter climbing experience and the right equipment though.

Access: From Kofu station (甲府駅), take a bus bound for Hirogawara (広河原). From there, change to a bus bound for Kitazawa-toge (北沢峠) and get off at the last stop. Click here for the bus schedule (in Japanese).

Live web cam: Click here

Level of difficulty: 4 out of 5 (elevation change 987m)

Mt. Azuma (吾妻山)

March 6, 2008

Last updated: Feb 17, 2025

Mt. Azuma is a magnificent volcano , with its own baby version of Mt. Fuji and plenty of wildflowers. Although Nishi-Azuma is the official high point for Hyakumeizan climbers, a full traverse from east to west is the best way to appreciate the beauty of the place.

Mt. Azuma

The hike: From the huge parking lot, you’ve got 2 options. You can either climb Mt. Fuji’s baby brother Azuma-kofuji (吾妻小富士) or head for Mt. Issaikyo (一切経山). The ascent and circling of the crater rim of baby Fuji should take about an hour or so. The trail up to Mt. Issaikyo is well tracked and easy to follow. Just find the trail between the visitor’s center and the rest house (or follow the crowds). Oh, and pick up a free map at the visitor’s center before venturing out. There are a vast network of trails, so if you’re just doing a day hike in this area and not a full traverse, you’ve got tons of great options. It should take about an hour of moderate climbing to reach the high point of Issaikyo. Along the way, the views toward baby Fuji are splendid, but make sure you frame your photos to cover up the huge parking lot. Upon reaching the top, you’ll notice a beautifully colored emerald volcanic lake on the other side. This lake is called Goshikinuma (五色沼) and it should take about 20 minutes of steep descending to reach the shoreline. If the top of Issaikyo is crowded, then consider traversing down here for a quieter respite. Continue past the lake and climb up towards the other side. The trail will split, but go left for a short climb to the top of Mt. Iegata (家形山). From there you’ll basically follow the ridgeline all the way to Nishi-Azuma (西吾妻山). The first hour or so to Mt. Eboshi (烏帽子山) is fairly easy-going, but then you’ll have a steep drop and a short climb to the top of Mt. Shougen (昭元山). After this peak, it’s a series of never-ending rolling hills. You can go for miles and miles, and that’s just what you’ll need to do to reach the western part of Azuma. There’s an escape route, however, a short distance from Shougen. A trail will join the main trail on the left. This is your last chance to get back to Jododaira, and it would make for an interesting 2-day loop. Higashidaiten (東大巓), a rock formation, is the next landmark you’ll come to . A short distance later, a trail will branch off to the right, taking you to a nice emergency hut called Meigetsusou (明月荘). This hut is free and has plenty of water, but you need your own food and sleeping bag. Consider staying here if you’re tired, the weather is bad, or it’s getting late. Before making the decision, bear in mind that you’ve got 3-1/2 to 4 hours of gentle hiking until reaching Nishi-Azuma. I did the entire traverse in one day, but I got an early start and the weather was stunning. Anyway, as I said before, the trail is really easy and it passes some beautiful marshland with wonderful views out to neighboring Mt. Bandai. You’ll reach Nakadaiten (中大巓), where the crowds will become noticeably larger. This is due to the nearby ski lift, operating all year round and bringing lazy tourists to this mountain. After leaving Nakadaiten, the trail drops via wooden stairs to a flat point and water source. This is your last chance to get water, so if you’re staying at the emergency hut at Nishi-Azuma then fill up generously. It’ll take about an hour of climbing before reaching the true high point of the Azuma range. You’ll be quite disappointed, because there’s absolutely no view from the top! Never fear, because after a short descent you’ll come to a wonderful unmanned mountain hut where you can stay all year round. If you’ve got time, then hike out to Nishidaiten (西大巓) because this is where the true views are. Mt. Bandai will be directly in front of you, and on a clear day you’ll also see Mt. Iide and Mt. Asahi. Retrace your steps back to the hut, and take the trail leading away toward Wakamedaira (若女平). You should reach this flat spot after an hour of steep descending. This trail is one of the main trails used in winter climbing of the mountain, so look for the trail markers high in the trees. If the trail is wet, you’ll be slipping and sliding all over the rocky course. The trail keeps going down, down, down, until popping out on a paved road near the ski lift. Follow the road downhill to Shirabu Hot Spring (白布温泉). Enjoy a well-deserved soak in town and check the schedule for the bus to Yonezawa station (米沢駅).

Here is some extra information in Japanese about the full traverse. 

When to go: This hike can be done from late April to early November, when the road to Jododaira is open. If you’re going to climb Nishi-Azuma only, then you can climb in the winter by using the ski lifts at Tendengai Kogen Ski Resort (天元台高原スキー場).

Access: From Fukushima station (福島駅), either take a taxi or rent a car to get to Jododaira. There used to be a bus to Jododaira but it was discontinued in 2022 due to COVID-19 effects. The only way to get there now by public transport is by bus tour

Level of difficulty: 2 out of 5 (elevation change ~400m)

Mt. Sobo (祖母山)

March 5, 2008

Last updated: March 3, 2025

Mt. Sobo translates as “grandmother mountain”, but it’s no walk in the park with an 1100m vertical ascent and an annoyingly large number of horseflies. The views are worth the work, though.

Mt. Sobo

The hike: From the bus stop, head up the forest road on your left. The first 3km or so is easy going, but you’ll soon find the trail proper and climb up, up, and up. There’s an unmanned hut at the 5th stage-point (五合目), which is a good place to fill up on water and take a break. If you’re hiking in summer, then this may be your last chance for a break, as the next section of the hike I’ve nicknamed ‘horsefly ridge’. The climb is not only steep, but if you stop to catch your break for more than a second, then you’ll be surrounded by hoards of horseflies! Once you hit Kunimitōge (国観峠) though, the pesky creatures will have vanished and you can take a much needed respite. There used to be some sort of hut here a long time ago, and the area is perfect for camping (except for the lack of water). If you’re keen to camp here, then drop off your stuff and head up to the hut to fill up on water. Otherwise, continue climbing up toward the peak. The aforementioned hut will come into view in around a half hour or so, and it’s a nice place to stay if you can forget about the musty smelling carpet. The trail to the peak of Mt. Sobo is directly in front of the hut, and it should take around 10 minutes or so to reach the bald, rocky top. The views toward Mt. Aso and Mt. Kuju are fantastic. Take the necessary photos, pat yourself on the back for a job well done, and head back to the hut. If you’re staying for the night, relax and write in the hut logbook. If you haven’t had enough punishment, then take the trail branching off to the left toward Miyahara (宮原). The trail loses altitude rather quickly, and flattens out once you come to Uma-no-kata (馬の肩). In another 15 minutes or so, you’ll come to a trail junction. My map had this marked as a campground, but there’s only room for one tent and no water source. However, it didn’t stop me from setting up camp to escape an oncoming thunderstorm! At this junction, take the trail going right toward Obira (尾平). It should take about 90 minutes to reach the flat area of the trailhead, and you’ll cross a beautiful river with crystal clear water. There’s a shared taxi (reservation only) from Obira to Ogata station (緒方駅) and onward to Oita station.

When to go: This hike can be done year round, but you’re in for a heck of a climb in the winter, so plan accordingly. The Azalia flowers bloom in early May, making this a popular destination during Golden Week. Beware of horseflies in the summer.

Access: From Oita station (大分駅), take a local train on the JR Hohi Line (豊肥本線) and get off at Bunko-Taketa station (豊後竹田駅). The train takes about an hour & 20 minutes. A limited express train, while costing more, will get you there in about an hour. From there, take a bus (reservation only) bound for Kamihara (神原).  A taxi will run you about 5750 yen. From Obira, you can take a taxi to Ogata station and onward to Oita station. Click here for more information about the taxi.

Digital Map in English (Avenza App): Click here

Level of difficulty: 3 out of 5 (elevation change ~1100m)

Mt. Akagi (赤城山)

March 4, 2008

Mt. Akagi is a gentle, docile peak surrounding a scenic lake. Its easy access from Tokyo brings the car-driving crowds in the summer.

Mt. Akagi

The hike: From the bus stop, check the bus timetable so you can plan your hiking times accordingly. Follow the road downhill toward the lake. You’ll pass a campground on the left, and the trailhead will appear quickly on the right side. The trailhead will be marked Komagadaketozanguchi (駒ヶ岳登山口). The path is well-maintained and you’ll spend the first 20 minutes or so climbing iron stairs. Eventually the trail will flatten out as it reaches the ridgeline, and you’ll be sitting on top of Komagadake in next to no time (about an hour from the bus stop). The views toward Lake Ono (大沼) are beautiful, and the summit of Mt. Akagi will be right in front of you. Continue on the same trail, dropping down to a saddle, where the real climb begins. It should take another45 minutes of sweating before reaching the summit plateau. You’ll first come to a stone marker on the right side, with a trail branching off to Hanami-ga-hara (花見ヶ原). Ignore this trail and head to the high point of Mt. Kurobi (黒檜山). Along the way, you’ll find another trail branching off to the left. This is your return trail to the lake, but for now ignore it and go to the top. The views toward the Nikko mountains are fantastic, and you’ll see the peaks of Oze as well and Mt. Fuji if the weather is clear. After a well deserved lunch break, retrace your steps to the junction and turn right. This trail descends very steeply, with big drops off the left side of the ridge. You definitely don’t want to fall here, and a hiking stick will save your knees. It should take about an hour to reach the lake shore. After reaching the lake, turn left and hike along the road for 20 minutes or so and you’ll reach the Visitor’s Center where you started. It’s perfectly feasible to do this hike in reverse, especially for people who’ve got bad knees.

When to go: This hike can be done year round, but bring some crampons and an ice axe for a winter ascent. Please note that there are no buses in winter.

Access: From Ueno station in Tokyo, take either a limited express train or local train and get off at Maebashi station (前橋駅). The local train takes about 2 hours, with a change of trains at Takasaki (高崎駅), , while the limited express train will save you about a half an hour, with a change of trains at Shinmaebashi (新前橋駅). The cost difference is 1890 yen versus 3700 yen, so take your pick according to budget. From Maebashi station, take a bus bound for Mt. Akagi Visitor’s Center (赤城山ビジターセンター) and get off at the Visitor’s Center. You might have to change buses at Fujimi-onsen (富士見温泉) depending on the season. The bus takes around an hour, but if you’re short of time a taxi will get you there in about 45 minutes, but will set you back about 8000 yen or so. Click here for the bus schedule.

Level of difficulty: 2 out of 5 (elevation change 468m)

Mt. Jonen (常念岳)

March 3, 2008

This blog post was written back in 2008. For the latest information about this hike (including color photos and maps), please consider purchasing my guidebook to the Japan Alps. 

Mt. Jonen is a wonderful alpine peak located just across the valley from Hotaka mountain range and Kamikochi. Sunrise and sunset are magical.

Mt. Jonen

The hike: From the parking lot, walk 4 km on a heavily damaged forest road until reaching the trailhead at Hiedaira (ヒエ平). The road was completely washed out in flooding a few years ago, and if they’ve re-opened it then you can save 8km of easy round-trip hiking. The trail starts off quite flat, following the Ichinosawa (一ノ沢) river upstream to its source. You’ll cross a few tributaries coming off the right side before the real climb begins. It should take about 3 or 3-1/2 hours of hiking along the river before reaching the final steep climb to the ridge line. You’ll know you’ve reached the point when the trail crosses a tributary and starts switching back quite rapidly. Make sure you fill your water bottle at the stream. It should take about an hour of steep climbing before reaching the ridge. Ther’ll be a massive hut greeting you, with the trail to the top of Mt. Jonen branching off to the left. The hut is called Jonengoya (常念小屋) and it’s a good place for a snack break. There’s a descent sized campground here, as well as some toilets. The views toward Mt. Yari and Hotaka are stunning. From the hut, the trail zigzags for about an hour before reaching the summit. The views are incredible if the weather is clear. For some reason, the fog seems to come in very quickly on this shy peak. There are 2 trails branching off from the top, but head back to the hut unless you’d like to traverse onward to Kamikochi. You can either head back down the way you came, stay at the hut, or continue on the ridge line to either Mt. Tsubakuro or Mt. Yari. The extensive network of ridge trails make for an interesting couple of days exploring the beauty of the Kita Alps.

When to go: This hike is popular from Golden Week to early November. Although not impossible, a winter hike requires experience and equipment, but neighboring Mt. Tsubakuro (燕岳) is popular for winter climbing, so a ridge traverse is quite feasible.

Access: While there are a number of approaches to this peak (including from Kamikochi), the hike described here is only accessible by car or taxi, and the forest road may still be closed to vehicular traffic. The nearest station is Toyoshina (豊科駅), on the JR Ooito Line (大糸線) conecting Matsumoto to Hakuba stations. The forest road to the trailhead at Hiedaira (ヒエ平) was closed at the time of writing, which means you’ve got an extra 4km of hiking from the parking lot to the trailhead, so get an early start.

Level of difficulty: 4 out of 5 (elevation change ~1500m)

Mt. Hotaka (武尊山)

February 29, 2008

Not to be confused with Hotaka-dake in the Japan Alps, Mt. Hotaka is a scenic peak with stunning views of all the mountains in Gunma Prefecture, even out to Mt. Fuji.

Mt. Hotaka

The hike: The trailhead starts at Hotakajinja (武尊神社), which is at the end of the paved forest road, about 2km from the Houdaigi campground (宝台樹キャンプ場). At first, the trail is just a continuation of the forest road, with “Beware of Bear” signs everywhere. Although I didn’t see any of those nocturnal creatures, I did spot a Japanese mountain goat (Kamoshika). After about 40 minutes of hiking, you’ll come to the end of the forest road, and are faced with 2 options. It’s a loop trail, so take your pick, but I must warn you that the trail to the left has a section with chains and ladders, which are a lot easier to climb than descend. Take the trail to the left, and you’ll come to an emergency “hut” and water source after about an hour of steep climbing. The hut is is nothing more than a huge corrogated metal pipe cut in half with a door attached. It’s not a very attractive place to stay, unless you’re dodging a typhoon! There’s a small stream near the hut where you can fill up your water bottle (you should filter the water just in case). The hut is hidden and off to the left of the main trail. After passing the hut, you’ve got a tough, steep climb with a section of chains and ladders. Be careful if it’s wet, and take it slow. It’s not as bad as some of the stuff I’ve encountered in the Japan Alps, but careless and a broken bone on any mountain is no fun. After you pass this short section, it’s easygoing to the top. Once on the summit, take a lunch break and enjoy the views. The trail splits in 3. You’ve got some options, but the most enticing is to head to the spear-like peak of Kengamine (剣ケ峰山). It’s an hour of up and down traversing before reaching a junction. Take the trail on the right to head down the mountain, but before you do that, climb the rocks in front of you to the top of Kengamine. The views of Mt. Fuji on a clear day are wonderful, and you’ll also have a panoramic view back to Hotaka, Mt. Tanigawa, Mt. Makihata, Mt. Shibutsu, Mt. Sukai, the peaks of Nikko and beyond. After taking some photos, retrace your steps back to the junction and head down off the mountain. You’ll be back at the forest road in about 90 minutes, passing a water source along the way. If you’ve got time, then head to Takaragawa-onsen (宝川温泉) before heading back into town.

When to go: This mountain gets meters and meters of snow in the winter, but the road to the bus stop is open all year round, so if you’ve got the right equipment (and experience), then go for it. Otherwise, aim to go between April and November.

Access: From Minakami station (水上駅), take a bus bound for Takaragawa-onsen (宝川温泉) and get off at Hotakakyou (武尊橋). From there, it’s a 2-hour walk on a paved road to the trailhead, although you should try to hitch. I got a ride with a guy on his way to work at the campground noodle shop. According to the campground web site, there’s a direct shuttle bus from Minakami station in the summer. Check the site here in Japanese for more information.

Level of difficulty: 4 out of 5 (elevation change 1118m)

Mt. Asahi (朝日岳)

February 28, 2008

Last updated: Feb 17, 2025

Mt. Asahi, in Yamagata Prefecture, is one of the most inaccessible peaks in Japan, and one of the most breathtakingly beautiful.

Mt. Asahi- Yamagata Pref.

The hike: From the hut at Koderakousen, take the trail heading towards Mt. Kodera (小寺山). The trail wastes no time in gaining elevation, and you’ll be happy for the abundance of fresh water if hiking in the summer. After about 2 hours of climbing, a trail will come in from the right. This leads to Hananukimine (ハナヌキ峰). Ignore this trail and keep climbing on the well maintained path. After another 30 minutes you’ll reach the top of Mt. Kodera. The views will start to open up, but the best is yet to come. Continue for another half hour or so toward Mt. Ko-asahi (小朝日岳). Just before the steep climb to the top, there’s a spur trail off to the right. Take this if you’re feeling lazy, but otherwise head to the top for a sweet view of Mt. Asahi stretching out in front of you. On the peak, the trail from Asahikousen joins this trail, so the number of people should increase somewhat. From here to Mt. Asahi, there’s only one trail and it’s well maintained. Drop steeply off the top of Mt. Ko-asahi, being careful not to slip and fall. After descending to the saddle, the ‘lazy’ spur trail I mentioned earlier will come in on the right. Continue climbing up and up for another 90 minutes or so, enjoying the multitude of alpine flowers along the way. Eventually, you’ll reach Dai-asahikoya (大朝日小屋). This is your home for the rest of the day, as watching the sunrise from “Sunrise Peak” is one of the main reasons for doing this hike. You can camp outside the hut, or stay for the measly sum of 1200 yen. The hut has no food or futons, so bring your own cooking gear and sleeping bag. There’s a water source a short distance away on a side trail. Wander up to the main peak if the weather’s good to watch the sunset. The next morning, wake up early so you don’t miss the action. In the summer, you need to be out of the hut around 3:45am if you want to get a good spot for the sunrise. It’s only a 10-minute hike from the hut to the top, so pack up your gear and take it with you. The sunrise, if the weather is good, will definitely alter your sense of Japanese beauty. The sun comes up behind Mt. Zao, and illuminates the ridge lines of Mt. Iide, Gas-san, Mt. Chokai, Mt. Bandai, and hundreds of other nameless peaks. No utility poles and no concrete anywhere to spoil the view. After taking in the scenery, follow the trail heading to the left, towards Asahikousen (朝日鉱泉). The trail drops quite steeply for the first hour or so, and then enters a beautiful virgin forest, eventually flattening out to follow an amazing river with crystal clear water. Follow the river for about 2 hours or so, and you’ll end up at the Asahikousen, one of the best mountain huts in Japan. Keep your eye out for Japanese mountain goats (Kamoshika), as there are a lot in this area. The owner of the hut is really friendly and makes one of the best bowls of soba in Japan, teeming with fresh organic mushrooms. Oh, and use the hot spring bath while your noodles are being prepared.

When to go: This mountain is completely inaccessible in the winter due to its remote location and the obscene amount of snow it gets. The roads usually open up again in late April, so go between then and early November, but for a snow-free experience, wait until July to complete the hike.

Access: From Yamagata station, take a local train on the JR “Fruits Line Aterazawa” line and get off at Aterazawa (左沢駅), the last stop. Trains are very infrequent, so check the schedule in advance. From the station, take a bus to Asahikousen(朝日鉱泉). The bus only runs from July 23-August 14, leaving Aterazawa station at 1:00pm and reservations are required. You can inquire about bookings when you reserve accommodation at Asahikousen lodge. Click here for the bus schedule. Another option would be to take a taxi to Koderakousen (小寺鉱泉), an alternative starting point for the hike. The taxi is not cheap, though. I did this hike after descending Gas-san, and hitchhiked all the way from there to Koderakousen, so that’s definitely an option for those without a car. The hike described here is a traverse from Koderakousen to Asahikousen, so you can take your pick of trails.

Level of difficulty: 4 out of 5 (elevation change 1320m)