Posted tagged ‘Kansai’

Mt. Mitsuboshi (三星山) – Mt. Ryūzen (龍神山) loop

March 9, 2023

Extra tips:

DO NOT attempt the route from Kizestsu-kyo (奇絶峡) as it is incredibly steep and exposed. Instead, it’s much better and safer to do this hike as a loop starting from 佐向口登山口. There are a couple of parking spaces near the entrance. Otherwise, you can either take a taxi from Kii-Tanabe station to the trailhead or an infrequent bus bound for Ryujin Onsen and alight at Yahagi (矢はぎ) bus stop. Click here for the bus schedule.

Route:

The route from 佐向口登山口 first starts on a gravel forest road marked by a lot of cairns. Follow the mountain river upstream and pay attention to the tape marks. After 15 minutes or so you’ll reach the junction for the loop hike. The signposts are old, but rumor has it they will be replaced by the city soon. Anyway, turn left at this junction (instead of taking the trail straight further up the river) and follow the tape marks. You’ll first pass by a small waterfall flowing over some layers of rock, with a small altar and shrine gate resting at the entrance. Follow the switchbacks above the river and continue heading upstream, over a series of river crossings. At the junction, turn right and continue upward, where the trail soon splits. You can take either way, but a right turn here will offer more views as it climbs up a spur. Both trails meet up further on so take your pick. You’ll soon reach Ryūjin (or Ryūzen, as both readings are correct) shrine punctuated by some very massive trees in places. From here it’s a simple 15-minute ascent to the summit. Just before the summit plateau, ignore the trail junction (龍神分岐) heading right (you will take this later) and head straight on, past the castle ruins and up onto the summit of Mt. Ryūzen (龍神山). Take a quick break to admire the views.

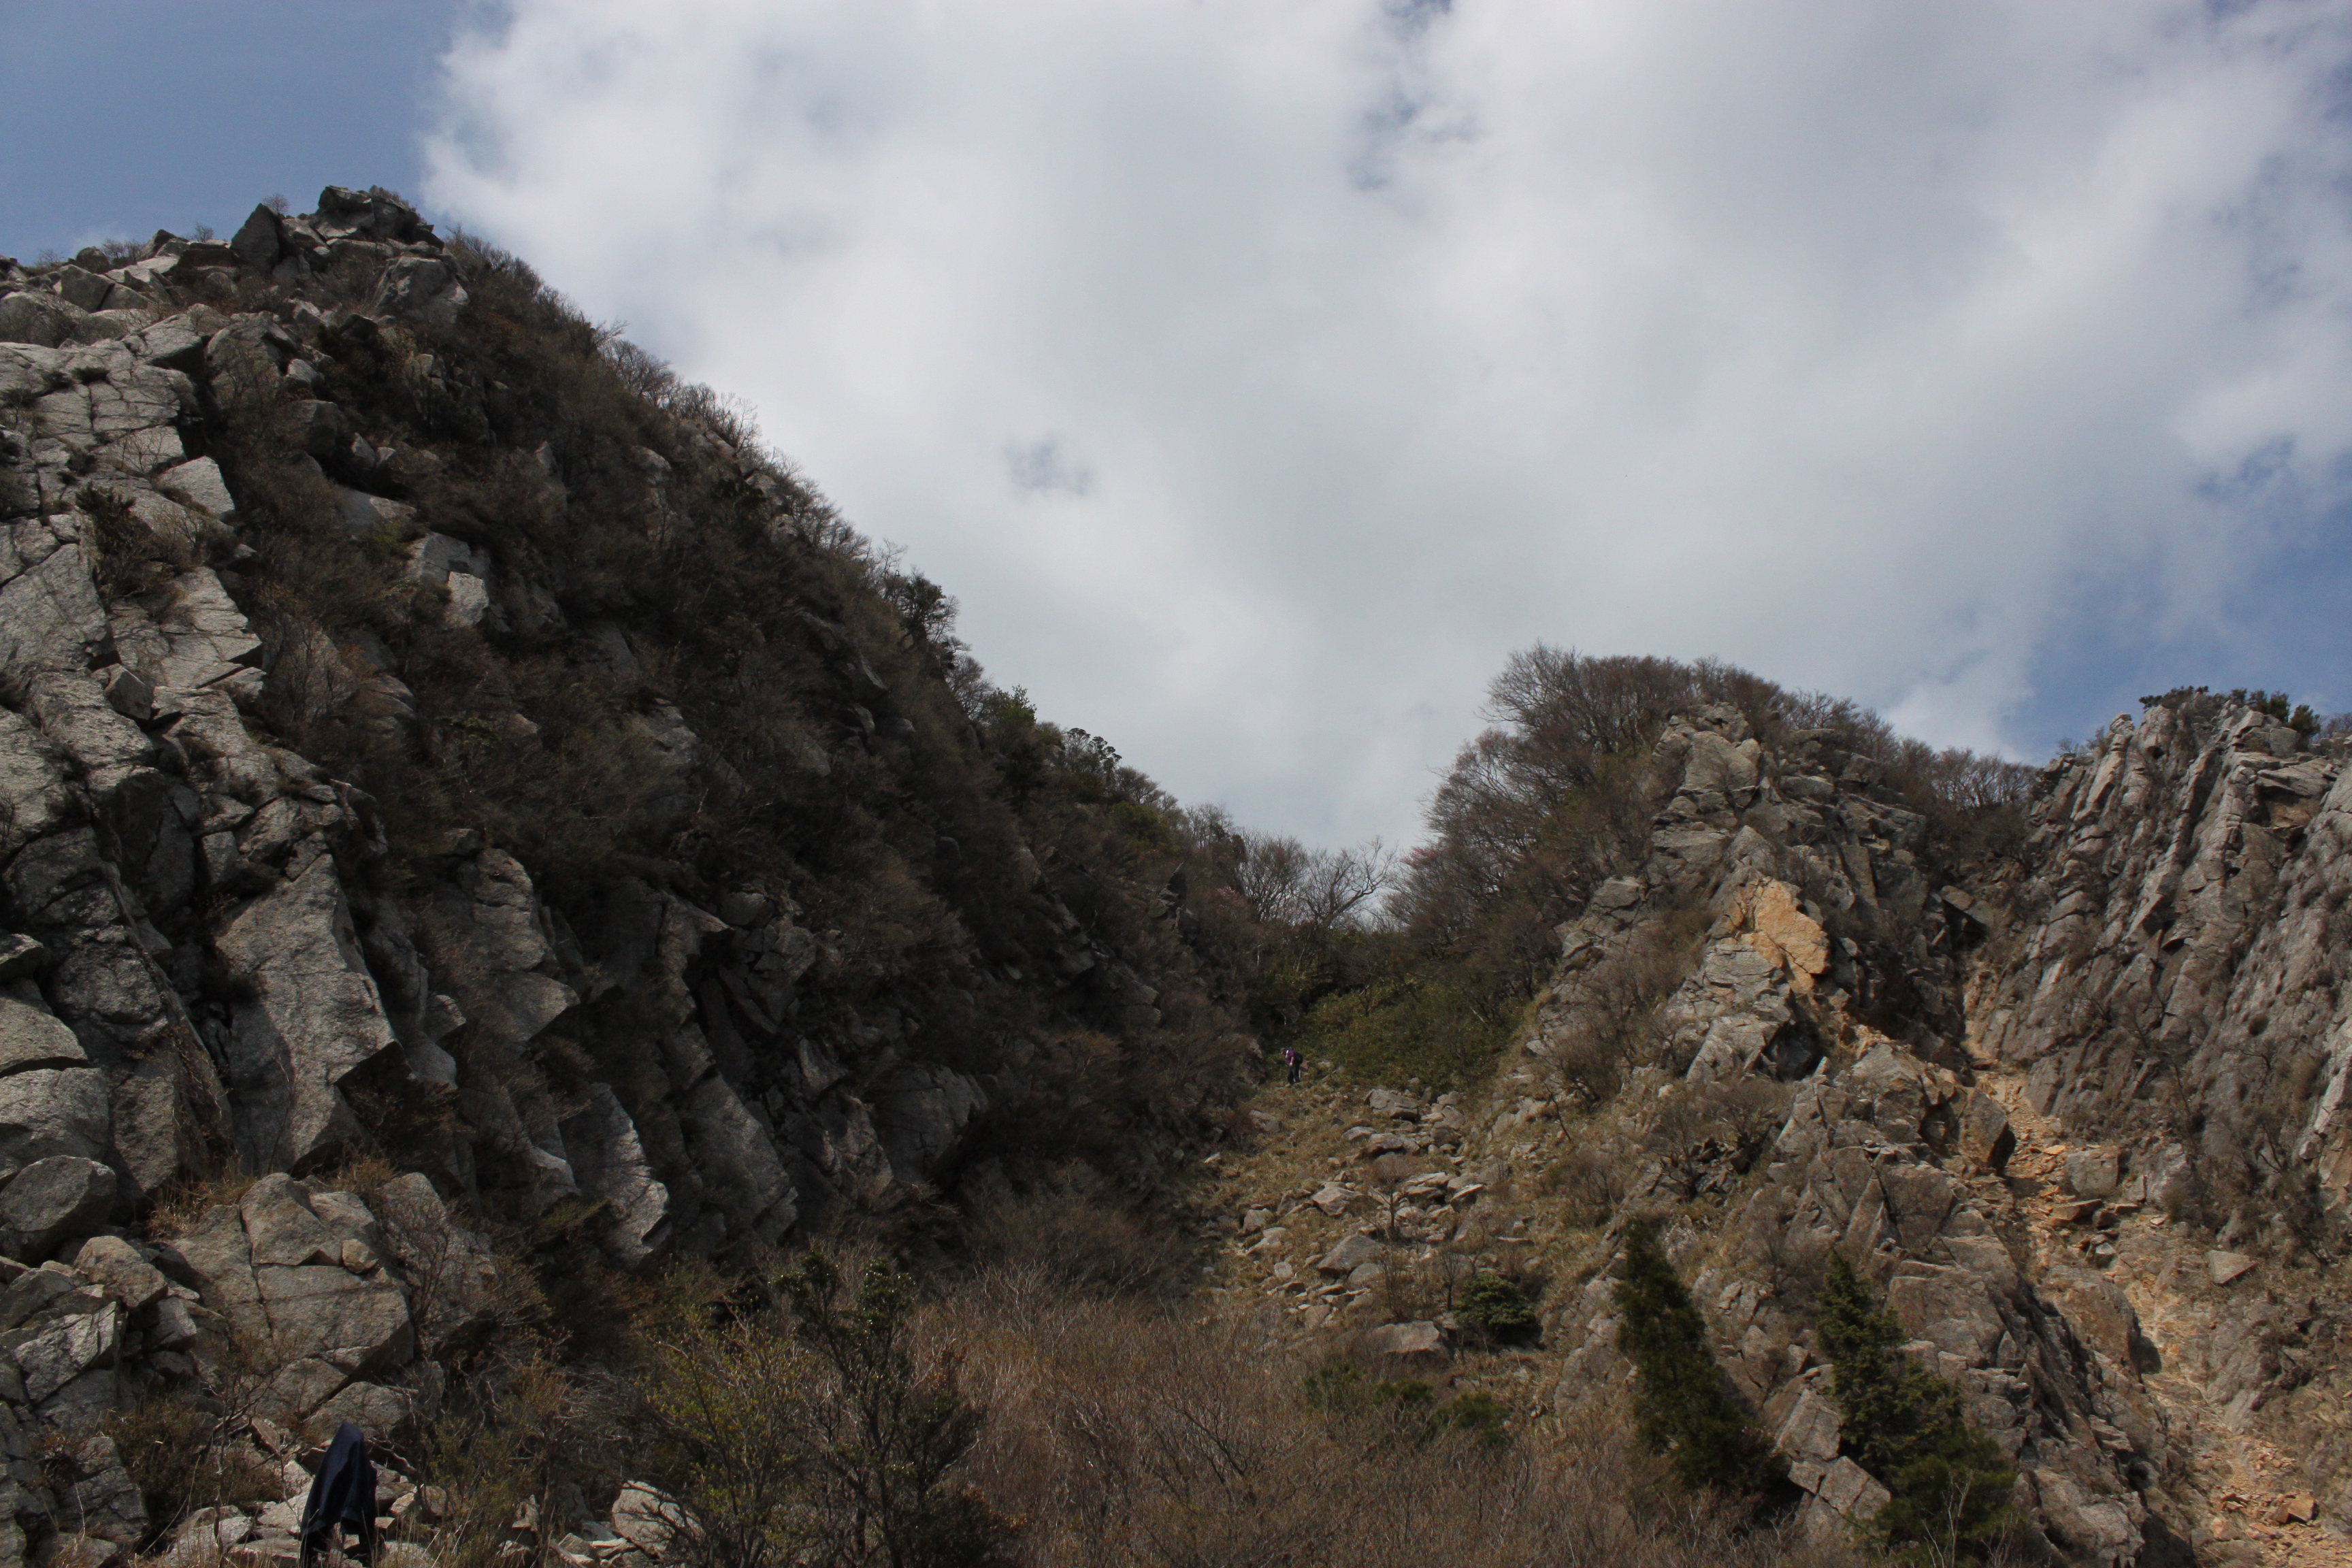
From the summit, retrace your steps back to the junction and turn left at 龍神分岐. There’s a sign here that says 三星山山頂 75分. The route is well-marked and starts off relatively flat before quickly losing altitude as it descends to a narrow saddle called 三星のコル. Take a sip of water and stow away your trekking poles, as things are about to become interesting. For the next hour or so, you’ll be involved in a fight against gravity, making your way up cliff faces with fixed ropes. Watch your footing as the rock is gritty sandstone that can be slippery depending on the traction of your shoes. It is A LOT easier to go up this route than down (see video above), but take it slow and enjoy the many vantage points along the way as you reach the cliff tops en route. Just below the summit, the climbing will become easier and once you reach the summit, settle down to a well-deserved break. If you would rather take your lunch break at a viewpoint, then continue past the summit just a few minutes (DO NOT take the trail left off the summit but continue straight on the well-used route) and you’ll reach a big rock formation with excellent views. After taking in the view, continue on the descent through a couple of fixed rope sections until reaching another saddle called 西岡のコル. The signposts here are tattered, but turn right at this junction for the signpost marked 竜星の辻. It will take about 30 minutes of so to reach the first junction of your hike, thereby completing the loop. The loop will probably take about 4 hours depending on how long you spend taking photos and enjoying the views.

Map:

Click here for a YAMAP post showing the route.

Mt. Shakujō (錫杖ヶ岳)

February 18, 2023

Additional details:

Best Season:

This hike can be done year round, but definitely bring along a pair of crampons in the winter and DO NOT attempt the final chain section if conditions are icy. There are mountain leeches in the vicinity. so avoid hiking between June and August. Air pollution can be a problem in Mie Prefecture, so try to climb on a clear day with good air quality so you can get good views.

Kuroi Castle Ruins (黒井城跡)

January 23, 2023

Extra Tips:

There are two main paths up the mountain. I recommend ascending via the Nadaraka Course (なだらかコース) and descending via the Kyūzaka Course (急坂コース) to make a nice loop hike. At the trailhead, you’ll notice a small parking lot, toilet, and a long set of stairs on your right. These stairs is where you will complete the loop, so instead of heading to these steps, head straight and follow the signs for なだらかコース. On the descent, retrace your steps down from the summit (ignore the path on your left that reads 多田方面) go back through the animal gate and down the switchbacks to the flat area in front of the red gate. Instead of heading back to the red gate, hang a hard left here and follow the signs for the 急坂コース. It’s a steep but easy-to-follow track that leads straight down the mountain and to that set of concrete stairs at the end.

History:

The castle was built by the Akai Clan in the 14th century but is best known for having be seiged by Akechi Mitsuhide, who is best-known as the man who betrayed and killed Oda Nobunaga. The castle became abandoned just before the start of the Edo Era and all that remains now are the castle wall foundations and a spectacular panoramic view.

Mt Ryūō (竜王岳)

January 14, 2023

Extra Tips:

A longer path to Ōhara is to take the main ridge from the junction to Mt Amagatake (天ヶ岳) which is one of the 10 peaks of Ōhara. Please note that it is easy to get lost, especially on the far side of the peak, so make sure you have the digital and paper maps. Here is my trip report so you can get an idea of what to expect.

Another good way to end your hike is by having a soak at the baths at Kurama Onsen. There are two bath houses, and I personally recommend the outdoor bath. However, please note that the hot spring is currently closed due to a COVID infection among staff, so double check their website before heading there.

Mt. Ōe (大江山)

June 7, 2014

Mention Mt. Ōe to any Japanese person, and they’ll likely start indulging you in the legends of the many oni (demons) that roam the ridges of the hallowed peak. Despite the less than stellar image, a traverse along the entire mountain range in good weather is one of the best hikes in Kansai for panoramic views.

Oe1

The hike: There’s a water source at the shrine so fill up your bottles before setting out and take a couple of minutes to admire the wonderful view of the valley below. The trail starts just to the left of this water fountain (on the right side of the road), but if you look across the road you’ll see a trail marked for the Oni’s cave (鬼の洞窟). You could consider taking this 10-minute detour to check out the cave (I didn’t have time when I went so I’d be curious to know what’s down there). Anyway, take the trail marked for Senjogatake (千丈ヶ嶽) which meanders through a beautiful forest on a series of wooden steps built into the hillside. It’s a steep climb at first but the grade flattens out a bit as you approach the ridge. After about 15-minutes you’ll reach a trail junction where you’ll turn right for the final climb up to the first of three summits. Shortly before the junction you’ll see a clearing on your left that has good views of the surrounding mountains. Continue the gentle ascent for another 10 minutes until arriving on a broad summit plateau. This is the official high point of Mt. Ōe, so pat yourself on the back and take a few minutes to take in the superb scenery. On a clear day you can see every mountain in Kyoto Prefecture as well as most of the peaks of Hyogo Prefecture. If the cloud is in (as it often is) then you’ll just have to use your imagination. The trail continues on the far side of the summit, so walk past the tall signpost and drop into the forest to the northwest. You’ll soon see signposts indicating a 500 meter horizontal distance to Hatogamine (鳩ヶ峰). Once you bottom out it’s a short but somewhat steep climb above the trees again to the top of the second peak, where there are even better panoramic views. This time you’ll be able to see the Sea of Japan and also see a mountain in front of your that resembles an inverted cooking pot. This is the final peak in the Ōe trilogy, aptly named Nabezuka (鍋塚 – Nabe pot mound). It’ll take about an hour to reach the summit of that mountain, so continue traversing along the trail directly in front of you. Again you’ll drop back down into the forest and descend to a saddle, where you’ll find a parking lot and toilet. This is an escape route if you don’t have the time or energy for the final peak. All you need to do is follow the forest road back down into the valley and you’ll arrive at the bus stop. Otherwise, continue on the trail just above the parking lot. It’s a long, gentle climb with views that open up the higher you go. After about 15 minutes you’ll reach a junction with a path shooting off to the right. The signpost is hand-written and hard to read, but this is the trail you want to take on the way down after visiting the summit of Nabezuka. It’s 500 horizontal meters to the top and it should take you about 10 minutes to reach it. There are a couple of benches you can use to take a rest and admire the scenery. Once satisfied, retrace your steps back to the junction and turn left, dropping through an area of ankle-turning rocks before reaching a forest road with a signpost that says Oeyama Green Lodge 3.5km. Turn left and walk on the flat gravel road, following the signs to the lodge as you wind your way though an area with blue netting set up to keep the deer from eating the tree bark. At the end of the road the trail will fork to the left, so follow the steep switchbacks for about 20 minutes until reaching a paved road. Walk down the road and turn left when you see the signpost that reads Viewpoint of the Senjougataki 150m. If you have extra time you could walk that extra 150 meters to see the waterfall, but keep the (limited) bus times in mind. From here it’s about a brisk 10-minute walk to the bus stop. Turn left when the road merges with the main road (there are a couple of colorful Oni statues here). The bus stop is just down from the entrance to the Oni museum, which makes for a great place to kill time if you’re stuck waiting for the 6:10pm bus.

When to go: This hike is best done from mid-April to late November, when the trails are clear from snow. The peak is also popular for snowshoeing from the ski resort, but you will need a lot of stamina and time to traverse all the way over to the high point.

Access:  Although best approached by car, relying on public transport, though inconvenient, allows you a chance to traverse the entire ridge without having to retrace your steps back to the car. From either Osaka or Kyoto, take a JR train to Fukuchiyama (福知山) station and change to a local train bound for Miyazu (宮津) on the Kita Kinki Tango Railway (北近畿タンゴ鉄道). Get off at Ōeyamaguchi-Naiku (大江山口内宮) station. The railway platform is actually inside of the JR station, so go downstairs and then up to the second floor and buy a separate ticket there. It costs 380 yen one-way from Fukuchiyama station. You might find it faster to take a limited express JR train to Fukuchiyama if you don’t want to leave at the crack of dawn. The first limited express train leaves Kyoto at 9:25am (9:10am from Osaka) on weekends, which allows you plenty of time to connect to the 11:07am train bound for Miyazu. That’ll get you to Ōeyamaguchi-Naiku at 11:36am. Go out the exit, down the stairs, and turn left on the main road when you get outside. Walk 100 meters down the road to the Tourist Information Center, marked by the colorful oni statue outside. The staff there will call a taxi for you (tell them you want to go to Oni-take Inari Jinja (鬼岳稲荷神社). The local taxi company is now bankrupt, so you’ll need to wait about 30 minutes for the taxi to come from Fukuchiyama to fetch you. The taxi will cost about 2500 yen for the 15-minute journey to the trailhead.

From the end of the hike at Ōeyama-no-ie, there is a cheap bus back to Ōe station, where you can take the train back to Fukuchiyama and transfer back to a JR train for Kyoto or Osaka. There are only 2 buses in the afternoon, so aim for the 3:50pm bus if you’re a fast hiker or the more leisurely 6:10pm bus. There’s a great museum at the bus stop dedicated to the Oni culture if you’ve got extra time to kill before the bus. The bus, if you can call it that, is nothing more than a minivan that seats 7 people. It only costs 200 yen to ride and the driver is friendly. Click here for the bus schedule.

Map: Click here

Level of difficulty: 2 out of 5 (elevation change ~200 meters)

Total Round-trip Distance: 10km (4 to 6 hours)

This slideshow requires JavaScript.

Mt. Fujiwara (藤原岳)

March 1, 2014

Mt. Fujiwara is a rotund, boulder-dotted peak on the eastern cusp of the Suzuka mountains in northern Mie Prefecture. The rolling, grass-lined plains, unique alpine flora, and unobstructed panoramic views make it a popular year-round destination for serious outdoorsy Nagoyaites.

fujiwara1

The hike: When you exit Nishifujiwara station turn left and follow the paved road until it meets up with route 614. Cross over the small stream and take your second left (ignore the small street just after the creek). If you reach the elementary school then you’ve gone too far. After you turn, follow the road to the terminus and you’ll find a rest house with some restrooms and a parking lot most likely full of cars and hikers. The trail starts to the left of the building. Go under the shrine gate and head into the forest. You’ll soon pass by a shrine on your left and the real climb will begin. The route doesn’t waste any time gaining altitude, and the first third of the mountain is through a rather boring cedar forest. The path, like most big climbs in Japan, is divided into 10 stagepoints (known in Japanese as gōme). After reaching a fence, turn right following the arrow sign and you’ll soon reach a small rocky area known as the 2nd stagepoint (二合目). Take a quick break here if you need to, because the trail does anything but let up. Just past this the trail will veer towards the right, passing through an area with a metal handrail on the right side. There are a couple of nice beech trees in this area, and you can start to get a glimpse of the valley below in the gaps between the trees. Next it’s back into the cedar forest, past the 3rd stagepoint (三合目) and about twenty minutes further on you’ll reach a small plateau at stagepoint #4 (四合目). Luckily you’ll enter a beautiful area of deciduous trees and the contours will let up a bit. Enjoy this while you can as there’s still a lot of climbing left ahead. After a couple of switchbacks the course will veer left, following a ravine past the 5th stagepoint (五合目) before diving back into a cedar forest on the right. Here the angle steepens once again, and you’re faced with a sweat-inducing slog past the 6th (六合目) and 7th (七合目) stagepoints before reaching the crest of the ridge at the 8th stagepoint (八合目). This is a great place for a break because there is still more climbing yet to come. From here you’ll rid yourself of those pesky cedar trees for the remainder of the ascent. Turn left from the 8th stagepoint and you’ll soon see a junction on your right. This is an alternative way off the mountain that is currently (as of March 2014) closed to hikers. There was a lot of damage in a recent landslide and there’s no telling when the trail will be repaired. If it is open, then it’s an alternative way off the mountain and the path will loop back to Nishifujiwara station. Anyway, continue up the long switchbacks past the 9th stagepoint (九合目) and up a little further for about 20 more minutes until you break out of the forest and reach the summit plateau. You’ll find the mountain hut here nestled against a buffered hillside. It should have taken anywhere from 2-1/2 to 3 hours of tough climbing to reach this point, so reward yourself with a nice lunch or refreshing bottle of water that you should have packed with you.  The summit of Mt. Fujiwara is still about 20 minutes away, so turn left and descend away from the hut, following the sign for tenbōdai (展望台) and over two small rises before reaching the base of the final climb towards the tall point. In the green season there are two paths to choose from, but in winter you can pretty much kickstep your own path up the broad, bald knob, but be careful of avalanches, as they do sometimes occur in this area. The summit itself does not have a signpost marking the summit. Instead there’s a sign reading 展望台, so rest assured you are on the high point. After admiring the panoramic views, retrace your steps back to the hut, where a decision will have to be made. If you continue on the trail behind the hut for another half hour, you can reach a rock formation called Tengu-iwa (天狗岩). If the weather is good and you’ve still got energy I recommend the 1-hour round-trip jaunt, as it enters a beautiful grassy plateau with plenty of wildflowers and far-reaching views. After returning to the hut, simply retrace your steps all the way down the mountain, or consider staying the night in the hut to enjoy the stars and the sunset/sunrise (but bring plenty of water, as the hut has none). All in all it makes for a great alternative to the busier area Gozaisho to the west.

When to go: This hike can be done year round, but you’ll need some 6-point crampons or snowshoes if hiking in January or February. The route is popular with hikers year round, and there’s a free emergency hut near the summit that is basically a floor with no supplies. Bring your own gear and plenty of water if you want to stay here (in winter it’s possible to melt snow). Spring and summer are famous for wildflowers while autumn brings the fall colors and immense crowds.

Access: This hike is best accessed from Nagoya, but if you get an early start or have your own transport then it’s possible to do as a day hike from Osaka. From Kintetsu Nagoya station, take an express train on the Kintetsu line bound for Yokkaichi and get off at Kintetsu-Tomida (近鉄富田) station. From here, change to a train on the Sangi Railway (三岐鉄道) bound for Nishifujiwara (西藤原) and get off at Nishifujiwara. Trains are infrequent, so make sure you check the train schedule before departing Nagoya. It takes about 90 minutes including connection times. From Osaka you’ll need to change trains 3 times and it’ll take around 3-1/2 hours to reach Nishifujiwara.

Map: Click here

Live web cam: Click here

Level of difficulty: 3 out of 5 (elevation change ~1000 meters)

Total round-trip distance: 9km (5 to 7 hours)

This slideshow requires JavaScript.

Takedao Tunnel Hike (武田尾)

October 27, 2013

Officially known at Mukogawa Gorge (武庫川渓谷), this is a gentle, family-oriented afternoon stroll along the old, abandoned  JR Fukuchiyama Line railway tracks. There are several dark, creepy tunnels to pass through, so a headlamp or flashlight is imperative.

IMG_0233

The hike: When you exit the train at Namaze station, go out the ticket gate and head down the main road (with a Co-op Mini supermarket on your left) through the small tunnel that goes under a mountain. After the tunnel the road curves towards the right and meets a busy main road. You’ll see a bridge with a red railing directly in front of you. Do not cross the bridge. Instead, turn left, staying on the left shoulder of the really busy road on the narrow sidewalk. Follow this main road for about 20 minutes (past a Cosmo gas station), until you reach a large freeway overpass. Walk under the huge expressway and take your first right, turning down a paved road that has some curvy switchbacks. There are no signposts so it’s very easy to get lost, but make sure the road you take descends towards the river. At the end of the paved road turn left and follow the dirt road that will eventually turn into a proper hiking trail. Just as the trail starts, you’ll see a huge metal sign in Japanese with the kanji (告) telling you that this is not a hiking trail! Don’t worry, it’s just JR trying to inform you that it won’t take any responsibility if you injure yourself or get attacked by a zombie. In the summer the trail can be quite overgrown because the company that owns the land (JR railway) doesn’t do any trail maintenance. The path follows the left bank of the river most of the way, and if you look down you can still see the wooden railway ties in place, but the rails have been removed. Also, keep your eyes peeled on the left side of the path and you can see old railway signs from time to time. Anyway, you’ll soon come to a metal lookout point on your right. Climb the metal stairs and take in the scenery. From here the trail continues upstream for about 15 minutes until reaching the entrance for the first tunnel. This is a good warm-up of what to expect for most of the way, and if you let your eyes adjust to the dark, then a flashlight is not necessary in this first tunnel. After the first tunnel, the trail becomes a bit wild in the summer, with lots of overgrown foliage and the rhythmic pattern of half-buried wooden railroad ties. The river scenery on your right is nice, but to be honest would be a hundred times nicer if the river weren’t so polluted. There’s a factory upstream that is dumping some questionable waste into the river. Even if you could get down to the river bank, I would not swim there. Anyway, soon you’ll reach the second tunnel, which is  one of the longest and scariest on the entire route. Due to the bend in the tunnel, a flashlight is absolutely necessary. If you suffer from claustrophobia then perhaps this is one hike to miss. If you’ve brought your kids then they’ll have a blast running through the tunnels playing hide and seek. Be careful of water dripping from the ceiling of the aging tunnels, as it can get muddy in places. After coming out of the the tunnel, you’ll soon pass through a really short tunnel that is only about 5 meters long. There are some railroad ties here placed as makeshift benches if you want to take your first break. Otherwise, just keep walking on the flat trail admiring the river scenery. The next tunnel will come in about 20 minutes or so, and ends at the base of a stunning railroad bridge that has been fenced off. It looks like the trail ends, but don’t worry, as you can cross the bridge on your left. If you want to re-enact the scene from Stand By Me then be my guest, though one slip will mean tumbling into the river far below.  Immediately after crossing the bridge you’ll duck into another tunnel before popping out and following the right bank of the river (with the river on your left). Here the scenery resembles more of a walk in the park than a mountain stroll, and in the spring the cherry blossoms in view are a site to behold. You’ll soon reach your first signpost of the day, pointing towards Takedao (武田尾), which is still 1.6km away. After 5 minutes you’ll pass a lion carving on your right with a stone stairwell that leads to a forest filled with cherry blossoms. Feel free to explore it if you’ve got extra time. Otherwise, continue straight on through a short tunnel that is still completely made of brick. Just past the tunnel you’ll see a trail on your left that leads to a plaza and offers access to the river bank (again, don’t let your kids play in the filthy water). Soon after, you’ll pass through a final tunnel made of brick before reaching an area on the right with some large rocks that make a great place to take a break. Just after you’ll find some toilets on your left that will probably have a really long queue. Don’t worry, as there are more, less crowded toilets just 5 minutes away in the main town. Your next landmark will be a wooden bridge. Cross this and take the stairs on your left, and you’ll see a sign indicating 600 meters to Takedao station (武田尾). From here you’ll walk through the main street through the tiny town and will likely find hikers hanging out in the local shops drinking beer. Keep walking for about 15 minutes, and you’ll see Takedao station on your right. If you’re keen for a hot spring bath, then instead of going to the station, continue walking along the river for another 15 minutes or so, and you’ll find a couple of ryokan that offer baths. They aren’t cheap though. The nicest one costs 1800 yen just for a bath and is available from 11am to 5pm only. All in all is a 2 to 3 hour stroll depending on how many breaks you take.

When to go: This hike can easily be done year round. Make sure you bring a flashlight or headlamp, because two of the tunnels are impossible to traverse without one. If you’re there on a weekend you could rely on other groups, but during the week do not expect must other foot traffic. There is a very cool art event every September which uses some of the tunnels near Takedao station as a canvas for a giant art and music project. It’s highly recommended, and can be combined with a hike of the tunnels if you time it correctly. Search for Takedao Art Tunnel Event on Facebook and check out these photos from this year’s event.

Access: From Osaka station, take train on the JR Fukuchiyama Line bound for Shin-sanda (新三田) and get off at Namaze (生瀬) station. A local train takes about 40 minutes, so if you want to save time, then take a rapid (kaisoku) train to either Kawanishi-Ikeda (川西池田) or Takarazuka (宝塚) stations, and change to the local train there. The return train is just two stops further north from Namaze, so take a local train all the way back to Osaka or again change to a rapid at Takrazuka or Kawanishi-Ikeda if you’re pressed for time.

Level of difficulty: 1 out of 5 (elevation change 〜100m)

Distance: 7km ( 2 to 3 hours)

This slideshow requires JavaScript.

Mt. Kama-ga-take (鎌ヶ岳)

May 14, 2013

Mt. Kama is one of the hidden jewels of the Suzuka mountain range in eastern Mie Prefecture. The spear-like peak is a thrilling rock scramble with outstanding panoramic views of Ise bay and the rest of the mountains of Mie and Shiga Prefectures.

kama1

Note: If you don’t fancy taking the gondola, then there are several hiking trails to choose from. The most popular route is the Nakamichi (中道), but you’ll need to walk up the paved road for about an hour before reaching the trailhead. The Uramichi (裏道) route starts just past the gondola entrance and it’s a pleasant (and less crowded) climb. The summit of Mt. Gozaisho is an eyesore, with a ski resort, restaurants, and lots of concrete. It’s better to spend your energy getting towards Mt. Kama, which is why I recommend the gondola. In addition, there are outstanding views of Mt. Kama from the gondola: look out the left side of the carriage at the pyramidal peak on the ride up.

The hike: When exiting the gondola, head upstairs and enjoy the views from Fujimi-daira. On an exceptionally clear day, you can see the top of Mt. Fuji sticking up from behind the mountains of Aichi Prefecture. From here, take the concrete steps leading off the lookout point. The path will wrap around and pass by a restaurant (and the chairlift entrance). Climb the ski field just to the right of the chairlift for about 10 minutes and you’ll reach the high point of Mt. Gozaisho. From here, head left on the paved road, following the signs to Buhei-touge (武平峠).  After several minutes you’ll see a signposted path on the right side of the paved path with a warning sign in Japanese telling people it is dangerous (危険). The first part of the route is on slippery sandstone with a couple of low branches hanging across the path (watch your head please). After that, the route drops steeply through an area of large rocks and boulders. At times it feels as if you are traversing the Houou ridge of the Minami Alps with all of the sand stone present. It should take about 30 to 45 minutes to reach Buhei-touge, where you’ll want to take a break before starting the big climb. There are paths dropping off the ridge to both the left and right. The left path will take you back down to Yunoyama onsen, while the right path drops into Shiga Prefecture. The trail to the summit of Mt. Kama is straight ahead, and it’s a no-nonsense ascent of 300 vertical meters through more sandstone and large boulders. It’ll take about an hour to reach the summit, where you’ll have jaw-dropping panoramic views. The final 50 meters to the peak is tricky, with slippery rock and poor footholds. You’ll probably find yourself scrambling on all fours. However, there is a chain here to help you up the pebbly trail. You’ll know you’re just below the summit when you reach a blue signpost that says Kamagatake (Universal). Turn left here for the steep scurry. From the top, there’s a path that drops down on the left, but ignore this and continue on the ridge, past a rusty shrine and to a rock clearing. Don’t be tempted to keep traversing on the knife-edge ridge. The real path drops down on your left. It’s a steep 10-minute descent to Dake-touge (岳峠), where you’ll find a path on your left marked Nagaishidani (長石谷). Take this trail as it descends through a beautiful rocky, dry riverbed. The path can be difficult to pick up, so look for the red paint marks on the rocks and the red tape on the trees. As long as you stay close to the bed you’ll be fine. The gully will eventually turn into a stream with running water, which will grow larger the further you descend. The route crosses this river about a dozen times. The crossings aren’t well-marked, but a good rule of thumb is to stick to whichever side of the river is widest. After about an hour a tributary will come in from the left, and you can find a large waterfall here. There is a signpost on the path (on the right bank of the river) that says Inuhoshiootaki (犬星大滝). If you want to see the waterfall, then cross the stream on your left and you’ll find it about 50 meters up the tributary. It makes a wonderful place for a break. Retrace your steps to the trail and continue downstream. The waterfalls grow in size a bit from this point and the river crossings become a bit trickier, so take your time and make sure to look for the paint marks. There are also a couple of waste-deep pools that look great for a dip (as long as the leeches aren’t out). You’re next big landmark will (unfortunately) be a big concrete dam. You know you’re getting close when the cedar trees start showing up. When you reach the dam, head to the left and take the path that drops very steeply towards the bottom of the dam. This path will meet up with another path (this is the path that drops directly from the summit) and the route will drop back past a couple of more concrete dams before reaching a flat area where you’ll need to cross the river. From here it’s a short walk to the paved road, Turn right and follow the road for about 45 minutes to the bus stop just below the gondola. If it’s a weekend then you can try your luck hitching. Otherwise, wait for the bus that’ll take you back to Yunoyama station.

When to go: This hike can be done from late March to early December. May is the best time for flowers. Avoid the peak from June to August, as the Suzuka mountains are covered with blood-sucking leeches. Winter is for experts only.

Access:  Although it’s very far from Osaka, it can be done as a day trip if you’re prepared for a 5-hour round trip train ride. From Kintetsu-Namba station, take a Limited Express train bound for Nagoya and get off at Yokkaichi station, where you can transfer to the Yunoyama line. Some trains don’t stop at Yokkaichi, so you’ll need to transfer to a different Limited Express train at Tsu. From Yokkaichi, take the Yunoyama line and get off at Yunoyama Onsen station. From the station, take a bus to Yunoyama onsen. The buses are infrequent, so if you’ve got some people with you, it’ll be faster to share a taxi to the ropeway (a one-way taxi is about 1300 yen). From Nagoya, there are some direct trains to Yunoyama onsen, and there are direct buses as well, which will drop you off just below the gondola entrance. Click here for the Nagoya-Yunoyama bus schedule and here for the bus from Yunoyama station to the gondola.

Level of difficulty: 4 out of 5 (elevation change ~500 meters)

Distance: 7.5km (3-1/2 to 7 hours, depending on whether you use the gondola or not)

Vertical elevation chart:

 kama - vertical

This slideshow requires JavaScript.

Mt. Aoba (青葉山)

April 9, 2013

Mt. Aoba, also known by the nickname of Wakasa-fuji, is a twin-peaked volcanic cone rising proudly from Wakasa bay in northern Kyoto Prefecture. The hike is along an exhilarating ridge with outstanding views of the Sea of Japan, as well as the Japan Alps if you’re especially lucky with the weather.

aoba14

The hike: Climb the stone stairs leading to Matsuno temple. When you reach the main temple building (distinguished by the double-pitched roof), turn right, looking for the covered bridge that connects the main building with an adjacent structure. Cross under the bridge and you’ll find a signpost and trailhead behind. Climb the stairs and enter the bamboo forest, following the signs that say 青葉山・山頂まで 1.8km. The path is a gentle, steady climb for a few minutes until flattening out and crossing through a broken shrine gate. Here you’ll pass through a small clearing of bamboo grass before re-entering the forest, where the real climb begins. The path wastes no time in gaining altitude, with generous amounts of switchbacks in place to ensure the climbing is not too steep. Ropes and ladders can be found in the steepest places, and it should take a hour or so of steady climbing to reach the ridge just below the summit of the west peak (西峰). When you reach the ridge, you’ll see the remnants of an old stone temple building directly in front of you. Turn right and follow the windy ridge (watching out for the steep drops to your left towards the sea). After about 5 minutes you’ll reach a small emergency hut that marks the summit. If you look behind the small shrine, you’ll see an enormous rock formation with a handrail attached about 3/4 of the way up. Head behind the shrine and towards the right, where you’ll find a ladder and ropes that will assist in the near vertical climb to the top. The true summit has amazing views of  Uchiura bay directly below. On the right hand side of the peninsula you can see Takahama Nuclear Power plant. It’s unbelievable that such a structure was built in this beautiful bay, but that’s the reality of Japan. After admiring the views, retrace your steps back to the emergency hut and continue along the ridge (in the opposite way in which you climbed). The ridge between the west and east peaks is exciting: after descending steeply to the saddle, you’ll work your way through an area of metal ladders with amazing views of the valley below. It should take about 40 minutes to reach the summit of the east peak (東峰), which is marked by a shrine building. Just to the left of the shrine is a set of steps that descends to a flat area with a lot of benches. Be careful going down the stairs, as they are incredibly slippery (my butt is still sore from taking a tumble). The rest area makes a great place to relax for lunch, and at the far end there’s a rock formation that is chained off to keep people from entering. The views from this rock are nice if you climb over the chain (just don’t get too close to the edge). From here, the path heads towards the left (just before the rock formation). The trail is marked as 展望台まで 1.1km. It’s a very straightforward trail, winding its way through a beautiful forest on a series of wooden steps. Be sure to encourage those hikers you pass : the ascent from here really is tougher than the other approach (in terms of distance and vertical elevation gain, that is). In about 10 minutes you’ll come to a large rock formation. You can either skirt around it to the left or head up and over it. It’s worth climbing the rock for the views. After that, the path flattens out a little before climbing a small rise and descending steeply down the other side. Your next landmark will be another wooden shrine with a small clearing. There are a couple of benches here, but no real views to speak of. The real lookout tower is another couple of minutes down the trail, and there you’ll have outstanding views of Wakasa Bay and Tsuruga city. If you’re really lucky with the weather and visibility then you can also see Hakusan and the Japan Alps from here. After this, a bit of the beauty of the peak is lost, as you’ll pass by a couple of television antenna before entering a cedar forest and a junction, where a decision will have to be made. If you’ve driven to the mountain, then take the right fork marked for 高野 (Takano). If not, then stay on the ridge and follow the signs to Nakayamadera (中山寺), where you can grab a taxi or hitchhike to the nearest train station. I took the trail to Takano, and it’s easy to follow until reaching the village. From there, it’s a long walk on concrete roads back to Matsuno temple. There are no signposts, so it’s best to ask the locals about the best place to go. You could also try your luck hitching. The entire hike should take about 3 or 4 hours, depending on your speed and how many breaks you take.

When to go: This hike can be done year round, but you’ll want to be prepared for snow and ice during the colder months of January and February. The route is exposed in places, with ladders and ropes, so try to avoid wet conditons if you can.

Access:  Although very tricky to access, it can be done as a day hike from Osaka if you get an early start. The best (and cheapest) way is to take a highway bus from Hankyu bus terminal in Umeda to Higashi-Maizuru (東舞鶴) station. From there, change to a train on the JR Obama line and get off at Matsuno-odera (松尾寺) station. The train only takes 7 minutes, but the trains are few and far between. The bus takes about 2 hours, depending on traffic. There are also buses from Sannomiya in Kobe and from Kyoto station. Click here for the bus schedule) You can also access Higashi-Maizuru by train from Kyoto (90 minutes by limited express train). From Matsuno-odera station it’s a short taxi ride (or a 1 hour walk) to the trailhead.

Map: Click here , here, and here.

Level of difficulty: 4 out of 5 (elevation change ~400 meters)

Distance: 5km (3-1/2 to 5 hours)

This slideshow requires JavaScript.

Mt. Yura (由良ヶ岳)

March 16, 2013

Rising from the mouth of the Yura river in northern Kyoto Prefecture, Mt. Yura is a fantastic day hike for those looking for wonderful ocean views on one side, and a sea of mountains on the other.

yura9

The hike:  When exiting the train, give your ticket to the train driver, cross the overhead pedestrian bridge, and exit the station, checking the return train timetable before leaving. There’s a restroom on your left as you exit the station, along with some benches where you can eat lunch or organize your gear. From the station, walk straight on the paved road in front of you, turning left at the first intersection you come to (about 50 meters from the station). After passing by the elementary school, take your first left, following the signpost that says Kokumin-shukusha (国民宿舎). Cross over the railroad tracks and continue following the road straight towards the peak. Mt. Yura looks intimidating from this angle, as the peak rises abruptly directly above. Take it one step at a time and you should be fine. When you reach the Kokumin-shukusha (a tan building with a red tile roof), turn right on the road behind the building. Here you’ll find a small shelter and the start of the trail. The path is divided into 10 stages (or 6 stages if you follow the larger signposts). The path is blocked by a steel fence used to keep deer out of the village. Unlock the gate, enter the path, and don’t forget to relock the gate behind you. The first part of the route is extremely eroded, with deep head-high ruts riveted out of the sandstone. Follow the channel up for about 20 minutes until reaching a false ridge (it’s a secondary ridge that will lead you to the real climb). Your next landmark will be a spur trail with a signpost marked for water (水). There is a stream where you can get water, but you’ll need to descend down to a valley to get it. Anyway, unless you’re really thirsty, ignore this trail and continue the climb. A short time later, you will arrive at the 4th stagepoint (4合目), which is a great place to take a break. Just off the path on your left, you can see the remains of a charcoal kiln which was used to make charcoal in the old times. From here, the real start of the climb begins, as you’ll enter a cedar forest with steep switchbacks. You’ll cross a dirt forest road twice (be careful with the crossings – they’re not well-marked). The views towards the sea will start to open up behind you, so don’t forget to look back every once in a while to admire the scenery. Eventually you’ll reach another water source labeled Ippai-mizu (一杯水). The water is a short walk to your left, but wasn’t much more than a trickle when I visited in March. Take another quick break here. You’re almost on the ridge, but the steepest part of the hike is yet to come. After leaving the water source, follow the switchbacks through the deciduous forest until popping out on the ridge. From here, the walk becomes much easier and more pleasant, as your walking on a stellar ridge with beautiful foliage. Turn right when you hit the junction, following the spine of the mountain to Nishi-mine (西峰), the highest point of Mt. Yura. It should take 10 to 20 minutes of gentle walking to reach the summit, where you’ll have amazing views of Amanohashidate and Kunda bay, with it’s wonderful crescent-shaped beach. You’ll also see a dubious-looking power plant run by Kansai Electric company. Apparently it’s an “energy research center”, but who knows what they’re doing at that place. I really hope they are properly disposing of their waste and not dumping it in the scenic bay. After soaking up the views, retrace your steps back to the junction, and continue on to Higashi-mine (東峰), which is a short but steep climb. The views from here are much better than from the other peak, with panoramic views of the sea, Mt. Aoba, Hakusan and the Japan Alps (clear days only), as well as just about every peak in Kyoto and Hyogo Prefectures. You’ll find a small shrine and jizo statue on the summit. This would be a pretty impressive place to camp if not for the lack of water and toilet facilities. When you’ve had enough of the views, simply retrace your steps all the way back to the train station. Be sure to time your descent to coincide with the train departure times. There’s not much to do in the town if you’ve got an hour to kill before the next train.

When to go: Due to the extreme heat of the Kansai region, this hike is best avoided in the summer months of July and August unless you want to die of heatstroke. Winter is also a challenge due to the generally poor weather, frigid winds, and deep snow drifts. The best time to hike is either spring (mid-March to late May) or autumn (mid-September to late November). A good way to break up the hike might be to stay at the Kokumin-shukusha at the trailhead, which costs ¥ 6700 with 2 meals. Here is the website.

Access:  Although a bit tricky to access, it can be done as a day hike from Osaka if you get an early start. The best (and cheapest) way is to take a highway bus from Hankyu bus terminal in Umeda to Nishi-Maizuru (西舞鶴) station. From there, change to a train on the Kitakinki Tango railway (located in the main JR station on the first floor) bound for Miyazu (宮津) or Toyooka (豊岡) and get off at Tangoyura (丹後由良) station. The train takes about 15 minutes and costs 310 yen. The bus takes about 2 hours, depending on traffic. There are also buses from Sannomiya in Kobe and from Kyoto station. Click here for the bus schedule and here for information on the train line. You can also access Nishi-Maizuru by train from Kyoto (90 minutes by limited express train).

Map: Click here

Live web cam: Click here

Level of difficulty: 4 out of 5 (elevation change 640 meters)

Distance: 8km (3-1/3 to 5 hours)

This slideshow requires JavaScript.