Archive for the ‘Archive’ category

Washigamine (鷲ヶ峰)/Yashima marsh (八島湿原)

June 16, 2013

Last updated: Feb 19, 2025

photos and text by Alastair Bourne

Washigamine (eagle mountain) and Yashima (eight island) marsh offer a short but scenic hike through a national park straddling Suwa and Shimo-Suwa in the center of Nagano Prefecture.

washi4

The hike: With panoramic 360-degree views, little-known Washigamine probably deserves similar recognition to its more famous neighbors, Kirigamine and Kurumayama. Unusual for a place with such spectacular views, the trail to the summit is an easy ascent that should present no difficulties to moderately-experienced climbers or hikers. To start the hike, go through the tunnel under the road at the far end of the car park at Yashima marsh. Instead of heading straight to the marsh take a sharp left with the deer fence and the road immediately to your left. Head up the rocky slope through the trees and after about five minutes you will come to a flat area with a signpost pointing up towards Washigamine (鷲ヶ峰). Follow the sign, remembering to close the gate of the deer fence as you head up the well-marked path. Don’t forget to turn around and enjoy the view as you ascend. On a clear day you won’t have to climb far before taking in fantastic views of Mt. Tateshina, the Yatsugatake range and Mt. Fuji. Within minutes the tourists, car park and Venus Line road seem far behind you. Continue heading up the steady slope, taking care not to slip on the gravel and loose rocks until arriving at a plateau after about 25 minutes. Here the well-marked trail bears to the right. Walk along the ridge line for a couple of minutes and take a short rest at the first peak to enjoy the magnificent views of Yatsugatake. The trail then heads to the left, with steep grassy slopes on both sides. Follow the path for another 10 minutes to the summit of Washigamine. In summer, the route can be obstructed by thick vegetation, but there is only one way to go and no danger of getting lost. From the Washigamine summit you can once again enjoy the view of the mountains described earlier as well as spectacular vistas of Utsukushigahara, the South Alps, Yarigatake and the North Alps, Lake Suwa and parts of the Matsumoto valley. From here, intrepid explorers can continue onto Wada pass (和田峠). However, with the best of the views behind you, a circuit of Yashima marsh is perhaps a better option. Return along the same path until you reach the flat area with the signposted junction. Here, you should head straight down the slope instead of returning to the car park. After about 100 meters you will find yourself on the path that encircles the marsh, which contains a number of stunningly beautiful mirror-like ponds. The center of the marsh is out of bounds, but you can enjoy the views from the boardwalk and path that encircle the area. You can spend 45 minutes following the path around until you return to the car park, or head off towards Kirigamine or Kurumayama on one of the many well signposted paths that crisscross the area. Flora fans can enjoy the small alpine flowers throughout the area, while fauna fans may be lucky enough to catch sight of a fox or deer or unlucky enough to come across a bear in some of the areas off the beaten track.

When to go: The area is theoretically accessible all year round as the winter gates for the Venus Line are located just after Yashima car park. However, I don’t recommend going in winter when the area is covered in deep snow and you run the risk of starting an avalanche on the steep, treeless slopes of Washigamine. In June, the yellow nikkokisuge (day lilly) plant blooms across the area, which is filled with cars and buses carrying crowds yielding big, expensive-looking cameras. Car parks fill up from early in the morning, and all but the most determined botanists are unlikely to want to put up with the crowds or traffic. If you’re relying on the bus, then aim to go in July or August.

Access: It takes about 40 minutes by one of the infrequent buses from Kami-Suwa (上諏訪) station on the JR Chuo line to Yashima car park (八島湿原). The bus only runs from July 13 to August 25th (weekends only for the most part) and will set you back 1200 yen one-way. Click here for the bus schedule. Outside of these dates, you’ll need to take a bus that runs between Kamisuwa and Chino stations and get off at Kirigamine Interchange (霧ヶ峰インターチェンジ). From there, you’ll have to walk for about an hour, or you can try your luck hitching. Click here for that bus schedule. There are no buses in the winter, but if you have your own car, you can drive to Yashima car park via route 194 (aka the Venus Line). In fact, the Yashigamine Hotel at the trailhead is open all year.

Map: Click here

Live web cam: Click here

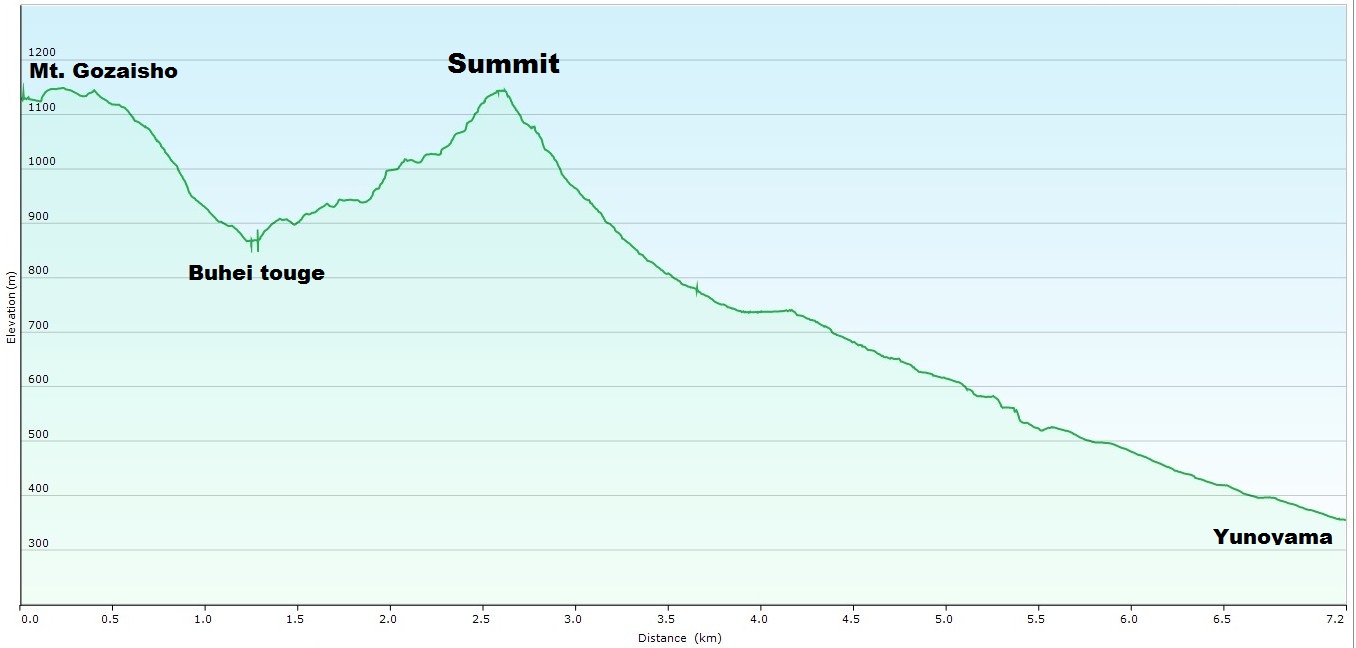
Level of difficulty: 2 out of 5 (elevation change ~200 meters)

Distance: It’s a 4-km round trip from Yashima to the summit of Washigamine. The circuit around Yashima marsh is another 2-3 km. The entire hike should take no more than three hours at even the most gentle of paces.

This slideshow requires JavaScript.

Mt. Kama-ga-take (鎌ヶ岳)

May 14, 2013

Last updated: Feb 21, 2025

Mt. Kama is one of the hidden jewels of the Suzuka mountain range in eastern Mie Prefecture. The spear-like peak is a thrilling rock scramble with outstanding panoramic views of Ise bay and the rest of the mountains of Mie and Shiga Prefectures.

kama1

Note: If you don’t fancy taking the gondola, then there are several hiking trails to choose from. The most popular route is the Nakamichi (中道), but you’ll need to walk up the paved road for about an hour before reaching the trailhead. The Uramichi (裏道) route starts just past the gondola entrance and it’s a pleasant (and less crowded) climb. The summit of Mt. Gozaisho is an eyesore, with a ski resort, restaurants, and lots of concrete. It’s better to spend your energy getting towards Mt. Kama, which is why I recommend the gondola. In addition, there are outstanding views of Mt. Kama from the gondola: look out the left side of the carriage at the pyramidal peak on the ride up.

The hike: When exiting the gondola, head upstairs and enjoy the views from Fujimi-daira. On an exceptionally clear day, you can see the top of Mt. Fuji sticking up from behind the mountains of Aichi Prefecture. From here, take the concrete steps leading off the lookout point. The path will wrap around and pass by a restaurant (and the chairlift entrance). Climb the ski field just to the right of the chairlift for about 10 minutes and you’ll reach the high point of Mt. Gozaisho. From here, head left on the paved road, following the signs to Buhei-tōge (武平峠).  After several minutes you’ll see a signposted path on the right side of the paved path with a warning sign in Japanese telling people it is dangerous (危険). The first part of the route is on slippery sandstone with a couple of low branches hanging across the path (watch your head please). After that, the route drops steeply through an area of large rocks and boulders. At times it feels as if you are traversing the Hō-ō ridge of the Minami Alps with all of the sand stone present. It should take about 30 to 45 minutes to reach Buhei-tōge, where you’ll want to take a break before starting the big climb. There are paths dropping off the ridge to both the left and right. The left path will take you back down to Yunoyama onsen, while the right path drops into Shiga Prefecture. The trail to the summit of Mt. Kama is straight ahead, and it’s a no-nonsense ascent of 300 vertical meters through more sandstone and large boulders. It’ll take about an hour to reach the summit, where you’ll have jaw-dropping panoramic views. The final 50 meters to the peak is tricky, with slippery rock and poor footholds. You’ll probably find yourself scrambling on all fours. However, there is a chain here to help you up the pebbly trail. You’ll know you’re just below the summit when you reach a blue signpost that says Kamagatake (Universal). Turn left here for the steep scramble. From the top, there’s a path that drops down on the left, but ignore this and continue on the ridge, past a rusty shrine and to a rock clearing. Don’t be tempted to keep traversing on the knife-edge ridge. The real path drops down on your left. It’s a steep 10-minute descent to Dake-tōge (岳峠), where you’ll find a path on your left marked Nagaishidani (長石谷). Take this trail as it descends through a beautiful rocky, dry riverbed. The path can be difficult to pick up, so look for the red paint marks on the rocks and the red tape on the trees. As long as you stay close to the bed you’ll be fine. The gully will eventually turn into a stream with running water, which will grow larger the further you descend. The route crosses this river about a dozen times. The crossings aren’t well-marked, but a good rule of thumb is to stick to whichever side of the river is widest. After about an hour a tributary will come in from the left, and you can find a large waterfall here. There is a signpost on the path (on the right bank of the river) that says Inuhoshi-ōtaki (犬星大滝). If you want to see the waterfall, then cross the stream on your left and you’ll find it about 50 meters up the tributary. It makes a wonderful place for a break. Retrace your steps to the trail and continue downstream. The waterfalls grow in size a bit from this point and the river crossings become a bit trickier, so take your time and make sure to look for the paint marks. There are also a couple of waste-deep pools that look great for a dip (as long as the leeches aren’t out). You’re next big landmark will (unfortunately) be a big concrete dam. You know you’re getting close when the cedar trees start showing up. When you reach the dam, head to the left and take the path that drops very steeply towards the bottom of the dam. This path will meet up with another path (this is the path that drops directly from the summit) and the route will drop back past a couple of more concrete dams before reaching a flat area where you’ll need to cross the river. From here it’s a short walk to the paved road, Turn right and follow the road for about 45 minutes to the bus stop just below the gondola. If it’s a weekend then you can try your luck hitching. Otherwise, wait for the bus that’ll take you back to Yunoyama station.

When to go: This hike can be done from late March to early December. May is the best time for flowers. Avoid the peak from June to August, as the Suzuka mountains are covered with blood-sucking leeches. Winter is for experts only.

Access:  Although it’s very far from Osaka, it can be done as a day trip if you’re prepared for a 5-hour round trip train ride. From Kintetsu-Namba station, take a Limited Express train bound for Nagoya and get off at Yokkaichi station, where you can transfer to the Yunoyama line. Some trains don’t stop at Yokkaichi, so you’ll need to transfer to a different Limited Express train at Tsu. From Yokkaichi, take the Yunoyama line and get off at Yunoyama Onsen station. From the station, take a bus to Yunoyama onsen. The buses are infrequent, so if you’ve got some people with you, it’ll be faster to share a taxi to the ropeway (a one-way taxi is about 1300 yen). From Nagoya, there are some direct trains to Yunoyama onsen, and there are direct buses as well, which will drop you off just below the gondola entrance. Click here for the Nagoya-Yunoyama bus schedule and here for the bus from Yunoyama station to the gondola.

Level of difficulty: 4 out of 5 (elevation change ~500 meters)

Distance: 7.5km (3-1/2 to 7 hours, depending on whether you use the gondola or not)

Vertical elevation chart:

 kama - vertical

This slideshow requires JavaScript.

Mt. Aoba (青葉山)

April 9, 2013

Mt. Aoba, also known by the nickname of Wakasa-fuji, is a twin-peaked volcanic cone rising proudly from Wakasa bay in northern Kyoto Prefecture. The hike is along an exhilarating ridge with outstanding views of the Sea of Japan, as well as the Japan Alps if you’re especially lucky with the weather.

aoba14

The hike: Climb the stone stairs leading to Matsuno temple. When you reach the main temple building (distinguished by the double-pitched roof), turn right, looking for the covered bridge that connects the main building with an adjacent structure. Cross under the bridge and you’ll find a signpost and trailhead behind. Climb the stairs and enter the bamboo forest, following the signs that say 青葉山・山頂まで 1.8km. The path is a gentle, steady climb for a few minutes until flattening out and crossing through a broken shrine gate. Here you’ll pass through a small clearing of bamboo grass before re-entering the forest, where the real climb begins. The path wastes no time in gaining altitude, with generous amounts of switchbacks in place to ensure the climbing is not too steep. Ropes and ladders can be found in the steepest places, and it should take a hour or so of steady climbing to reach the ridge just below the summit of the west peak (西峰). When you reach the ridge, you’ll see the remnants of an old stone temple building directly in front of you. Turn right and follow the windy ridge (watching out for the steep drops to your left towards the sea). After about 5 minutes you’ll reach a small emergency hut that marks the summit. If you look behind the small shrine, you’ll see an enormous rock formation with a handrail attached about 3/4 of the way up. Head behind the shrine and towards the right, where you’ll find a ladder and ropes that will assist in the near vertical climb to the top. The true summit has amazing views of  Uchiura bay directly below. On the right hand side of the peninsula you can see Takahama Nuclear Power plant. It’s unbelievable that such a structure was built in this beautiful bay, but that’s the reality of Japan. After admiring the views, retrace your steps back to the emergency hut and continue along the ridge (in the opposite way in which you climbed). The ridge between the west and east peaks is exciting: after descending steeply to the saddle, you’ll work your way through an area of metal ladders with amazing views of the valley below. It should take about 40 minutes to reach the summit of the east peak (東峰), which is marked by a shrine building. Just to the left of the shrine is a set of steps that descends to a flat area with a lot of benches. Be careful going down the stairs, as they are incredibly slippery (my butt is still sore from taking a tumble). The rest area makes a great place to relax for lunch, and at the far end there’s a rock formation that is chained off to keep people from entering. The views from this rock are nice if you climb over the chain (just don’t get too close to the edge). From here, the path heads towards the left (just before the rock formation). The trail is marked as 展望台まで 1.1km. It’s a very straightforward trail, winding its way through a beautiful forest on a series of wooden steps. Be sure to encourage those hikers you pass : the ascent from here really is tougher than the other approach (in terms of distance and vertical elevation gain, that is). In about 10 minutes you’ll come to a large rock formation. You can either skirt around it to the left or head up and over it. It’s worth climbing the rock for the views. After that, the path flattens out a little before climbing a small rise and descending steeply down the other side. Your next landmark will be another wooden shrine with a small clearing. There are a couple of benches here, but no real views to speak of. The real lookout tower is another couple of minutes down the trail, and there you’ll have outstanding views of Wakasa Bay and Tsuruga city. If you’re really lucky with the weather and visibility then you can also see Hakusan and the Japan Alps from here. After this, a bit of the beauty of the peak is lost, as you’ll pass by a couple of television antenna before entering a cedar forest and a junction, where a decision will have to be made. If you’ve driven to the mountain, then take the right fork marked for 高野 (Takano). If not, then stay on the ridge and follow the signs to Nakayamadera (中山寺), where you can grab a taxi or hitchhike to the nearest train station. I took the trail to Takano, and it’s easy to follow until reaching the village. From there, it’s a long walk on concrete roads back to Matsuno temple. There are no signposts, so it’s best to ask the locals about the best place to go. You could also try your luck hitching. The entire hike should take about 3 or 4 hours, depending on your speed and how many breaks you take.

When to go: This hike can be done year round, but you’ll want to be prepared for snow and ice during the colder months of January and February. The route is exposed in places, with ladders and ropes, so try to avoid wet conditons if you can.

Access:  Although very tricky to access, it can be done as a day hike from Osaka if you get an early start. The best (and cheapest) way is to take a highway bus from Hankyu bus terminal in Umeda to Higashi-Maizuru (東舞鶴) station. From there, change to a train on the JR Obama line and get off at Matsuno-odera (松尾寺) station. The train only takes 7 minutes, but the trains are few and far between. The bus takes about 2 hours, depending on traffic. There are also buses from Sannomiya in Kobe and from Kyoto station. Click here for the bus schedule) You can also access Higashi-Maizuru by train from Kyoto (90 minutes by limited express train). From Matsuno-odera station it’s a short taxi ride (or a 1 hour walk) to the trailhead.

Map: Click here , here, and here.

Level of difficulty: 4 out of 5 (elevation change ~400 meters)

Distance: 5km (3-1/2 to 5 hours)

This slideshow requires JavaScript.

Mt. Eboshi (烏帽子岳)

March 18, 2013

Mt.  Eboshi, or Shinto priest hat peak, is a knobby mountain perched on the northern shores of Lake Haruna in central Gunma Prefecture. The steep hike is filled with pristine forests, wild bamboo grass, and enticing views of the lake directly below.

eboshi9

The hike: From the bus stop, walk on the paved road (with the lake on your left), turning left to cross the bridge, and you’ll see a signpost reading 烏帽子岳登山口 about a hundred meters on your right. Follow the trail through the forest for a couple of minutes and you’ll come to a small Inari shrine adorned with hundreds of tiny ceramic fox statues. Just in front of the shrine you’ll see a dirt forest road. Turn right on the road and you’ll find a sign that reads 烏帽子山登山道入口. Turn left at the sign and follow the well-worn path for about 30 minutes as it climbs towards the ridge. The last 50 meters of the climb are along a series of wooden steps, but all-in-all it’s not too steep of a climb. When you reach the ridge, you’ll find a junction. If you turn left, there’s an alternate peak called 鬢櫛山, which is a steep 30-minute climb to the summit. Ignore this for now and turn right, passing through the red torii gate flanked by two stone fox statues. The route immediately steepens, with lots of stairs and a roped handrail to aid in the ascent. Be particularly careful in wet conditions, especially on the descent. After about 20 minutes, you’ll reach a giant rock formation with a shrine torii gate in front. This is where the mountain god resides. The path becomes a bit unclear at this point, but turn left when you reach this rock and you should see the trail climb steeply around the stone, with ropes tied to the trees for assistance. After this, the trail flattens out as you reach the summit plateau, which is overgrown with bamboo grass. In about 5 minutes you will reach the summit of Mt. Eboshi, which is covered in trees and doesn’t offer any views. If you continue walking on the plateau, and descent for a couple of minutes towards the lake side of the peak, you will reach a small clearing with a small cliff, which has fantastic views of the lake and the mountains of Chichibu. This is the best place to take a break. Once satisfied, retrace your steps back to the junction and consider climbing the other peak (鬢櫛山) before descending back down to the lake on the trail you came from. One option would be to do what we did: climb this peak in the morning, and follow it up with an afternoon ascent of neighboring Haruna-fuji.

When to go: This hike can be done year round, but you’ll need some 6-point crampons if hiking in January or February. Winter is the best time to see the mountains of Niigata Prefecture covered with snow, as the lack of foliage improves visibility from the forest-covered summit and the clear air means Mt. Fuji will likely be visible on the horizon.

Access: From Tokyo, take a train to Shibukawa (渋川), and transfer to a bus bound for either Ikaho hot spring (伊香保温泉) or Ikaho-Harunaguchi (伊香保榛名口) and get off at Ikaho Bus Terminal. From here, you can catch a bus bound for Haruna-ko Onsen Yuusuge (榛名湖温泉ゆうすげ), the start of the hike.  The buses are poorly-timed, so double-check both schedules before you set off, or consider breaking up the trip by staying at the hot spring. Click here for the bus from Shibukawa, and here for the bus that runs between Lake Haruna and Ikaho hot spring. Alternatively, if you’re staying in the area for a few days, then you can simply just stay at the Kokumin-shukusha (recommended), or the more expensive Hotel Yuusuge, which is more convenient for the hike. Either place will pick you up from the bus stop if you’ve taken the bus from Takasaki (see Mt. Kamon hike for a description of that bus route). From the Kokumin-shukusha, you’ll need to walk clockwise around 1/4 of the lake to reach the trailhead.

Map: Click here

Live web cam: Click here

Level of difficulty: 3 out of 5 (elevation change ~360 meters)

Distance: 3km (2 to 3 hours)

This slideshow requires JavaScript.

Mt. Yura (由良ヶ岳)

March 16, 2013

Rising from the mouth of the Yura river in northern Kyoto Prefecture, Mt. Yura is a fantastic day hike for those looking for wonderful ocean views on one side, and a sea of mountains on the other.

yura9

The hike:  When exiting the train, give your ticket to the train driver, cross the overhead pedestrian bridge, and exit the station, checking the return train timetable before leaving. There’s a restroom on your left as you exit the station, along with some benches where you can eat lunch or organize your gear. From the station, walk straight on the paved road in front of you, turning left at the first intersection you come to (about 50 meters from the station). After passing by the elementary school, take your first left, following the signpost that says Kokumin-shukusha (国民宿舎). Cross over the railroad tracks and continue following the road straight towards the peak. Mt. Yura looks intimidating from this angle, as the peak rises abruptly directly above. Take it one step at a time and you should be fine. When you reach the Kokumin-shukusha (a tan building with a red tile roof), turn right on the road behind the building. Here you’ll find a small shelter and the start of the trail. The path is divided into 10 stages (or 6 stages if you follow the larger signposts). The path is blocked by a steel fence used to keep deer out of the village. Unlock the gate, enter the path, and don’t forget to relock the gate behind you. The first part of the route is extremely eroded, with deep head-high ruts riveted out of the sandstone. Follow the channel up for about 20 minutes until reaching a false ridge (it’s a secondary ridge that will lead you to the real climb). Your next landmark will be a spur trail with a signpost marked for water (水). There is a stream where you can get water, but you’ll need to descend down to a valley to get it. Anyway, unless you’re really thirsty, ignore this trail and continue the climb. A short time later, you will arrive at the 4th stagepoint (4合目), which is a great place to take a break. Just off the path on your left, you can see the remains of a charcoal kiln which was used to make charcoal in the old times. From here, the real start of the climb begins, as you’ll enter a cedar forest with steep switchbacks. You’ll cross a dirt forest road twice (be careful with the crossings – they’re not well-marked). The views towards the sea will start to open up behind you, so don’t forget to look back every once in a while to admire the scenery. Eventually you’ll reach another water source labeled Ippai-mizu (一杯水). The water is a short walk to your left, but wasn’t much more than a trickle when I visited in March. Take another quick break here. You’re almost on the ridge, but the steepest part of the hike is yet to come. After leaving the water source, follow the switchbacks through the deciduous forest until popping out on the ridge. From here, the walk becomes much easier and more pleasant, as your walking on a stellar ridge with beautiful foliage. Turn right when you hit the junction, following the spine of the mountain to Nishi-mine (西峰), the highest point of Mt. Yura. It should take 10 to 20 minutes of gentle walking to reach the summit, where you’ll have amazing views of Amanohashidate and Kunda bay, with it’s wonderful crescent-shaped beach. You’ll also see a dubious-looking power plant run by Kansai Electric company. Apparently it’s an “energy research center”, but who knows what they’re doing at that place. I really hope they are properly disposing of their waste and not dumping it in the scenic bay. After soaking up the views, retrace your steps back to the junction, and continue on to Higashi-mine (東峰), which is a short but steep climb. The views from here are much better than from the other peak, with panoramic views of the sea, Mt. Aoba, Hakusan and the Japan Alps (clear days only), as well as just about every peak in Kyoto and Hyogo Prefectures. You’ll find a small shrine and jizo statue on the summit. This would be a pretty impressive place to camp if not for the lack of water and toilet facilities. When you’ve had enough of the views, simply retrace your steps all the way back to the train station. Be sure to time your descent to coincide with the train departure times. There’s not much to do in the town if you’ve got an hour to kill before the next train.

When to go: Due to the extreme heat of the Kansai region, this hike is best avoided in the summer months of July and August unless you want to die of heatstroke. Winter is also a challenge due to the generally poor weather, frigid winds, and deep snow drifts. The best time to hike is either spring (mid-March to late May) or autumn (mid-September to late November). A good way to break up the hike might be to stay at the Kokumin-shukusha at the trailhead, which costs ¥ 6700 with 2 meals. Here is the website.

Access:  Although a bit tricky to access, it can be done as a day hike from Osaka if you get an early start. The best (and cheapest) way is to take a highway bus from Hankyu bus terminal in Umeda to Nishi-Maizuru (西舞鶴) station. From there, change to a train on the Kitakinki Tango railway (located in the main JR station on the first floor) bound for Miyazu (宮津) or Toyooka (豊岡) and get off at Tangoyura (丹後由良) station. The train takes about 15 minutes and costs 310 yen. The bus takes about 2 hours, depending on traffic. There are also buses from Sannomiya in Kobe and from Kyoto station. Click here for the bus schedule and here for information on the train line. You can also access Nishi-Maizuru by train from Kyoto (90 minutes by limited express train).

Map: Click here

Live web cam: Click here

Level of difficulty: 4 out of 5 (elevation change 640 meters)

Distance: 8km (3-1/3 to 5 hours)

This slideshow requires JavaScript.

Utara Coal Mine Ruins (ウタラ炭坑)

March 5, 2013

The ruins of the largest coal mine on Iriomote Island, the 20-minute stroll is a great chance to get a taste of jungle hiking without the effort or discomfort of getting there.

utara5

The hike: From the bus stop, cross the street and walk though the parking lot. Instead of dropping down to the boat landing on your right, continue straight on and the concrete road will turn into a dirt forest track. You’ll soon see signs pointing to Utara Coal Mine (ウタラ炭坑), which is 1km from the parking lot. There are signs every 200 meters, so it’s impossible to get lost. Depending on when you go, you may very well have the entire trail to yourself, since most people opt for the boat ride. You can also rent a kayak at the boat landing and paddle up to the ruins, but I’m not sure if they’ll rent it to you without joining an expensive tour. Anyway, after a few minutes of hiking, you’ll come to a lookout point with fantastic views of the river below. A little further on the trail will drop down to meet Utara river, which it will follow for the remainder of the walk. There are places where you can drop down and observe the wildlife of the mangroves. At the end of the path, you’ll see some wooden stairs on your left which lead to an elevated wooden walkway. Follow this walkway to the end, and you’ll arrive at the ruins. There are explanatory panels here (in Japanese only), as well as a black-and-white photo of what the place used to look like. Apparently, the Imperial Army used slaves from Korea and China for the perilous work in the coal mines, during which time Iriomote Island was infested with malaria. The walkway is a good place to contemplate what life must have been like years ago. The rest of the area is heavily overgrown, but if you’re keen to do some additional exploring, then hop over the wooden railing and knock yourself out. Be careful of snakes, leeches, and other creatures that may be lurking in the deep.

When to go: This relatively flat hike can easily be done year round, and is great to do with kids. It’s also great to do after doing the Kanbiree hike, since you’re already in the area.

Access: From Uehara ferry terminal, take a bus bound for Shirahama and get off at Urauchibashi (浦内橋). The first bus is at 10:43am. Click here for the schedule. Otherwise, if you stay at Mariudo Guesthouse, they should be able to give you a ride to the start if you ask them. Hitching is also an option.

Level of difficulty: 1 out of 5 (a pretty flat walk)

Distance: 2km (40 minutes to 1-1/2 hours)

This slideshow requires JavaScript.

Mt. Souma (相馬山)

February 1, 2013

Mt. Souma is the second highest summit in the Lake Haruna area. The knobby peak is a steep, challenging climb with fantastic views of the entire Kanto Plain.

souma13

The hike: At the bus stop, look for the red shrine torii which marks the entrance to the trail. If you took the bus from Lake Haruna, you’ll need to backtrack about 50 meters to see it on the left side of route 33. If coming from Ikaho hot spring, then walk along the road away from the direction you came. Go through the series of shrine gates and follow the well-worn path through a forest of bamboo grass and deciduous trees for about 20 minutes until reaching a junction marked with yet another red torii. After climbing a small set of steps, the path takes a 90-degree turn to the right, but you’ll want to head left here, up the incredibly steep rock formations imbedded with rusty metal ladders and chains. This is the route to the summit of Mt. Souma, and it’s anything but gentle. Follow the tape marks up, over, and around the collection of boulders for about half an hour before reaching the summit, marked by a shrine building and Buddhist statues. The views to the east are outstanding, with the buildings of downtown Shinjuku visible on a clear day. You can also see most of the peaks of the Kanto region laid out before you (Mt. Tanzawa, Kumotori, Myogi, Fuji, Kobushi, Kinpu, Yatsugatake, The Minami Alps, Tateshina, and Asama just to name a few). After taking in the views, retrace your steps back to the junction and continue along the ridge towards Surusu-toge (スルス峠) and Haruna shrine (榛名神社). The trail drops to a saddle where you’ll have two options. You can either take the unmarked trail directly ahead, which sticks to the ridge, or you can veer to the right and follow the real path which bypasses the hills. The ridge course offers better views, but both paths meet up a little further on, so take your pick. After this, your next landmark is an roofed-shelter with open walls, which makes a good place to take a break. Just beyond this, you’ll find a trail breaking off the main ridge towards the right. This is the way off the mountain, but continue to the left for now until reaching the base of Surusu Rock. Here you’ll find a side trail on your left with a sign in Japanese reading “スルス岩行人洞3分”. Follow this path for 3 minutes and you’ll find a small cave lined with Buddhist statues and Chinese characters carved into the rock. After some quick photos, retrace your steps to the junction, turn left, and continue on the main trail for about 50 meters or so. Here you’ll find an unmarked trail on your left that leads steeply up to the rock formations. The path banks hard to the right until ending at the base of a metal ladder. Climb the ladder and you’ll find yourself on top of Surusu Rock. Be careful not to slip here, because the fall will likely kill you. The views towards Haruna-Fuji are stellar, and it’s a good place to contemplate life for a while (as long as you don’t suffer from vertigo) When you’ve had your fill, simply retrace your steps back to the unmarked junction. If you’re still fit and it’s early in the day, you can continue along the ridge for another 4-1/2 km or so to the lake. The route is relatively flat and will cross two hard-surfaced roads before climbing up to Mt. Tenmoku (天目山) and Mt. Himuro (氷室山) before ending at the main road at Tenjin-toge (天神峠). From here, turn right on the road and follow it for 10 minutes to Lake Haruna. You could also take a trail from the Tenjin down to Haruna Shrine, where you can catch a bus back to Lake Haruna or out to Takasaki. You’ll need to allocate around 4 hours from Surusu Rock to Tenji-toge. If you’re short on time, then retrace your steps to the junction between the Surusu Rock and the rest shelter and follow the spur trail as it descends to a vast meadow. From here you can walk out to route 33 and turn left to reach the lake, or right to return back to Yaseone-toge. The trail meets route 33 at an interesting area with a series of grooves cut into the asphalt. Wait for a car to head west and you’ll hear a song resembling Eensy Weensy Spider played out on the musical road.

When to go: This hike can be done year round, but you’ll need some 6-point crampons if hiking in January or February. Winter offers the best chance to see the smog-free skyscrapers of Tokyo, as well as clear views of Japan’s highest peak.

Access:  The trailhead is a 6km walk along route 33 from the lake. If you’re staying at the lake, then you can catch a local bus bound for Ikaho Bus Terminal (伊香保バスターミナル) and get off at Yaseone-toge (ヤセオネ峠). If you’re coming from Tokyo, then take a train to Shibukawa (渋川), and transfer to a bus bound for either Ikaho hot spring (伊香保温泉) or Ikaho-Harunaguchi (伊香保榛名口) and get off at Ikaho Bus Terminal. From here, you can catch a bus bound for Haruna-ko Onsen Yuusuge (榛名湖温泉ゆうすげ), which stops at Yaseon-toge.  The buses are poorly-timed, so double-check both schedules before you set off, or consider breaking up the trip by staying at the hot spring. Click here for the bus from Shibukawa, and here for the bus that runs between Lake Haruna and Ikaho hot spring.

Map: Click here

Live web cam: Click here

Level of difficulty: 4 out of 5 (elevation change ~300 meters)

Distance: 4km (2 to 3 hours)

This slideshow requires JavaScript.

Geeda Waterfall (ゲーダの滝)

January 21, 2013

Geeda waterfall is a three-tiered beauty with magnificant views over the jungle to the East China Sea. The river slog and accompanying climb are recommended for experienced hikers only unless you go with a guide.

IMG_5793

The hike: Once you cross Geeda bridge (ゲーダ橋), look behind the railing on the right side of the road and you can see the trail descending into the jungle. Be careful when coming by bicycle, because just before Geeda bridge is Nishi Geeda bridge (西ゲーダ橋). Don’t get the two bridges confused. If the bus driver lets you off at Omijya, then you’ll need to backtrack a few minutes to find the bridge. Enter the jungle and you’ll soon cross over the river and follow the right bank. After a couple of minutes, the trail ends at the edge of the river. From here you’ll basically need to spend most of the time in the river, alternating from the left to right banks. Basically choose whichever areas look stable and relatively safe to climb. You might find it useful in tricky areas to actually exit the river and follow through the overgrown jungle. I spent most of the climb trying to stay dry, but ended up spending the entire time in the river on the way back, since I was already wet from swimming. The water isn’t too deep, but there are a few waist-deep pools to watch out for. After 20 to 30 minutes of scrambling, you’ll reach the base of the 3-tiered waterfall. Instead of climbing up to the base, look on the left bank of the river for a trail through the jungle that will take you to the top of the waterfall. It’s marked with a pink ribbon that can be difficult to find, but just head up the steep incline. The path climbs steeply at first before descending to the top of the first tier. From here you can get a good view of the jungle with the sea beyond. The part of the climb to the second tier is tricky and vertigo-inducing, so do not attempt it if you’re not confident with climbing. The route continues climbing to the base of a cliff. When you reach this area, turn right and traverse the edge of the cliff before reaching an overgrown tree. You’ll see some ropes here, so hoist yourself up to the second tier of the waterfall. The views here and outstanding and the flat rocks make it an ideal place to take a break. If you’re still gungho, there’s an incredibly steep and dangerous trail to the left of the waterfall that will take you to top, but do not proceed if the rocks are wet, as you’ll have no traction. I turned back just before the top because I was alone, and didn’t have a rope and harness. After admiring the views, make your way carefully back down to the base of the first tier, where you’ll find a great swimming hole. After getting thoroughly soaked, head back down through the river back to the paved road and your waiting transport.

When to go: This hike can be done year round, but be sure to have good footwear. I did this hike in sandals and my toes got pretty beat up, so consider wearing some sawanobori shoes or Vibram 5-Fingers. You can rent wetsuit boots at Mariudo if you don’t have any. Hiking boots are pretty useless, since the trail pretty much runs straight up the river. Mariudo also runs half-day tours if you’re inexperienced. Climbing rope and a harness will come in handy if you choose to climb the final tier.

Access: Although there is no bus stop at the trailhead, the bus driver will usually let you off there if you tell him/her. Just ask to get off at Omijya (お見謝) Paakingu or Geeda hashi. Another option (which I chose) was to rent a bicycle and ride out to the trailhead from Uehara. If you’re staying at Mariudo Guesthouse then you can rent a bicycle there and ride the 6km to the trailhead. Just head downhill towards Funaura port and keep going. This might be a better option because of the limited bus schedule. If you’ve got a license then you can rent a scooter as well.

Level of difficulty: 5 out of 5 (elevation change ~100m)

Distance: 3km (1 to 4 hours, depending on how long you swim)

This slideshow requires JavaScript.

Mt. Kamon (掃部ヶ岳)

December 31, 2012

Mt. Kamon is the highest peak of the Lake Haruna area and a challenging hike with scenic views of Mt. Asama and the mountains surrounding the Kanto Plain.

923

The hike: When you arrive at the lake, it is important to get your bearings first. Directly across the lake is Haruna-fuji, the conical volcano which looks like a miniature version of Mt. Fuji. To the left of that peak, you’ll see a pointy knob called Mt. Eboshi. If you continue in a counterclockwise fashion around the lake, you’ll see a large gaudy hotel with an orange roof, and another hotel behind with a  green roof. Directly behind those buildings lies your target peak of Mt. Kamon. Walk along the main road past the souvenir shops towards the orange-roofed hotel. Just beyond the hotel, the main road forks. Don’t take the right fork towards the lake. Instead, continue on the left fork which leads to the entrance of Haruna Agatsumaso (the hotel with the green roof). You’ll find the trailhead directly past the sloped driveway entrance to the hotel. There’s a white sign on the white railing that says 掃部ヶ岳登山口。Walk up the concrete ramp and enter the forest. The path is really easy to find, meandering through the forest for about 10 minutes until reaching the ridge line. Here you’ll find a junction. Turn right here and climb for 5-minutes until reaching a rock formation called Suzuri Iwa (硯岩). The cliffs here afford jaw-dropping views of the lake below. Even though it’s still early in the hike, a break here is highly recommended to soak up the scenery. If you’re staying at Agatsumaso (also highly recommended), then you can easily hike up here to watch the sunrise before eating breakfast. After checking out the views, retrace your steps back to the junction and continue on the ridge towards your target peak. The route is covered with wooden logs built as steps to help aid your climb. It feels a bit more like a stair climb than a hike in parts, and after 30 minutes or so you’ll reach the top of the stairs which marks the beginning  of the summit plateau. This is distinguished by a signpost that says 掃部ヶ岳 0.2km. Remember this landmark on your descent, as it marks the junction of an alternative way off the mountain. Anyway, from here the trail becomes a series of ups-and-downs for the next 10 minutes until you reach the summit of Mt. Kamon. Take a well-deserved break here and admire the views. On a clear day you can see the skyscrapers of Tokyo, as well as all of the mountains of Chichibu, Mt. Myogi, and even the top of Mt. Fuji. Mt. Asama is also visible if you stand on the rocks on the top. Through the trees behind you, you should be able to spot Mt. Kusatsu-shirane, Mt. Naeba, and Mt. Tanigawa. In the winter it will be one continuous string of brilliant snow-capped peaks. Once you’ve had enough of the views, retrace your steps back to the start of the stairs and the 0.2km signpost. There’s also another option to continue along the ridge for a couple of hours to Mt. Sumon (杏ヶ岳), but beware that the trail is incredibly overgrown and difficult to navigate. Once back at the junction, you’ll see a faint trail leading down the other side of the mountain (just to the right of the signpost). Although the path is overgrown, it is somewhat easy to follow if you just keep your eyes out for the tape on the trees. You’ll find yourself swimming through waist-deep bamboo grass most of the way. About halfway down, the grass mysteriously ends at a rock formation. If you look to the right you’ll see some ropes which will be of some assistance to getting you past this tricky section. After this, the trail enters thick bamboo grass once again until reaching a steep forested area with a lot of fallen foliage. Continue descending through the woods, being careful not to slip on the volcanic mud if there’s been any precipitation recently. The path will eventually spit you out in a small park, with a small amphitheater and a monument to an old folk song written about Lake Haruna. From here the park connects with the main road, and you can retrace your steps back to the bus stop.

When to go: This hike can be done year round, but you’ll need some 6-point crampons if hiking in January or February. Winter is the best time to see the mountains of Niigata Prefecture covered with snow, as the lack of foliage improves visibility from the forest-covered summit and the clear air means Mt. Fuji will likely be visible on the horizon.

Access: From Takasaki station, take a bus bound for Harunako (榛名湖) and get off at the final stop. The bus leaves from bus stop #2 of the west exit of the station. Go out the ticket gates, turn right (past the tourist information center). Once outside, walk across the pedestrian bridge and down the stairs to bus stop #2. Buses depart hourly for the 90-minute journey to the lake, stopping halfway at the Gunma bus garage for a 10-minute toilet break. Click here for the bus schedule.

Map: Click here

Live web cam: Click here

Level of difficulty: 3 out of 5 (elevation change ~400 meters)

Distance: 2.5km (2 to 3 hours)

This slideshow requires JavaScript.

Mt. Taishaku (帝釈山)

November 28, 2012

Surrounded by serene broadleaf forests, Mt. Taishaku is a secluded peak in western Kobe city with wonderful views of Awaji Island and the Inland Sea. Even on weekends, you’ll find the lack of people a nice change from the hoards of hikers on neighboring Mt. Rokko.

The hike: If you need to use the toilet, then go in the large brown building next to the bus stop, since there are no other toilets on the entire hike. From the bus stop, walk away from the main road and into the small village past the cigarette and udon shop. After 50 meters, you’ll see a large thatched farmhouse on your left. Next to the farmhouse there’s a house with a giant tanuki statue outside. The 600-year old house is an Important Cultural Property and well worth the 300 yen admission price. After checking out the house, take the road that runs perpendicular to the house until you reach the river. Turn right and then left, crossing the concrete bridge over the river. Turn right when you reach the other side and you’ll see a large concrete building with large letters in katakana that read サイクリングターミナル on the roof. The trail starts just to the left of this building and is easy to miss since the signpost is small. Walk to the front of the metal gate that marks the entrance to the building and take the road on your left. You’ll see the trail near the rear of the building with a small sign that reads 丹生山登山口. The path dives into the woods and skirts past a small pond before winding up towards the ridge. The route is easy to follow and not too difficult, with views opening up the higher you get. After 20 minutes you’ll reach a false ridge and the trail will flatten out a bit before starting a longer, steeper climb. Your next landmark will be a small graveyard on the left side of the trail, marked with old stone graves and a couple of jizo statues. After another 10 minutes of climbing you’ll reach the ridge line and a junction for the main trail to Mt Tanjo (丹生山). Turn left when you hit this junction and you’ll reach the shrine in about 5 minutes. The shrine is built on top of the ruins of an old castle, and you can still see the castle walls as you make your way to the top. Before you cross under the shrine gate (torii) look to your right and you’ll see a trail that heads into the forest. This is the trail that you want to take, so retrace your steps after checking out the adjacent shrine. The views are pretty nice just to the left of the highest shrine building and there’s a giant maple tree one level below that is absolutely stunning in the autumn. The giant tree has a sister located next to the shrine gate and both trees are a must-see when the leaves change color. Once you’re back at the shrine torii, take the path that runs perpendicular to the gate that is marked as シビレ山・帝釈山. The route follows a concrete forest road to a saddle and then climbs up the other side of the ridge. Head towards the right, being careful not to take the path that heads straight ahead. There’s a small, handwritten brown sign that reads 帝釈山縦走路. There’s a bit of a gentle up-and-down for the next several minutes until the path takes a sudden dip and a sharp left. Be careful not to miss this turnoff, since it’s not well-marked. Your momentum will likely carry you forward on the wrong path if you’re not careful. When you hit the dip, bank hard towards the left, following the sign that reads 太陽と緑の道. Once past this tricky point, it’s a straightforward, gradual climb up to the summit of Mt. Taishaku, where you’ll have views out to the south towards Awaji Island and the Inland Sea. Unfortunately, the tree cover means you won’t be able to see Mt. Rokko or Kobe city unless it’s the dead of winter and the leaves are gone. The summit is marked by several small stone shrines and makes a pleasant place to kick back and enjoy your lunch. After a modest break, continue on the trail away from the direction you came. The path drops rather steeply and then banks hard to the left. There’s a trail straight ahead marked with blue tape, but ignore this and continue descending for about 5 minutes until the path flattens out and you reach a large junction. The path continues towards your left, but you’ll find a poorly marked trail on your right that looks a bit like an old road. It is marked by a small white metal sign with red Chinese characters that read 歩. Next to this sign you’ll see a tree with a red smiley face painted on it, topped off by yellow tape. This is your landmark, so turn here and descend into the forest. The route follows a dry creek bed that is covered with dried leaves and is incredibly rocky and steep. If there’s any place where you’re likely to turn an ankle it’s here, so descend with caution. After 20 minutes or so you’ll see a cave on your right in a flat area. There’s an unmarked trail that leads off to your right at this point. This area used to be a coal mine, and if you climb this unmarked trail for a few minutes, you’ll see one of the old mine shafts. The mine is big enough to enter, but you’ll need a flashlight and you should watch out for wild boar, who probably live in the old caves (I advise against entering the mine shaft without proper spelunking experience). After checking out the cave, retrace your steps and continue descending down the valley. You’ll soon reach a small river. Cross the river and follow the overgrown path on the other side. In another 5 minutes you’ll reach an unmarked forest road. Instead of taking this road to the left and down towards the river, head straight ahead and follow the road as it climbs gently up to a mountain pass and then flat for about 15 minutes until connecting with another road. When you hit this next road, turn left and go past a couple of abandoned vehicles on the left side of the road. You’ll soon reach yet another junction, so turn left here and follow the handwritten sign that says 丹生会館. It should take another 20 minutes of descending on a route dotted with old stone markers to reach the village below. You know you’re getting close when you enter a bamboo thicket. Once you hit the road, turn right and follow it straight past some persimmon trees and rice fields until reaching the main road. You’ll see the bus stop on your left, and you can take the bus back to Minotani station. All in all it should take about 4 hours or so to complete the loop, depending on how many breaks you take.

When to go: Autumn is by far the best season to do this hike, as the mountain comes alive with brilliant hues of yellow. The shrine on the peak is home to two giant mountain maple trees whose leaves change from green to yellow to red. It has to be seen to be believed. Summer is hot and sticky, with heaps of mosquitos.

Access: From Umeda station in Osaka, take an express train on the Hankyu line bound for Shinkaichi (新開地) and get off at Shinkaichi. From there, change to the Kobe Dentetsu Line and take a train bound for either Sanda (三田) or Arima Onsen (有馬温泉) and get off at Minotani (箕谷) station. You might find it faster to take an express train to Suzurandai first and then change to the local, since Minotani is only 3 stops further on. There’s also a direct bus from Sannomiya to Minotani, so take your pick of public transport. From Minotani station, go out the ticket gates, and walk downhill for a couple of minutes to the bus roundabout. From there, take bus #111 bound for Tsukihara (衝原) and get off at the last stop. There’s one bus an hour, so try to line up the train and bus schedule so you don’t have to sit around waiting long. Click here for the bus schedule.

Level of difficulty: 3.5 out of 5 (elevation change ~400 meters)

Distance: 7km (3.5 to 4.5 hours)

This slideshow requires JavaScript.