Posted tagged ‘blogsherpa’

Mt. Hiko (英彦山)

July 26, 2011

Hikosan is a sacred peak nestled on the border of Fukuoka and Oita Prefectures in northern Kyushu. Unlike its volcanic neighbors, the peak is known for old growth cedar trees, rustic shrines carved into cliffs, and an ambiance you’d expect to find in the hills of Kansai.

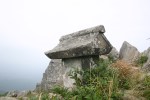
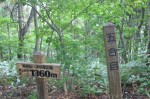
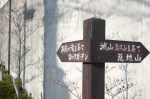
The hike: Please note that you can also start this hike from the back side of the mountain at Buzenbou, but you’ll miss out on the impressive shrine at the top of the slope car. From the bus stop, walk a few meters in front of the bus and on your right you’ll see a huge bronze shrine gate with the characters “英彦山” carved on the front. Follow this stepped-stone path all the way to the terminus. It should take about 20 minutes of steep climbing to reach the top of the stairs. Here you’ll find the immense, bark-roofed shrine of Hikosan-Jingu. On the stone path to the shrine you’ll find plenty of stone lanterns and a rather rustic thatched teahouse on your left. It all reminds me a bit of the scenery in Kyoto, somehow magically transformed to the hills of northern Kyushu. If you’re feeling really lazy, then you could just skip this first step and board the futuristic slope car up to the shrine, but it’ll set you back 500 yen. Anyway, once at the shrine, you’ll find a path leading towards Nakadake (中岳) just in front of you. The path is very well worn and it’s just about impossible to get lost. You’ll start by meandering through the forest via a series of switchbacks until reaching Chuuguu shrine (中宮). After this, the path starts to flatten out a bit, and it really starts to open up just before Musubi shrine (産霊神社). Here you’ll once again start following the stone steps through a grassy area with lots of dead trees. At the top of the stairs you’ll reach the summit of Nakadake (中岳), where you’ll find a large, weather-beaten shrine building. Take a quick break here and admire the views down the valley. There’s a junction here, so turn left if you want to climb to Kita-dake and descend to the bus stop at Buzenbou. Otherwise, turn right and drop steeply to a saddle before climbing up to Minami-dake (南岳), Hikosan’s highest point. There’s not much of a view here, unless you climb the rusty metal lookout tower that is officially off-limits. I wouldn’t trust that thing with my weight and I really wish the prefecture would spend some money to remove that thing. Make sure you rest the knees here, as things are about to become a bit tricky. If you’ve got vertigo, then definitely skip this next section and retrace your steps back to the shrine. The path drops steeply off of Minami-dake’s rocky face. There are plenty of metal chains to help you through the gnarly sections, but this is definitely not a place you’d want to fall. Take your time and definitely make sure you go down the chains backwards, as it’ll help you with balance. Luckily the chain section is relatively short, and you’ll find yourself back in the forest soon enough. Now, at your first junction you’ve got a decision to make. If you take the path to the left through the downed trees, then you’ll reach an 1200-year old cedar tree. If you ignore this path and continue straight and take your first left, then you’ll reach Daiminami Shrine (大南神社). From the shrine you can take a path down to the cedar tree. I must admit that I took the initial left and ended up missing Daiminami Shrine completely. It helps to have a detailed map in this place. Anyway, the name of the tree is called Onisugi (鬼杉) and it’s a sight to behold. Just to the left of the tree you’ll find a large rock outcrop, and this is the path you want to take. Don’t take the trail leading away from the tree towards the south or you’ll end up on a forest road. The path skirts the edge of the rock cliff before climbing up towards Tamaya shine (玉屋神社). Just before the shrine, you’ll find an unmarked junction. Turn right and you’ll climb a set of stone stairs to the front of the shrine. If you’re staying at Shakunage-sou (しゃくなげ荘), then take this unmarked path down to the forest road and turn right for the easy walk to the lodge. Shakunage-sou is highly recommended, with spacious rooms, tasty meals, and a wonderful hot spring bath. If you’re just visiting Hikosan for the day, then continue to Tamaya shrine and take the path passing in front of the building. This route will take you all the way back to Houheiden (奉幣殿) at the top of the slope car. All in all, it should take about 4-1/2 hours to complete the entire loop.

When to go: This hike can be done year round, but you’ll need to be prepared for ice and snow during the winter months. The autumn foliage is spectacular, but so are the crowds.

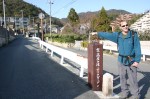
Access: From Kokura (小倉) station, take a train on the JR Hitahikosan Line and get off at Hikosan (彦山) station. From there, change to a bus bound for Buzenbou (豊前坊) and get off at Kane-no-torii (銅の鳥居). The front of the bus usually just says Hikosan (英彦山) and it’s usually timed to meet up with the infrequent trains. Click here for the bus schedule.

 Live web cam: Click here

Map: For once there’s no shortage of decent maps! Click here for an printer-friendly illustrated color map, and here for a more detailed topo map.

Level of difficulty: 4 out of 5 (elevation change 570m)

This slideshow requires JavaScript.

Mt. Shiraga (白髪岳)

May 22, 2011

Mt. Shiraga is a bald, rocky peak sandwiched between Sanda and Sasayama cities in central Hyogo Prefecture. The unspoilt panoramic views and tranquil forest make it one of Kansai’s hidden treasures.

The hike: Go out the only exit at Furuichi station and turn right on the road in front of you. Hang a quick left at the first road you come across, followed by a right on the main street through town shortly after that. You’ll pass by a few old houses before reaching the railroad tracks. After crossing the tracks, the road merges with route 372 and you’ll see an elevated walkway on the right side of the street. The walkway parallels the road and is about 1.5 meters above the street. The road bends to the right and the elevated walkway ends. As soon as it ends, take a right on the street running through the countryside. You should see a small sign white sign that says “白髪岳●松尾山 住山ルート”.  The road passes through a lot of fields and a few thatched farmhouses. There’s very little traffic, so it’s a nice taste of country life. Follow this road for roughly 45 minutes, and you’ll reach a fork in the road. Just before the fork, you’ll find a huge billboard-sized map (案内図). Turn left at the fork, following the sign that says “白髪岳方面”. The deserted forest road passes through an orchard before climbing up into the forest. It should take about a half-hour to reach the trailhead near the end of the forest road. If you’re coming by car, then you should be able to drive this far, though the road is rough and there’s not much parking here. Anyway, you’ll find a small gazebo and a water source here, so fill up your bottles. The path starts next to the gazebo and follows the stream for a short way before suddenly and quickly veering off towards the right, into a cedar forest. The path climbs quite steeply at first before reaching a junction. Turn left at this junction, traversing along the side of the mountain and into a beautiful virgin forest. The trail winds its way though the trees until reaching the ridge line. It’s a pretty short climb but somewhat steep. Once you hit the ridge, you’ll find a nice lookout with a wooden bench. Take a rest here, because things are about to get a little challenging. You can see the rocky summit of Shiraga in front of you, so keep climbing up the ridge until reaching your first set of rock formations. Ropes will assist in making the ascent somewhat easier, but be careful not to bang your knees on any boulders. After a series of false summits and narrow rock passages, you’ll pop out on the summit and be rewarded with a spectacular panoramic view of most of the mountains in Hyogo Prefecture. The top is surprisingly spacious, with lots of rock formations to relax and enjoy your lunch. If you’ve come during the week, you’ll more than likely have the entire place to yourself. After taking a rest, continue scrambling on the rocks away from the signpost and you’ll find a trail descending down the northern face of the mountain. This trail is quite tricky in the winter when there’s snow and ice, but otherwise manageable thanks in large part to the ropes tied to the trees. The knee-knocking descent is short but sweet and you’ll soon be sitting on a saddle. Take the trail to the right that skirts the large peak in front of you. This trail will meet up with the main ridge after about 10 minutes. Continue hiking on the ridge towards the east, following the signposts for “松尾山山頂”. You’ll be able to glimpse across the valley on your right towards the peak you just came from. The route will reach another saddle, with a trail branching off towards the left towards 文保寺. Ignore this trail, as well as the path to the right, and follow the steep path just to the right of the sign that says 鐘掛の辻. After a sweaty 10-minute slog, you’ll pop on on the summit of Mt. Matsuo. The views aren’t as great as on Mt. Shiraga, but the history makes up for it. There used to be an old castle up here, and you can still see some of the foundations in places. From the summit, head south, following the sign that says 卯塔群より住山. The path drops past a really old cedar tree before reaching a rock outcrop. The outcrop is a little off the trail to your left, so look out for it. There are really nice views into the valley below, so it’s a nice place for a break. Continue descending on the ridge and after 30 minutes or so you’ll reach a clearing with a lot of old jizo statues. Don’t take the trail that goes down the other side of the statues. Instead, take a sharp left turn on the path that is marked 高仙寺本堂跡より住山へ. The trail cuts through a dense forest before arriving at the temple ruins. There are two sets of ruins, and at the last one you’ll find a path on your right marked 不動の滝より住山へ. The route drops quickly to a beautiful moss covered waterfall. This is the perfect place to meditate and ponder about life. From here it’s an easy descent down to a forest road. Once you reach the tea fields on your left, the path meets up with the paved road again, which will take you all the way back to the station. If you’ve met any other hikers on the trip, then you might want to ask them for a lift to the station. All in all it should take about 6 hours to complete the loop, depending on your pace.

When to go: This hike can be done year round, but bring a light pair of crampons in the winter, as the northern face of the peak can get quite icy. Autumn is the best time to view the foliage, but winter usually has the clearest skies.

Access: From Osaka  (大阪) station, take a kaisoku train on the JR Fukuchiyama line (福知山線) bound for Sasayama-guchi (笹山口) and get off at Furuichi (古市) station. The train ride takes about 1 hour. You can also take the JR Tozai (東西) line from Kyobashi (京橋) station if you’d like. Take note that Furuichi is an unmanned station.

Level of difficulty: 3 out of 5 (elevation change ~500m)

Distance: 12km (5 to 7 hours)

This slideshow requires JavaScript.

Mt. Kuro (黒岳)

February 8, 2011

For up-to-date information about Mt. Kuro and the Lake Kawaguchiko area please consider purchasing my guidebook to the Japan Alps. 

Mt. Kuro is the highest mountain in the Misaka mountain range running along the southern shores of Lake Kawaguchi. It’s also about 100 times less crowded than neighboring Mitsutoge, and the scenery is just as good. The hot spring bath at the end of the hike is an added bonus.

The hike: From the bus stop, cross the main road running through the tunnel (don’t go in the tunnel) and head up the small forest road running perpendicular to the main road. After 5 meters you’ll see a road/path on your left signposted for Misaka-toge (御坂峠). Turn left here and head up the road to a large signboard with a map that says Kawaguchi-no-mori (河口の森). There’s a faint trail on your left but do not take this. Instead head up the forest road. The road meanders up into the mountains before passing by a couple of concrete dams. The road eventually turns into the trail and becomes quite nice, rising through beautiful virgin forest with views of Mt. Fuji through the trees. The path is easy to follow, and after 80 minutes of climbing you’ll reach the mountain pass and the main ridgeline for the Misaka range. You’ll find a sheet metal hut and some bilingual signposts. There’s plenty of open space to sit here, as well as a toilet behind the boarded up hut. Turn left on the ridge line, climbing past the mountain hut. The path starts off pretty gentle before reaching the start of a rather steep and somewhat rocky climb. This is in fact the final climb to the summit, so push ahead steadily and you’ll be rewarded for your efforts. The maps say to allow an hour from the pass to the summit, but I did it in about 35 minutes. Just before the top, you’ll see a signposted trail on your right. Ignore this and continue straight ahead for about 50 meters before reaching the top of Mt. Kuro. You’re about 10 meters higher than Mitsutoge and will more than likely have the place to yourself. On the summit, you’ll see a small sign that says 富士山、河口湖が一望できる場所あり pointing to the left. Take this small trail running away from the ridge for 5 minutes and you’ll reach a rock outcrop with fantastic views of all of Lake Kawaguchi and Mt. Fuji. You can even see the Minami Alps if you look to the left. While the views are not panoramic, they sure beat the antenna-filled carnage of Mitsutoge. Take a break here, because your knees are about the get an unforgettable workout. You’ll see an unmarked trail running just to the left of the rock outcrop, so take this trail for about 25 meters and you’ll see a small signpost nailed to a tree that says Eboshi-iwa (烏帽子岩). If you see this, you know you’re on the right trail. The path descends very steeply. If there’s any snow then the crampons will come in quite handy. Despite the lack of crowds, the route is pretty well-maintained. Every so often you’ll see a green signpost reading Hirose (至広瀬), so just follow the signs. There are plenty of fixed ropes to help in the steeper areas and after about 40 minutes of descending, you’ll reach a junction with a small sign that says Misaka tunnel (御坂トンネル). This trail will take you back to the bus stop where you started. If you’re not comfortable with the descent so far, then this is a viable escape route. Otherwise, turn right here and continue following the green Hirose signs. There’s one tricky part in the descent, where you’ll reach a rock traverse. The path is eroded below the rocks and there are no ropes here to help you. Instead of trying to risk traversing the slippery-looking rock, try climbing towards your left to the top of the rock formation. From here, you’ll find some fixed ropes to help you through the section. It’s the only dodgy part of the hike, but once you’re past it then it’s smooth sailing. As you drop closer and closer to the lake, the trail becomes a bit straighter and steeper, but there are ropes here to help you. The final 100 meters down to the end of the trail is quite amusing, especially in late autumn or winter when the foliage had fallen. The leaves are nearly waist-deep in places, and you’ll spend more time on your butt than on your feet, but just keep holding onto the ropes and let gravity take its toll. I know it sounds dangerous but it’s actually quite enjoyable. Anyway, once you reach the bottom, turn right and cross the creek over to the paved road. Turn left on the road and the first building you come to on your right is the hot spring! After a therapeutic soak, head down the paved road to the bus stop, where you can catch a bus back to Kawaguchiko station.

When to go: This hike can be done year round if you bring some crampons. Winter is indeed the best time to view Mt. Fuji, but if there’s any snow then be careful on the incredibly steep descent down to Hirose (広瀬)

Access: From Kawaguchiko (河口湖) station, take a bus bound for Kofu (甲府駅) station and get off 三ツ峠入り口 (Mitsutoge-Iriguchi). Alternatively, you can take a bus bound for Tenkachaya (天下茶屋) and get off at the Mitsutoge-Iriguchi stop. The Tenkachaya bus runs from April to November (weekends only), so if you’re hiking in the winter, go for the Kofu bus. Pick up a handy bilingual bus schedule from the tourist information center. Click here for the Kofu bus schedule and here for the Tenkachaya schedule.

Live web cam: Click here

Level of difficulty: 4 out of 5 (elevation change 783m)

This slideshow requires JavaScript.

Mt. Yufu (由布岳)

January 30, 2011

Mt. Yufu is a massive volcano towering over the idyllic hot spring town of Yufuin. The views from the summit are impressive on the rare day when the cloud isn’t in.

The hike: After exiting the bus, turn left and walk along the road a few meters, and you’ll see the entrance to the trail on your right. The first part is a vast meadow with views of Mt. Yufu towering above. There are several trails in this area. Take whichever you like, but make sure you head towards the forest under Mt. Yufu and not up the bald conical peak to your left. You should reach the edge of the forest in about 10 minutes or so. There’s a trail branching off to the right, but ignore this trail and head straight ahead. The woods are quite beautiful and surprisingly quiet, and the path meanders a bit before shooting off towards the left and up to the ridge line. At the junction, you’ll find a couple of places to sit down. This junction is marked on the maps as 合野越, but I don’t recall any signposts indicating this name. Take a breather because the real climb is about to begin. Take the trail to the right, where you’ll soon start the first of many switchbacks. How many, you ask? Well, I basically stopped counting after 40! The route is well-trodden and impossible to get lost as long as you follow the switchbacks. The views will gradually start to open up as you climb higher above the valley. In no time you’ll have a view directly down into the grassy crater of Mt. Iimorigajou, with the town of Yufuin beyond that. As you reach the saddle below the peak, the switchbacks become shorter and steeper, with the last few meters up a series of large steps built to keep erosion at bay. Once at the junction, you have two options. You can either turn right and climb to the summit of Higashi-mine (東峰) or turn left for the treacherous ascent of Nishi-mine (西峰), the higher of the two. If you have any fear or heights or no confidence using metal chains, then I recommend opting for the safety of Higashi-mine. Otherwise, turn left at the junction. Immediately after climbing, you’ll reach your first set of chains. If the cloud is in, then it could easily be mistaken for one of the trickier sections of the Japan Alps. There’s a fair amount of up-and-down between here and the summit, so follow the paint marks, chains, and crowds if there are any. After around 15 minutes you’ll reach the summit of Nishi-mine, where the views are supposedly spectacular. I spent the entire climb in the clouds, so hopefully you’ll be luckier that I was. If you’ve got time, then you can actually do an entire loop of the crater, taking in Higashi-mine before descending back down to the saddle. Just continue on the path you haven’t taken from the summit. The maps recommend one hour for the loop, but I wouldn’t recommend doing it if visibility is poor. If you’re short on time, then simply retrace your steps back through the danger zone of the chains and back down to the saddle. Descend down the same switchbacks you used to climb the mountain, and amuse yourself by trying to determine the precise number of switchbacks. Once you’re back at the junction of 合野越, instead of turning left to head back to the parking lot where you started, take the faint, overgrown straight ahead that leads towards Iimorigajou (飯盛ヶ城). Follow the path for about 50 meters before reaching a rather large clearing. This is actually an old forest road, and you’ll see an unmarked and incredibly steep trail directly in front of you that leads to the summit of Iimorigajou. It only takes about 5 minutes to reach the summit, and the views are totally worth it. With all of the lush greenery, it’s a splendid place to take a break and admire both the view of Yufuin and of the towering volcano you just finished climbing. After admiring the views, retrace your steps back to the forest road and turn left. After a few minutes of descending, you’ll see a white sign that says 湯布院町に至る、西登山道、岳本. The trail branches off towards the left and, honestly speaking, is a bit difficult to follow. Scattered throughout the grasslands are red signs reading 西登山道 and the grass is greatly overgrown. If you’re not up for the adventure, then never fear, because if you stay on the forest road then it’ll lead you to the junction. Whichever route you decide to take, once the trail intersects the forest road again, you’ll see a path heading into a cedar forest with a signpost marked for Takemoto (岳本). Follow the path through the forest and watch out for spider webs. Eventually, the path will end behind a series of greenhouses. Turn right when you hit the paved road and then a left at the first junction and you’ll descend to a larger road with a Lawson convenience store. Walk over to the Lawson and take the road next to it that descends towards the town of Yufuin. Take your first left and you’ll arrive at a small lake and the wonderful thatched-roof bath of 下ん湯. Drop 200 yen in the honesty box and enjoy the angelic hot-spring waters. After a soak, you can walk through the touristy town back to the station in about 25 minutes.

When to go: This hike can be done year round if you bring crampons and an ice axe in the winter. The final climb to Nishi-dake should not be attempted in icy conditions. November is the best time to see the autumn colors.

Access: From Yufuin bus center, there are regular buses to Beppu that stop at Yufuin Tozanguchi (由布岳登山口). The bus takes about 15 minutes and costs 360 yen. Yufuin bus center is about 20 meters east of JR Yufuin (由布院) station. Go out the main exit and walk down the main street running perpendicular to the station. The bus center is on your left. Click here for the bus schedule.

Map: Click here

Live web cam: Click here and select ライブカメラ

Level of difficulty: 4 out of 5 (elevation change 813m).

This slideshow requires JavaScript.

Mt. Ryuu-ga-take (竜ヶ岳)

January 4, 2011

Ryuu-ga-take, otherwise known in English as dragon’s peak, is a serpent-shaped mountain towering over Lake Motosu at the western end of Mt. Fuji. It is best known as a vantage point for seeing the ‘Diamond Fuji’ phenomenon on New Year’s Day. Oh, and the unobstructed views of Fuji aren’t half bad either.

The hike: From the bus stop, cross the main road and head down the street that runs perpendicular to the main road (there’s a traffic light here). The road descends towards the lake and after 5 minutes, you’ll see a restaurant and gift shop called Motosu-kan (本栖館) on your left. Cut through the parking lot of the restaurant and head down the concrete stairs towards the lake. You’ll see a restroom and another parking lot. Head to the shore of the lake and take a left towards the “yellow submarine” called Moguran. Once you reach the submarine-shaped tourist boat, turn left and head up to the paved forest road. Turn right on the road and walk about 200 meters until you reach the entrance for the campground (本栖湖キャンプ場). Turn left and enter the campground. During the winter this place is deserted, but it must be a hub of activity in the summer. Follow the white signs that say Ryuu-ga-take Tozandou Iriguchi (竜ヶ岳登山道入口) The path makes multiple turns through the campground, so make sure you follow the signs. Once you reach a forest road the path will appear on your left. Make a sharp 180º turn and start climbing through the forest. There are numerous switchbacks and if you imagine this peak as a dragon, it truly feels like you’re climbing on the tail of a dragon. The views down to Lake Motosu will quickly open up, and after about 20 minutes of steady climbing you should get your first views of Mt. Fuji. Once you reach the top of the ridge line you’ll find a wooden bench with a stellar view of Japan’s highest peak. Take a break here, as the bulk of the climbing is yet to come. The trail veers towards the right and flattens out somewhat before climbing through bamboo grass towards a large clearing with a wooden, covered viewing platform. If climbing in the rain, you’ll appreciate the small break from the elements. Just in front of the platform, there’s a small wooden building housing several ancient stone Buddha statues. Say a quick prayer before starting the final push towards the summit. Again, imagine you’re climbing a dragon. You’ve already climbed up the tail and now you’re heading straight up the spine of the beast towards the head. There are numerous switchbacks that make the climbing easier and the unobstructed views of Mt. Fuji directly behind you will quickly make you forget about the sweat wicking off your body. If it’s been raining or snowing recently, then the track will more than likely be one slippery, sloppy mess, so be prepared for muddy feet. It should take about 40 minutes or so to reach the summit plateau, where you’ll have a view of not only all of Lake Motosu, but also the Aokigahara-Jukai forest, the western tip of Lake Kawaguchi, and Mitsutoge, with the mountains of Chichibu-Tama-Kai National Park rising behind. You’ll soon reach a junction on your right which is an alternative way back to the campground. You can take this path on the way down if running short on time. Continue climbing on the ridge for 5 more minutes until reaching the high point of the peak. They’ll be a weathered signpost as well as a couple of picnic tables. Take a break here and admire the million dollar views. If you’re lucky then you can see the Minami Alps and Yatsu-ga-take rising up beyond Lake Motosu. From the summit, head past the signpost towards the west and not back the way you came. The trail follows the bamboo grass a short distance before descending rather steeply through a beautiful forest. After a few minutes you’ll reach a clearing and the trail will veer off towards the right. You can see the mountain pass directly below you and if you look off in the brush to your left, you’ll see the remnants of the old trail with a lot of wooden steps. If the path is muddy then I recommend opting for the steps (but watch out for the bushes with thorns). Both paths meet at the bottom, so if you can’t find the steps then take the switchbacks. Once you reach the saddle, the path continues climbing directly in front of you, with Mt. Fuji on your left. After 10 minutes or so, you’ll see a small white signpost with the letters Hashita-touge (端足峠). Turn right here away from the ridge on what appears to be an old forest road. This trail will traverse along the edge an adjacent peak before descending down to Lake Motosu. The trail is easy to follow and is stunningly beautiful during autumn. It should take about an hour or so to reach the shore of the lake. You’ll reach a junction, but ignore the trail to the left and follow the sign that says Motosuko-kohan (本栖湖湖畔). After a few ups and downs, you’ll reach another junction, where you’ll have 2 options. You can either turn left here and descend to the paved forest road or stay on the more scenic (but more strenuous) trail in front of you. If you’ve got the energy, I recommend staying on the trail. It should take another hour or so to reach the campground where you started. At one point, you’ll reach a junction which has a sign for Ryuu-ga-take pointing directly in front of you and a set of stairs leading down to your left to the forest road. This is the place where you’ll want to drop down and take the road back to the bus stop where you started. All in all, it should take about 6 hours to complete this strenuous but incredibly scenic loop.

When to go: This hike can easily be done year round, but you might want to bring a pair of light crampons if hiking in the winter. If you want to watch the sunrise over the summit of Mt. Fuji, then go during the last week of December or the first week of January. You’ll need your own transport for the sunrise hike, however, as the first bus doesn’t arrive until 10:07am. Be warned that this is an extremely popular hike on New Year’s Day for the first sunrise.

Access: From Kawaguchiko  (河口湖) station, take a bus bound for Shin-fuji (新富士) station and get off at Motosu-ko Iriguchi (本栖湖入り口). If coming from Osaka, it is faster to take the shinkansen to Shin-fuji station and catch the bus from there. The tourist information center at Kawaguchiko station has bilingual copies of all the bus timetables in the area. Click here for the bus schedule.

Live web cam: Click here

Level of difficulty: 3 out of 5 (elevation change 550m)

This slideshow requires JavaScript.

Mt. Akita-Komagatake (秋田駒ヶ岳)

December 20, 2010

Mt. Akita-komagatake is the highest mountain in Akita Prefecture and easily one of the most picturesque. The views down towards Lake Towada are incredible on a clear day, and the wildflowers are some of the best in the Tohoku region.

The hike: From the bus stop, head past the entrance of the souvenir shop to the fountain that doubles as a water source. Fill up your bottles here, as there are no other reliable water sources on the hike. The trail starts to the right of the water. After 5 meters of walking, you’ll see a trail on your left, but ignore this and head straight. The path will curve off to the right, climbing a gentle spur towards the summit plateau. The path looks a bit like a volcanic forest road, with colorful lava rocks and an immense collection of wildflowers. After about 15 minutes of climbing, the mound-shaped peak of Mt. Oname (男女岳) will come into your view. The trail wraps around the northern flank of the peak before flattening out at a splendid volcanic lake. The reflections of the peak in the water are phenomenal when the weather is clear. At the far side of the lake is a mountain hut, so follow the wooden planks and drop your gear out front. This hut was locked when I climbed in August 2010, so I’m not sure whether you’re allowed to stay here or not. It should have taken anywhere from 30 to 50 minutes to reach this hut, depending on your speed. Follow the steps (and the crowds) up to the summit of Mt. Oname, the highest peak in Akita prefecture. The peak overlooks Lake Tazawa, as well as the distant peaks of Mt. Iwate and Mt. Chokai. After a few obligatory snaps, retrace your steps back to the hut and walk back along the lake as if you were going to descend back down to the parking lot. On the left side of the lake you’ll find a trail branching off to the left with a signpost for Odake (男岳). In 5 minutes, you’ll reach the ridge line. Turn right and start the steep, rocky climb towards the twin peak of Akita-koma. This climb is a lot more strenuous than the ascent of Mt. Oname, but the views down towards the grassy crater of Ko-dake are well worth the extra effort. After reaching the top, retrace your steps back to the saddle. Instead of turning left back down to the lake, keep climbing straight ahead on a path labeled on the maps as the “horse’s back” (馬の背). The narrow path lives up to its name, with steep drops on both sides and a panoramic view of lush, verdant peaks all around. It should take about 10 minutes of sweaty climbing to reach Yoko-dake (横岳). Turn left here and follow the ridge up and over the scree fields of Yakemori (焼森). If you’re tired, then there’s a trail on your left that leads down to the parking lot of Hachigome in about 40 minutes. Otherwise, start the long descent and even longer climb towards Mt. Yumori (湯森山). At the bottom of the descent there’s a small stream marked as a water source on the map. I’d recommend bringing a water filter in you’re planning on relying on this water. It should take about 40 minutes from the water source to reach the summit, where the views back towards Mt. Oname are entrancing. Here you’ll have to make a decision. If you want to continue all the way to Nyuto-dake and down to Nyuto Onsen, then you’ve still got 4 to 5 hours of long hiking in front of you. I recommend turning left here for the 20 minute stroll to the peak of Sasamori (笹森山), which has one of the best alpine grasslands in the entire area, filled with a wide assortment of wildflowers. From here it’s a 30 minute descent back to Hachigome. The trail drops steeply to a mountain stream and then climbs up towards the bus stop. All in all, it should take between 4 to 6 hours to complete the entire loop.

When to go: This hike can be done from early June to late October, when the buses to Hachigome are running. Please note that private cars are not allowed at the trailhead, so you’ll have to park at Arupa-Komakusa and take the bus along with everyone else. A winter ascent is also possible with the right gear and experience. Click here and here to see 2 different Japanese blogs.

Access: From Tazawako (田沢湖) station on the Akita Shinkansen, take a bus bound for Komagatake-Hachigome (駒ヶ岳八合目) and get off at the last stop. The bus takes about an hour and runs from June 1st to October 31st. Click here for the bus schedule. You can also take a bus bound for Nyuutou-Onsen (乳頭温泉) and change to the Hachigome bus at Arupa-Komakusa (アルパこまくさ) bus stop. Click here for the Onsen bus schedule.

Live web cam: Click here

Map: Click here

Level of difficulty: 2 out of 5 (elevation change 337m)

This slideshow requires JavaScript.

Mt. Himekami (姫神山)

September 25, 2010

Mt. Himekami is a inverted wedge-shaped peak situated roughly 20km north of Morioka city in Iwate Prefecture. The views of Mt. Iwate and the alpine flora make this area a hit with locals throughout the year.

The hike: From the parking lot, head up the trail past the toilet block of the small campground. After around 5 minutes you’ll enter the forest and cross the dirt forest road. This is where the trailhead proper starts and where the taxi driver will drop you off unless you say otherwise. The path is well-trodden and easy to follow. Meander through the cedar forest for a few minutes or so and you’ll come to a large cedar tree and a water source on your right. Please note that as of August 2010 this water is unsafe to drink, and there are signs in Japanese warning hikers not to do so. This is the only water source on the mountain, so make sure you fill up at the parking lot before you start the hike! Anyway, from here the trail parallels the stream, traversing a steep area with lots of wooden steps built to help prevent erosion. Eventually you’ll reach the 5th stagepoint (五合目), a good place to take a break. The path continues its steep ascent with even more steps (reinforced with concrete, no less) to assist in your effort. After 10 minutes of sweaty climbing, the route abruptly turns right, traversing the side of the mountain until reaching the 8th stagepoint (八合目). Be careful of this traverse in the winter/spring if the snow is unstable. From the 8th stagepoint, the best part of the hike awaits, as the alpine flowers will now start appearing in the rock formations around the trail. Although steeper than before, this really is very pleasant hiking, especially due to the lack of boring wooden steps! You’ll still be in the treeline, so it’s difficult to gauge how far you need to go, but don’t give up. In around 20 minutes you’ll reach a junction. Either path will lead you to the summit, but I highly recommend taking the right fork, as there’s a fantastic section of boulder-hopping that awaits. The forest turns into brush pine as the views really start to open up. Mt. Iwate towers over everything else around, and if visibility is good you can even see Mt. Chokai way off in the distance. Mt. Hayachine will be due east as well. Keep hopping over the rocks for about 5 minutes, turning left to reach the summit. Take a break here and admire the spectacular scenery. If you’re hiking in the winter you might want to avoid the right fork and just stay left for the easy zig-zag route to the top. You can take this trail on your way back down if you like as well. All in all, it should take around 90 minutes to reach the summit from where the taxi dropped you off. From the summit, simply retrace your steps back to the parking lot. There’s also another trail called the kowazaka route (こわ坂コース) that’ll also take you back to where you started, but it involves a long walk on a forest road to get you back to the parking lot. There’s also another trail that heads southwest from the summit that leads to the Shironai (城内) trailhead, a longer, less popular approach. I personally haven’t used that route so I unfortunately can’t offer any advice on that approach.

When to go: This hike can be done from April to November without too much trouble or effort. Bring a pair of crampons/snowshoes and watch out for the boulders on the summit if attempting this hike in the winter. Click here to see the beautiful winter scenery.

Access: Please note that there is no public transportation to the trailhead, but you can affordably take a taxi. From Morioka station, take a train on the exotic-sounding Iwate Galaxy Railway (Iwate Ginga Tetsudo in Japanese) bound for Metoki (目時) and get off at Koma (好摩) station. The train takes around 25 minutes. From there, tell the taxi driver to let you off at Ipponsugi Tozan Guchi (Ipponsugi trailhead). The driver will probably try to take you up the forest road to the actual start of the hike, but ask him/her to let you off at the shuushajou (parking lot) because there’s a toilet and water source there. The taxi should cost around 3000 yen. If there’s no taxi waiting at the station, then call 019-683-2311 in Japanese and tell them you are at Koma station and want to go to Himekami san.

Map: Click here

Level of difficulty: 2 out of 5 (elevation change ~600m)

Mt. Niseko Annupuri (ニセコアンヌプリ)

August 27, 2010

Mt. Niseko Annupuri is the highest peak in the Niseko mountain range and popular with hikers throughout the year. The views across the valley towards Mt. Yotei are nothing short of magical.

The hike: Walk on the concrete road between Yama no Ie hut and the campground, where you’ll find the trailhead a short distance from the parking lot. Fill up on water at the campground, as there’s no water source on the mountain. The well-used trail crawls its way through a dense forest for the first half hour or so, before popping out of the trees onto the main ridge. About 15 minutes into your ascent, you’ll see an unmarked trail branch off towards the right. Ignore this path, as it leads to Mt. Moiwa and Niseko Annupuri ski resort. Stay towards the left and keep climbing. In clear weather it’s easy to see where you’re going, but if the cloud is in then be careful because there are no signposts or paint marks on the rocks. The views will start to open up when you hit the ridge, and you’ll see the summit peaks rising sharply across the col on your right. As you rise higher and higher above the tree line, the trail becomes much rockier. This is where the switchbacks start, making navigation a lot smoother than just shooting straight up the side of a steep mountain. After another 20 minutes of meandering towards your destination, the trail will flatten out, with the high point directly ahead. Continue straight ahead towards the summit of Niseko Annupuri, where you’ll be rewarded with a breaktaking view of Mt. Yotei across the valley. You can see whyYotei was nicknamed Ezo-fuji in the old days. There’s a concrete emergency hut here that smells of paint inside. Don’t stay here unless you have adequate water and want to have a chemical induced headache from inhaling all the harmful fumes. From the summit, you can either retrace your steps back to the hot spring, or take the trail directly in front of you that drops down into the ski resort. You’ll reach the ski lifts after about 10 minutes, where you can follow them all the way down to Hirafu. Another interesting option would be to turn left once you reach the top of Grand Hirafu Summer Gondola and follow the signs towards Kagami-ike (鏡池), which has beautiful mirror-like reflections of the surrounding peaks. From the lake, it’s another hour or so to the bus stop at Hanaen (花園), where you can take a bus back to Kucchan station.

When to go: This hike can be done year round if you approach from the top lift of the ski resort in the winter. Otherwise, aim to go when the road/bus to Goshiki Onsen is running between early July and late October. If you’ve got your own transport then you can go earlier in the season.

Access: From Niseko station (ニセコ駅), take a red-colored bus bound for Goshiki Onsen (五色温泉) and get off at the last stop. You can also take this bus from Kucchan station (倶知安).  Please note that there are only 2 buses a day, one leaving Niseko station at 10:10am, and the other departing at 2:35pm. I recommend staying at the beautiful Goshiki Onsen Ryokan, where you’ll find 2 outstanding outdoor baths. The lodge across the street (Niseko Yama no Ie) is a bit run down but has a very friendly/helpful manager and a nice bath as well. Click here for the bus schedule.

Map: You can get a decent free map at the tourist information center at Kucchan station, or from the huts at Goshiki Onsen.

Live web cam: Click here

Level of difficulty: 2 out of 5 (elevation change ~500m).

This slideshow requires JavaScript.

Mt. Buna-ga-take (武奈ヶ岳)

May 23, 2010

photo and text by James McCrostie

The hike described here is an alternative, longer way to climb the Buna-ga-take hike listed in the Lonely Planet hiking guide. This hike begins from Shiga station (志賀駅) near the shores of Lake Biwa and requires one night’s camp in the mountains.

The hike:

DAY ONE: (5-6 hours) Exit Shiga station by turning right to walk back along the tracks in the direction the train came into the station. When you come to the third road that crosses the tracks turn right, cross the tracks, and head up the hill towards Kinoshita Shrine (樹下神社). Turn right when you reach the shrine’s torii gate and follow the hiking course signs. After crossing highway 161 via a pedestrian tunnel you’ll come to a sign-posted path called Kitadaka-michi (キタダカ道) which heads up into the mountains. It takes about 40 minutes from the station to this start of the hiking trail proper. After crossing a small concrete bridge, the trail makes a slow and steady climb up, going around a pair of dams. There are plenty of switchbacks and after about two and a half hours you’ll reach a junction leading to Kido-touge (木戸峠) or to Biwako Alps lodge (びわ湖アルプス山荘) and Biwako valley ski area (びわ湖バレイ). Head towards Kido-touge and after about 20 minutes the trail reaches another junction. This time head towards the 1,051 meter Hira-dake (比良岳) and after about 20-30 minutes there is a stream marked on maps and with a small wooden sign as a water source but it should probably be filtered, boiled or treated before drinking. The rubbish pits around this stream raise the philosophical question when do discarded cans and bottles stop being garbage and start being historical artefacts? Depending on your answer, you might consider bringing an extra garbage bag with you on this hike to pack out some of the rubbish. After reaching Hira-dake continue on the trail to Karatoyama (烏谷山) then Arakawa-touge (荒川峠). Twenty minutes after Arakawa-touge the trail reaches Minami-hira-touge (南比良峠) where you should take the trail down to Kanakuso-touge (金糞峠). From Kanakuso-touge, ignore the trail leading to Kitahira-touge (北比良峠) and follow the trail down towards Yakumo-ga-hara (八雲ヶ原) and Naka-touge (中峠). From Kanakuso-touge you can hear the sound of rushing water and the trail soon begins to follow a stream. Beside this stream, where the trail splits towards Yakumo-ga-hara or Naka-touge, there is an unofficial campsite with several flat areas to pitch a tent. This is also the last good place to get water so make sure you fill all your canteens. There’s no reliable source of good water on day two so you’ll need two days worth. The lack of proper toilet facilities around this unofficial campsite also means you should filter, boil or otherwise treat the water.

DAY TWO:(9+ hours) Following the trail towards Yakumo-ga-hara you’ll crisscross the same stream several times, reaching Yakumo-ga-hara and the now abandoned Hira ski hill after about 40 minutes. Take some time to explore the Yakumo marsh; depending on the time of year you may spot flora such as white egret orchids or fauna including fire-bellied newts or forest green tree frogs. During rainy season these frogs lay large egg sacks in tree branches above ponds. After hatching, the tadpoles fall into the water below. Keep to the boardwalk to avoid damaging the delicate ecosystem and ponder how anyone got permission to build a ski resort essentially on top of it. From Yakumo-ga-hara, it’s nearly an hour and a half to the peak of Buna-ga-take. Initially, it’s a steep climb up to the top of an abandoned ski run, then the trail heads back into the forest. After 30-40 minutes in the forest you’ll pass through a section of the trail littered with old bottles and cans and, not long after, reach the 1,214 meter peak of Buna-ga-take. From the peak, take the Kita-ryou route (北稜) towards Hosokawagoe (細川越) and Tsurube-dake (釣瓶岳) and continue on to Ikuwata-touge-kita-mine (イクワタ峠北峰) which should take about an hour and a half. However, after descending from the top of Buna-ga-take and shortly after passing a rock cairn, avoid taking an unofficial trail that leads off to the left. There is no sign-post marking the start of this unofficial trail and it isn’t marked on the maps but it leads straight down the mountain, reaching highway 367 after 2-3 hours. Itユs poorly marked with red and silver or red-faded-to-pink tape tied to branches and isn’t nearly as well maintained as the main trail. From Ikuwata-touge, avoid the trail going down to Hotorayama (ホトラ山) and take the trail to Sugawa-touge (須川峠), which you should reach after about two hours. A little more than an hour walking will then bring you to the top of the 901-meter Jyatani-ga-mine (蛇谷ヶ峰). If the clouds cooperate you can enjoy views of Lake Biwa and Mount Ibuki. Keep to the trail leading down to Kutsuki-onsen-tenku (くつき温泉てんくう), which takes about an hour and forty minutes from the top of Jyatani-ga-mine. From Kutsuki-onsen-tenku there’s a shuttle bus leading to the Kutsuki-gakko-mae bus stop (朽木学校前) where buses run twice a day to Demachiyanagi bus stop in Kyoto (leaving at 9:30 and 17:00 and taking about 90 min.) and nine times a day to Adogawa station (安曇川) on the JR Kosei line (about 30 min.). Click here for the latest bus schedules and more information about the hot spring

When to go: The most picturesque, though busiest, time is during the autumn when the leaves have changed colour, usually from late October to early November. Only hikers with winter hiking experience and gear should even think about climbing Buna-ga-take in the winter.

Access: From Kyoto (京都) station, take a local (普通) JR Kosei line (湖西線) train bound for Ohmi-Imazu (近江今津) or Tsuruga (敦賀). Get off at Shiga Station, 36 minutes from Kyoto Station.

Map: Hira-Yama-Kei (比良山系) No. 45 in the Yama to Kogen Chizu (山と高原地図) series should definitely be carried by those attempting this hike. It has several alternative approaches and ways off the mountain in case of emergency.

Level of difficulty: 3.5 out of 5 (elevation change ~1000m). Being gradual, the climb to the top itself isn’t too strenuous. However, the second day is fairly long and made more difficult by the lack of water sources. While mountain huts are labelled on maps, most (if not all) are locked and/or abandoned so a tent and cooking gear are required for this hike.

Rokku Gaaden (ロックガーデン)

January 6, 2010

The “rock garden” is one of the most popular hikes in the Kobe area, and is renowned for wild board sightings, as well as incredible views of Osaka and Kobe cities.

Special note: It’s quite easy to get lost on this hike, due to the confusing signpost and plethora of side trails that lead to nowhere. My best advice to you is to stay on the main ridge as much as possible, follow the other hikers, and use your instinct.

The hike: Go out the north exit (北出口) of Ashiya-gawa station, cut through the small concrete plaza directly in front of you and continue climbing straight ahead. Follow the road towards the mountains, keeping the river on your right. Across the river there’s a beautiful Frank Lloyd Wright designed building sitting on the hill. Built in 1924, it’s one of a handful of original Wright buildings still remaining in Japan, and the only one in the Kansai area. After about 5 minutes, you’ll cross a bridge and see a sign in blue letters reading “高座の滝/ロックガーデン with a red arrow point towards the right. Follow this road for a short bit until reaching a fork in the road and a wooden sign with the same Chinese characters as before. This one has a 左 on top, which is the character for “left”. Take the upper road on the left that climbs up and not the flat road on the right. Another 100 meters or so, you’ll see a road going straight with a yellow sign in black letters reading この先行き止まり/Uターンできません。Strangely, there is are no signs telling you where to go, but turn left here and do not go straight. After 10 meters you’ll see a road going straight but keep towards the right, following the overgrown hedges that curve around on the right side. A little further ahead you’ll see a brown sign reading 高座の滝. Continue on the road you’re on and shortly you’ll enter the forest. The trailhead starts at the very end of the road. Don’t cross the metal bridge on your left, but continue straight past a tea shop selling food and drinks. Kouza (高座) waterfall, just behind the teahouse, is considered to be one of the 100 most beautiful waterfalls in Japan. Cross the small rock bridge in front of the waterfall and you’ll immedately start climbing up some steep switchbacks. You’re now entering the ‘rock garden’, a series of large sandstone formations that are suffering from a massive bout of erosion and overuse. After about 50 meters you’ll see a small clearing on your right with a large concrete dam. This is the hangout of the wild boar, known in Japanese as Inoshishi. Sightings are apparently quite common, but in the half a dozen times I’ve done this hike I’ve only managed to see 1 of the elusive creatures. The trail continues straight ahead and is very easy to follow due to all of the scuff marks. There’s an area with metal chains at one point, but it’s not too difficult. While climbing, don’t forget to look behind you and admire the stellar view of Kobe city. The path meanders through the rock formations for about 15 minutes until reaching the bottom of a large electrical tower. Turn right here and follow the ridge, ignoring the spur trails that branch off down the mountain. As long as you continue ascending and follow the most worn path you should be ok. Occasionally you’ll see a signpost pointing you towards Kazafukiiwa (風吹岩), and you’ll pass under another electrical pylon before reaching the summit. On the summit you’ll find (surprise, surprise), yet another electrical tower! If you’re not sterile before the completion of this hike then consider yourself lucky. Drop your pack and admire the incredible views that are only slightly marred by the power lines. If you want to continue on to Mt. Rokko, then take the trail on the other side of the summit. Otherwise, to complete the loop, pass under the electrical pylon and descend to a saddle. Follow the flat trail for a short distance until reaching a trail junction. Turn right when you see the signpost reading 金鳥山保久良神社を経て阪急岡本JR岡本駅。You’ll pass under another electrical tower before descending to a saddle and a 3-way junction. Turn left here, and you’ll start descending through an area of bamboo grass and steep steps built into the hillside. This area was recently clearcut, revealing mouth-watering panoramic views of Kobe below. If you’re lucky you can also catch glimpses of Akashi bridge and Awaji island on your right. Continue descending and eventually you’ll end up back in the city. There aren’t very many sign posts in the lower section of the hike, and I’ve ended up at 3 entire different locations on 3 separate occasions! Wherever you do end up, just head downhill and ask someone how to get to Okamoto station. The entire hike should take around 3 hours or so, which is perfect as an afternoon hike.

When to go: This hike can easily be done year round, but you should avoid the place during periods or snowy or icy weather, as the sandstone scramble can be potentially deadly if you slip on any ice.

Access: From Hankyu Umeda station, take a Limited Express train on the Kobe line bound for Shinkaichi (新開地) and change to a local train at either Nishinomiya-Kitaguchi or Shukugawa stations. Take a local train on the same line to Ashiya-gawa (芦屋川) station, which is one stop from Shukugawa. On the return, you can take a Hankyu train on the same line from Okamoto (岡本)station, which is only one stop from Ashiya-gawa. The price is 270 yen for a one-way ticket.

Level of difficulty: 2 out of 5 (elevation change ~400m)