Posted tagged ‘hiking’

Mt. Akita-Komagatake (秋田駒ヶ岳)

December 20, 2010

Last updated: Feb 14, 2025

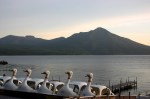
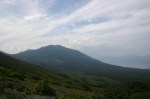
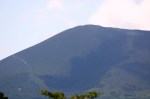
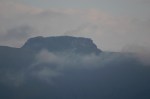
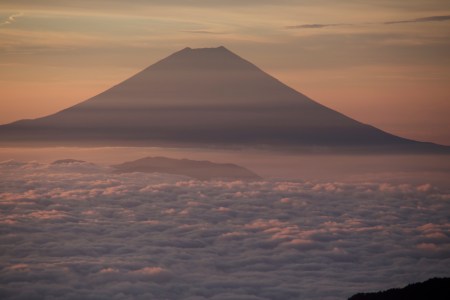
Mt. Akita-komagatake is the highest mountain in Akita Prefecture and easily one of the most picturesque. The views down towards Lake Towada are incredible on a clear day, and the wildflowers are some of the best in the Tohoku region.

The hike: From the bus stop, head past the entrance of the souvenir shop to the fountain that doubles as a water source. Fill up your bottles here, as there are no other reliable water sources on the hike. The trail starts to the right of the water. After 5 meters of walking, you’ll see a trail on your left, but ignore this and head straight. The path will curve off to the right, climbing a gentle spur towards the summit plateau. The path looks a bit like a volcanic forest road, with colorful lava rocks and an immense collection of wildflowers. After about 15 minutes of climbing, the mound-shaped peak of Mt. Oname (男女岳) will come into your view. The trail wraps around the northern flank of the peak before flattening out at a splendid volcanic lake. The reflections of the peak in the water are phenomenal when the weather is clear. At the far side of the lake is a mountain hut, so follow the wooden planks and drop your gear out front. This hut was locked when I climbed in August 2010, so I’m not sure whether you’re allowed to stay here or not. It should have taken anywhere from 30 to 50 minutes to reach this hut, depending on your speed. Follow the steps (and the crowds) up to the summit of Mt. Oname, the highest peak in Akita prefecture. The peak overlooks Lake Tazawa, as well as the distant peaks of Mt. Iwate and Mt. Chokai. After a few obligatory snaps, retrace your steps back to the hut and walk back along the lake as if you were going to descend back down to the parking lot. On the left side of the lake you’ll find a trail branching off to the left with a signpost for Odake (男岳). In 5 minutes, you’ll reach the ridge line. Turn right and start the steep, rocky climb towards the twin peak of Akita-koma. This climb is a lot more strenuous than the ascent of Mt. Oname, but the views down towards the grassy crater of Ko-dake are well worth the extra effort. After reaching the top, retrace your steps back to the saddle. Instead of turning left back down to the lake, keep climbing straight ahead on a path labeled on the maps as the “horse’s back” (馬の背). The narrow path lives up to its name, with steep drops on both sides and a panoramic view of lush, verdant peaks all around. It should take about 10 minutes of sweaty climbing to reach Yoko-dake (横岳). Turn left here and follow the ridge up and over the scree fields of Yakemori (焼森). If you’re tired, then there’s a trail on your left that leads down to the parking lot of Hachigome in about 40 minutes. Otherwise, start the long descent and even longer climb towards Mt. Yumori (湯森山). At the bottom of the descent there’s a small stream marked as a water source on the map. I’d recommend bringing a water filter in you’re planning on relying on this water. It should take about 40 minutes from the water source to reach the summit, where the views back towards Mt. Oname are entrancing. Here you’ll have to make a decision. If you want to continue all the way to Nyuto-dake and down to Nyuto Onsen, then you’ve still got 4 to 5 hours of long hiking in front of you. I recommend turning left here for the 20 minute stroll to the peak of Sasamori (笹森山), which has one of the best alpine grasslands in the entire area, filled with a wide assortment of wildflowers. From here it’s a 30 minute descent back to Hachigome. The trail drops steeply to a mountain stream and then climbs up towards the bus stop. All in all, it should take between 4 to 6 hours to complete the entire loop.

When to go: This hike can be done from early June to late October, when the buses to Hachigome are running. Please note that private cars are not allowed at the trailhead, so you’ll have to park at Arupa-Komakusa and take the bus along with everyone else. A winter ascent is also possible with the right gear and experience. Click here and to see a Japanese blog. You can also search on Youtube for 秋田駒ケ岳冬登山 .

Access: From Tazawako (田沢湖) station on the Akita Shinkansen, take a bus bound for Komagatake-Hachigome (駒ヶ岳八合目) and get off at the last stop. The bus takes about an hour and runs from June 1st to October 31st. Click here for the bus schedule. You can also take a bus bound for Nyūtō-Onsen (乳頭温泉) and change to the Hachigome bus at Arupa-Komakusa (アルパこまくさ) bus stop. Click here for the Onsen bus schedule.

Live web cam: Click here

Map: Click here

Digital Map in English (Avenza App): Click here

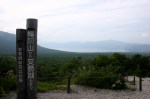
Level of difficulty: 2 out of 5 (elevation change 337m)

This slideshow requires JavaScript.

Mt. Himekami (姫神山)

September 25, 2010

Last updated: Feb 7, 2025

Mt. Himekami is a inverted wedge-shaped peak situated roughly 20km north of Morioka city in Iwate Prefecture. The views of Mt. Iwate and the alpine flora make this area a hit with locals throughout the year.

The hike: From the parking lot, head up the trail past the toilet block of the small campground. After around 5 minutes you’ll enter the forest and cross the dirt forest road. This is where the trailhead proper starts and where the taxi driver will drop you off unless you say otherwise. The path is well-trodden and easy to follow. Meander through the cedar forest for a few minutes or so and you’ll come to a large cedar tree and a water source on your right. Please note that as of August 2010 this water is unsafe to drink, and there are signs in Japanese warning hikers not to do so. This is the only water source on the mountain, so make sure you fill up at the parking lot before you start the hike! Anyway, from here the trail parallels the stream, traversing a steep area with lots of wooden steps built to help prevent erosion. Eventually you’ll reach the 5th stagepoint (五合目), a good place to take a break. The path continues its steep ascent with even more steps (reinforced with concrete, no less) to assist in your effort. After 10 minutes of sweaty climbing, the route abruptly turns right, traversing the side of the mountain until reaching the 8th stagepoint (八合目). Be careful of this traverse in the winter/spring if the snow is unstable. From the 8th stagepoint, the best part of the hike awaits, as the alpine flowers will now start appearing in the rock formations around the trail. Although steeper than before, this really is very pleasant hiking, especially due to the lack of boring wooden steps! You’ll still be in the treeline, so it’s difficult to gauge how far you need to go, but don’t give up. In around 20 minutes you’ll reach a junction. Either path will lead you to the summit, but I highly recommend taking the right fork, as there’s a fantastic section of boulder-hopping that awaits. The forest turns into brush pine as the views really start to open up. Mt. Iwate towers over everything else around, and if visibility is good you can even see Mt. Chokai way off in the distance. Mt. Hayachine will be due east as well. Keep hopping over the rocks for about 5 minutes, turning left to reach the summit. Take a break here and admire the spectacular scenery. If you’re hiking in the winter you might want to avoid the right fork and just stay left for the easy zig-zag route to the top. You can take this trail on your way back down if you like as well. All in all, it should take around 90 minutes to reach the summit from where the taxi dropped you off. From the summit, simply retrace your steps back to the parking lot. There’s also another trail called the kowazaka route (こわ坂コース) that’ll also take you back to where you started, but it involves a long walk on a forest road to get you back to the parking lot. There’s also another trail that heads southwest from the summit that leads to the Shironai (城内) trailhead, a longer, less popular approach. I personally haven’t used that route so I unfortunately can’t offer any advice on that approach.

When to go: This hike can be done from April to November without too much trouble or effort. Bring a pair of chain spikes/crampons/snowshoes and watch out for the boulders on the summit if attempting this hike in the winter. Click here to see the beautiful winter scenery.

Access: Please note that there is no public transportation to the trailhead, but you can affordably take a taxi. From Morioka station, take a train on the exotic-sounding Iwate Galaxy Railway (Iwate Ginga Tetsudo in Japanese) bound for Metoki (目時) and get off at Koma (好摩) station. The train takes around 25 minutes. From there, tell the taxi driver to let you off at Ipponsugi Tozan Guchi (Ipponsugi trailhead). The driver will probably try to take you up the forest road to the actual start of the hike, but ask him/her to let you off at the shuushajou (parking lot) because there’s a toilet and water source there. The taxi should cost around 3000 yen. If there’s no taxi waiting at the station, then call 019-683-2311 in Japanese and tell them you are at Koma station and want to go to Himekami san.

Map: Click here

Level of difficulty: 2 out of 5 (elevation change ~600m)

Mt. Niseko Annupuri (ニセコアンヌプリ)

August 27, 2010

Mt. Niseko Annupuri is the highest peak in the Niseko mountain range and popular with hikers throughout the year. The views across the valley towards Mt. Yotei are nothing short of magical.

The hike: Walk on the concrete road between Yama no Ie hut and the campground, where you’ll find the trailhead a short distance from the parking lot. Fill up on water at the campground, as there’s no water source on the mountain. The well-used trail crawls its way through a dense forest for the first half hour or so, before popping out of the trees onto the main ridge. About 15 minutes into your ascent, you’ll see an unmarked trail branch off towards the right. Ignore this path, as it leads to Mt. Moiwa and Niseko Annupuri ski resort. Stay towards the left and keep climbing. In clear weather it’s easy to see where you’re going, but if the cloud is in then be careful because there are no signposts or paint marks on the rocks. The views will start to open up when you hit the ridge, and you’ll see the summit peaks rising sharply across the col on your right. As you rise higher and higher above the tree line, the trail becomes much rockier. This is where the switchbacks start, making navigation a lot smoother than just shooting straight up the side of a steep mountain. After another 20 minutes of meandering towards your destination, the trail will flatten out, with the high point directly ahead. Continue straight ahead towards the summit of Niseko Annupuri, where you’ll be rewarded with a breaktaking view of Mt. Yotei across the valley. You can see whyYotei was nicknamed Ezo-fuji in the old days. There’s a concrete emergency hut here that smells of paint inside. Don’t stay here unless you have adequate water and want to have a chemical induced headache from inhaling all the harmful fumes. From the summit, you can either retrace your steps back to the hot spring, or take the trail directly in front of you that drops down into the ski resort. You’ll reach the ski lifts after about 10 minutes, where you can follow them all the way down to Hirafu. Another interesting option would be to turn left once you reach the top of Grand Hirafu Summer Gondola and follow the signs towards Kagami-ike (鏡池), which has beautiful mirror-like reflections of the surrounding peaks. From the lake, it’s another hour or so to the bus stop at Hanaen (花園), where you can take a bus back to Kucchan station.

When to go: This hike can be done year round if you approach from the top lift of the ski resort in the winter. Otherwise, aim to go when the road/bus to Goshiki Onsen is running between early July and late October. If you’ve got your own transport then you can go earlier in the season.

Access: From Niseko station (ニセコ駅), take a red-colored bus bound for Goshiki Onsen (五色温泉) and get off at the last stop. You can also take this bus from Kucchan station (倶知安).  Please note that there are only 2 buses a day, one leaving Niseko station at 10:10am, and the other departing at 2:35pm. I recommend staying at the beautiful Goshiki Onsen Ryokan, where you’ll find 2 outstanding outdoor baths. The lodge across the street (Niseko Yama no Ie) is a bit run down but has a very friendly/helpful manager and a nice bath as well. Click here for the bus schedule.

Map: You can get a decent free map at the tourist information center at Kucchan station, or from the huts at Goshiki Onsen.

Live web cam: Click here

Level of difficulty: 2 out of 5 (elevation change ~500m).

This slideshow requires JavaScript.

Mt. Buna-ga-take (武奈ヶ岳)

May 23, 2010

photo and text by James McCrostie

The hike described here is an alternative, longer way to climb the Buna-ga-take hike listed in the Lonely Planet hiking guide. This hike begins from Shiga station (志賀駅) near the shores of Lake Biwa and requires one night’s camp in the mountains.

The hike:

DAY ONE: (5-6 hours) Exit Shiga station by turning right to walk back along the tracks in the direction the train came into the station. When you come to the third road that crosses the tracks turn right, cross the tracks, and head up the hill towards Kinoshita Shrine (樹下神社). Turn right when you reach the shrine’s torii gate and follow the hiking course signs. After crossing highway 161 via a pedestrian tunnel you’ll come to a sign-posted path called Kitadaka-michi (キタダカ道) which heads up into the mountains. It takes about 40 minutes from the station to this start of the hiking trail proper. After crossing a small concrete bridge, the trail makes a slow and steady climb up, going around a pair of dams. There are plenty of switchbacks and after about two and a half hours you’ll reach a junction leading to Kido-touge (木戸峠) or to Biwako Alps lodge (びわ湖アルプス山荘) and Biwako valley ski area (びわ湖バレイ). Head towards Kido-touge and after about 20 minutes the trail reaches another junction. This time head towards the 1,051 meter Hira-dake (比良岳) and after about 20-30 minutes there is a stream marked on maps and with a small wooden sign as a water source but it should probably be filtered, boiled or treated before drinking. The rubbish pits around this stream raise the philosophical question when do discarded cans and bottles stop being garbage and start being historical artefacts? Depending on your answer, you might consider bringing an extra garbage bag with you on this hike to pack out some of the rubbish. After reaching Hira-dake continue on the trail to Karatoyama (烏谷山) then Arakawa-touge (荒川峠). Twenty minutes after Arakawa-touge the trail reaches Minami-hira-touge (南比良峠) where you should take the trail down to Kanakuso-touge (金糞峠). From Kanakuso-touge, ignore the trail leading to Kitahira-touge (北比良峠) and follow the trail down towards Yakumo-ga-hara (八雲ヶ原) and Naka-touge (中峠). From Kanakuso-touge you can hear the sound of rushing water and the trail soon begins to follow a stream. Beside this stream, where the trail splits towards Yakumo-ga-hara or Naka-touge, there is an unofficial campsite with several flat areas to pitch a tent. This is also the last good place to get water so make sure you fill all your canteens. There’s no reliable source of good water on day two so you’ll need two days worth. The lack of proper toilet facilities around this unofficial campsite also means you should filter, boil or otherwise treat the water.

DAY TWO:(9+ hours) Following the trail towards Yakumo-ga-hara you’ll crisscross the same stream several times, reaching Yakumo-ga-hara and the now abandoned Hira ski hill after about 40 minutes. Take some time to explore the Yakumo marsh; depending on the time of year you may spot flora such as white egret orchids or fauna including fire-bellied newts or forest green tree frogs. During rainy season these frogs lay large egg sacks in tree branches above ponds. After hatching, the tadpoles fall into the water below. Keep to the boardwalk to avoid damaging the delicate ecosystem and ponder how anyone got permission to build a ski resort essentially on top of it. From Yakumo-ga-hara, it’s nearly an hour and a half to the peak of Buna-ga-take. Initially, it’s a steep climb up to the top of an abandoned ski run, then the trail heads back into the forest. After 30-40 minutes in the forest you’ll pass through a section of the trail littered with old bottles and cans and, not long after, reach the 1,214 meter peak of Buna-ga-take. From the peak, take the Kita-ryou route (北稜) towards Hosokawagoe (細川越) and Tsurube-dake (釣瓶岳) and continue on to Ikuwata-touge-kita-mine (イクワタ峠北峰) which should take about an hour and a half. However, after descending from the top of Buna-ga-take and shortly after passing a rock cairn, avoid taking an unofficial trail that leads off to the left. There is no sign-post marking the start of this unofficial trail and it isn’t marked on the maps but it leads straight down the mountain, reaching highway 367 after 2-3 hours. Itユs poorly marked with red and silver or red-faded-to-pink tape tied to branches and isn’t nearly as well maintained as the main trail. From Ikuwata-touge, avoid the trail going down to Hotorayama (ホトラ山) and take the trail to Sugawa-touge (須川峠), which you should reach after about two hours. A little more than an hour walking will then bring you to the top of the 901-meter Jyatani-ga-mine (蛇谷ヶ峰). If the clouds cooperate you can enjoy views of Lake Biwa and Mount Ibuki. Keep to the trail leading down to Kutsuki-onsen-tenku (くつき温泉てんくう), which takes about an hour and forty minutes from the top of Jyatani-ga-mine. From Kutsuki-onsen-tenku there’s a shuttle bus leading to the Kutsuki-gakko-mae bus stop (朽木学校前) where buses run twice a day to Demachiyanagi bus stop in Kyoto (leaving at 9:30 and 17:00 and taking about 90 min.) and nine times a day to Adogawa station (安曇川) on the JR Kosei line (about 30 min.). Click here for the latest bus schedules and more information about the hot spring

When to go: The most picturesque, though busiest, time is during the autumn when the leaves have changed colour, usually from late October to early November. Only hikers with winter hiking experience and gear should even think about climbing Buna-ga-take in the winter.

Access: From Kyoto (京都) station, take a local (普通) JR Kosei line (湖西線) train bound for Ohmi-Imazu (近江今津) or Tsuruga (敦賀). Get off at Shiga Station, 36 minutes from Kyoto Station.

Map: Hira-Yama-Kei (比良山系) No. 45 in the Yama to Kogen Chizu (山と高原地図) series should definitely be carried by those attempting this hike. It has several alternative approaches and ways off the mountain in case of emergency.

Level of difficulty: 3.5 out of 5 (elevation change ~1000m). Being gradual, the climb to the top itself isn’t too strenuous. However, the second day is fairly long and made more difficult by the lack of water sources. While mountain huts are labelled on maps, most (if not all) are locked and/or abandoned so a tent and cooking gear are required for this hike.

Rokku Gaaden (ロックガーデン)

January 6, 2010

The “rock garden” is one of the most popular hikes in the Kobe area, and is renowned for wild board sightings, as well as incredible views of Osaka and Kobe cities.

Special note: It’s quite easy to get lost on this hike, due to the confusing signpost and plethora of side trails that lead to nowhere. My best advice to you is to stay on the main ridge as much as possible, follow the other hikers, and use your instinct.

The hike: Go out the north exit (北出口) of Ashiya-gawa station, cut through the small concrete plaza directly in front of you and continue climbing straight ahead. Follow the road towards the mountains, keeping the river on your right. Across the river there’s a beautiful Frank Lloyd Wright designed building sitting on the hill. Built in 1924, it’s one of a handful of original Wright buildings still remaining in Japan, and the only one in the Kansai area. After about 5 minutes, you’ll cross a bridge and see a sign in blue letters reading “高座の滝/ロックガーデン with a red arrow point towards the right. Follow this road for a short bit until reaching a fork in the road and a wooden sign with the same Chinese characters as before. This one has a 左 on top, which is the character for “left”. Take the upper road on the left that climbs up and not the flat road on the right. Another 100 meters or so, you’ll see a road going straight with a yellow sign in black letters reading この先行き止まり/Uターンできません。Strangely, there is are no signs telling you where to go, but turn left here and do not go straight. After 10 meters you’ll see a road going straight but keep towards the right, following the overgrown hedges that curve around on the right side. A little further ahead you’ll see a brown sign reading 高座の滝. Continue on the road you’re on and shortly you’ll enter the forest. The trailhead starts at the very end of the road. Don’t cross the metal bridge on your left, but continue straight past a tea shop selling food and drinks. Kouza (高座) waterfall, just behind the teahouse, is considered to be one of the 100 most beautiful waterfalls in Japan. Cross the small rock bridge in front of the waterfall and you’ll immedately start climbing up some steep switchbacks. You’re now entering the ‘rock garden’, a series of large sandstone formations that are suffering from a massive bout of erosion and overuse. After about 50 meters you’ll see a small clearing on your right with a large concrete dam. This is the hangout of the wild boar, known in Japanese as Inoshishi. Sightings are apparently quite common, but in the half a dozen times I’ve done this hike I’ve only managed to see 1 of the elusive creatures. The trail continues straight ahead and is very easy to follow due to all of the scuff marks. There’s an area with metal chains at one point, but it’s not too difficult. While climbing, don’t forget to look behind you and admire the stellar view of Kobe city. The path meanders through the rock formations for about 15 minutes until reaching the bottom of a large electrical tower. Turn right here and follow the ridge, ignoring the spur trails that branch off down the mountain. As long as you continue ascending and follow the most worn path you should be ok. Occasionally you’ll see a signpost pointing you towards Kazafukiiwa (風吹岩), and you’ll pass under another electrical pylon before reaching the summit. On the summit you’ll find (surprise, surprise), yet another electrical tower! If you’re not sterile before the completion of this hike then consider yourself lucky. Drop your pack and admire the incredible views that are only slightly marred by the power lines. If you want to continue on to Mt. Rokko, then take the trail on the other side of the summit. Otherwise, to complete the loop, pass under the electrical pylon and descend to a saddle. Follow the flat trail for a short distance until reaching a trail junction. Turn right when you see the signpost reading 金鳥山保久良神社を経て阪急岡本JR岡本駅。You’ll pass under another electrical tower before descending to a saddle and a 3-way junction. Turn left here, and you’ll start descending through an area of bamboo grass and steep steps built into the hillside. This area was recently clearcut, revealing mouth-watering panoramic views of Kobe below. If you’re lucky you can also catch glimpses of Akashi bridge and Awaji island on your right. Continue descending and eventually you’ll end up back in the city. There aren’t very many sign posts in the lower section of the hike, and I’ve ended up at 3 entire different locations on 3 separate occasions! Wherever you do end up, just head downhill and ask someone how to get to Okamoto station. The entire hike should take around 3 hours or so, which is perfect as an afternoon hike.

When to go: This hike can easily be done year round, but you should avoid the place during periods or snowy or icy weather, as the sandstone scramble can be potentially deadly if you slip on any ice.

Access: From Hankyu Umeda station, take a Limited Express train on the Kobe line bound for Shinkaichi (新開地) and change to a local train at either Nishinomiya-Kitaguchi or Shukugawa stations. Take a local train on the same line to Ashiya-gawa (芦屋川) station, which is one stop from Shukugawa. On the return, you can take a Hankyu train on the same line from Okamoto (岡本)station, which is only one stop from Ashiya-gawa. The price is 270 yen for a one-way ticket.

Level of difficulty: 2 out of 5 (elevation change ~400m)

Mt. Tarumae (樽前山)

October 28, 2009

Mt. Tarumae is an active volcano located on the shores of Lake Shikotsu in Western Hokkaido. In addition to the outstanding views of the lake below, the mountain offers a rare chance to view an unstable lava dome.

tarumae1

The hike: There’s a toilet and a small hut at the trailhead, but no water to speak of, so make sure you fill up before leaving Lake Shikotsu. The trail immediately starts gaining altitude, but the going is made easier with an endless array of wooden steps. You’ll reach a small clearing after 10 minutes or so, where the views will start to open up. You’ll see Lake Shikotsu directly behind you and Mt. Fuppushi rising steeply on your right. Directly in front of you lies the conical peak of Mt. Tarumae. The trail cuts a beeline directly across the eastern flank of the volcano, similar to what occurs on the trail up Mt. Asama in Nagano Prefecture. The trail is well-maintained and is suffering a bit from overuse, so it’s almost impossible to get lost. You’ll reach the crater rim in about a half an hour or so, where you’ll find a junction. Turn right for Higashi-dake (東岳), the high point of the crater. The views towards the lake below are spectacular, and on a clear day you can see Mt. Yotei rising gracefully in the distance. If you’ve got time, then you can circumnavigate the entire crater rim in about 2 hours or so. Just follow the trail around towards Nishi-dake (西岳). Whatever you do, don’t enter the caldera to get a look at the gigantic smoldering lava dome, as the gases will likely kill you. The lava dome has been growing steadily since 1909 and is now taller than the crater itself. This is an extremely active volcano with a long history of powerful eruptions and is currently under 24 hour surveillance by the Japan Meteorological Agency. When you’ve seen enough then you can simply retrace your steps back to the parking lot. If you’re looking for a more challenging hike away from the crowds, then you can consider climbing neighboring Mt. Fuppushi. There’s a trail to the summit on the other side of the parking lot. It should take about 3 to 4 hours to reach the top, where the views are outstanding. Make sure you bring a bear bell and/or bear repellent as the col between Tarumae and Fuppushi is a popular hangout for brown bears.

When to go: This hike can be done from mid April to late November, when most of the snow is gone. A mid-winter ascent is also possible for those with winter mountaineering experience and equipment, but you’ve got a much longer approach since the road to the trailhead will be closed.

Access: The start of the hike is only accessible by private transport. You can get as far as Shikotsu-kohan by bus, from where you can hire a taxi for the 3000 yen journey to the trailhead. Click here for the bus schedule from Sapporo to Lake Shikotsu. The number for the taxi company is 0123-25-2111. Just tell them you want to go to Tarumae-tozanguchi. You can also try your luck hitching by walking out to the main road just above the parking lot at Shikotsu-kohan.

Map: Click here

Live web cam: Click here

Level of difficulty: 1 out of 5 (elevation change 363m).

Mt. Mikuma (三熊山)

July 26, 2009

Mt. Mikuma is a small hill overlooking the coastal resort town of Sumoto on Awaji Island. The small elevation change and outstanding panoramic views make it the perfect afternoon stroll after a morning on the beach.

mikuma1

The hike: There’s a tourist information center at the bus terminal if you’d like to get a basic map or inquire about accomodation options. Walk out the main entrance of the terminal and turn right, heading for the large supermarket just in front of you. This is an excellent place to pick up supplies. You can also marvel at the grass parking spaces! Anyway, continue walking past the supermarket on the main road into town. If you want a little more scenic and quieter approach to the beach, then walk a few blocks towards the sea, where you’ll find a wonderful wooden boardwalk. Cross over the bridge and decent to the beach. This is actually one of nicest beaches in the Kansai area (sans Shirahama), but beware that there are no coin lockers here. (There are a few at the bus station if you’d like to save some money). Otherwise, you can pay 1000 yen at any of the shops on the beach and they’ll keep your stuff and let you have a warm shower. If you want to do the hike first, then walk all the way along the beach until reaching a rather large, modern hotel called the Hotel New Awaji. The hiking path starts just beyond the hotel, on a steep paved driveway. Follow the road to the top of the hill, where you’ll see signs pointing towards Mt. Mikuma. Turn left and follow the paved path as it winds its way through a spectacular forest. Despite the fact that it’s a completely concrete path, the beauty of the flora really makes you forget about this unfortunate truth. If you’re walking in sandals, then you might actually appreciate the grip the path has to offer. Continue climbing and turn left at the first major junction you see. Again, there’s a signpost here, so it’s difficult to get lost. After another couple of switchbacks you’ll arrive at the top of the ridge. Turn left again and the castle will come into view directly in front of you. There’s a hidden parking lot for people who are lazy and want to drive up, but I guarantee that you’ll pretty much have the place to yourself during the summer, as the hot and humid weather will keep most in their fancy hotels below. There’s a shop just below the summit that sells shaved ice and soft drinks. Make your way towards the castle, where you’ll be rewarded with stunning views of the beach below. The castle itself is a concrete reproduction built in 1928, but the castle walls date from the 6th century. The castle is free to enter and has outstanding vistas all the way over towards Wakayama city. If you’re keen to do a little more walking, then you can retrace your steps back towards the paved path, where you’ll find a loop trail over to nishi-no-maru (西の丸). There aren’t any views on that side of the mountain, but it looks like a good place to escape if there are any big crowds near the castle (which there could be in autumn.) Anyway, retreat back to the beach and reward yourself with a refreshing swim. In addition, Hotel New Awaji has two amazing hot spring baths that can be yours for a measly 1800 yen (surely the steepest day-use fee for any hot spring in Japan). There’s plenty of free camping on the beach, or you can shell out the big bucks for the hotel. There’s also a hostel-eque place right on the beach that gets very crowded with groups in the summer.

When to go: This hike can easily be done year round, but the best time is probably the summer, where you can combine the hike with a lovely swim on the beach. In addition, it can be easily done in sandals, eliminating the need to carry an extra pair of walking shoes.

Access: From the Hankyu bus terminal in Umeda, take a bus bound for Sumoto bus center (洲本バスセンター). The bus takes 2 hours and costs 2300 yen (one-way). Click here for the schedule. There are also JR buses leaving from the JR highway bus center (also in Umeda) which cost the same price and take about the same amount of time. Alternatively, you can also take a bus from Sannomiya station in Kobe. Click here for the schedule (click on the PDF file on that page).

Level of difficulty: 1 out of 5 (elevation change 133m)

This slideshow requires JavaScript.


Interview with Craig Mclachlan

May 10, 2009

Here is a recent interview I did with Lonely Planet author Craig Mclachlan for Kansai Scene magazine.

Craig

Mt. Fuji (富士山)

April 27, 2009

Mt. Fuji now has a climbing fee for all hikers regardless of trailhead or approach. Be prepared to pay to climb the mountain in 2025 if hiking during the summer season.

Interested in climbing Japan’s tallest mountain?  Our guidebook will show you everything you need to know for a successful climb.

IMG_7352.jpg

Mt. Kurobegoro (黒部五郎岳)

April 21, 2009

This blog post was written back in 2009. For the latest information about this hike (including color photos and maps), please consider purchasing my guidebook to the Japan Alps. 

Mt. Kurobegoro is on the main Kamikochi-Tateyama trekking route, and one of the most unspoilt peaks in the Kita Alps. The huge col below the summit traps snow until late in the year, providing numerous photo ops when the weather is cooperating.

kurobegoro

The hike: Please note that the trail from Utsubo towards the first big junction is upkept and is becoming less and less popular. If you’ve got your own transport, then it’s better to start at Hietsu Tunnel (飛越トンネル), which is just up the road from Utsubo. Anyway, walk on the forest road that continues past the bus stop to its terminus. It’s about 5km or so, and it should take about an hour. Once you reach the end, the trail will branch off towards the left, climbing a somewhat steep spur before flattening out into some marshlands. There’s a water source here, and the mizubasho (skunk cabbage) bloom from early to mid June. Stay on the trail for another 30 minutes or so, and you’ll reach a trail junction, and considerably more foot traffic. This is where the path meets up with the main trail coming from Hietsu tunnel, so turn right and follow the signs to Mt. Teraji (寺地山), which should take another hour or so to reach. Again, the trail is well trodden and easy to follow. The views will start to open up the higher you climb: Mt. Yakushi towers to your left and Mt. Kasa keeps a watchful eye on your right, while Mt. Kurobegoro rises directly in front of you. Continue climbing up for another hour or so, and you’ll find a trail junction on your right, which leads down to Kitanomata Emergency Hut (北ノ俣非難小屋), your home for the night. The triangular hut is small but well kept, with plenty of water flowing out front. If you’ve gotten an early start, then you can consider climbing up and over Mt. Kurobegoro, but keep in mind that you’ve got 4-1/2 to 5 hours of tough hiking before reaching the next hut, so plan accordingly. The next morning, retrace your steps back to the junction, turning right towards Mt. Kitanomata (北ノ俣岳). Soon you’ll rise above the tree line, and if the cloud isn’t in you can see your destination. After an hour or so, you’ll reach a large trail junction, where you’ll finally be on the main ridgeline of the Kita Alps. Turn left if you want to go to Tateyama, or right if Kamikochi is your destination. If you just want to do a quick up-and-back of Mt. Kurobegoro, then leave your pack at the junction. At any rate, it’s a steady 2 hour climb through stunning alpine terrain. Keep your eyes out for ptarmigan and take in the scenery if the weather is good. Unfortunately, when I did this hike in the pouring rain and I couldn’t see a thing. so you bet I’ll be back here to get revenge. Carry on climbing slowly and steadily, and before long you’ll be sitting on top of the target peak. The trail splits in two on the summit, but you can take either fork, since they both meet up again at the bottom. If there’s still a lot of snow, then the left fork is probably a better option. Descend through the spectacular col, and after 90 minutes or so, you’ll arrive at Kurobegoro hut and campground. Set up camp here, or continue along the ridge to Sugoroku if it’s still early in the day. Alternatively. you can turn left at the next trail junction and head north towards Mt. Washiba or Kumo-no-daira. Take your time and enjoy exploring one of the best sections of the Japan Alps.

When to go: This hike can be done from mid-July to early October, when most of the snow is gone. If you’ve got crampons and winter hiking experience, then you can go earlier in the season. Click here for an unbelievable account of a Japanese guy who skied 35km up and over the peak and down to Shin-hotaka hot spring during Golden Week!

Access: Access is really difficult without a car, but it can be done with a little time and patience. From the bus terminal next to Takayama (高山) station, take a bus bound for Nouhi-basu Kamioka Eigyousho (濃飛バス営業所) and get off at that stop. From there, change to the Yama-no-mura bus (山之村バス) bound for Wasafu (和佐府) and get off at Utsubobashi (打保橋). There are only 2 buses a day to Wasafu (only 1 during the winter season), so make sure you time your approach accordingly. If you take the 9:40am bus from Takayama, then the transfer is timed, so you can arrive at the Utsubo trailhead at 12:16pm. Click here to download the bus schedule from Takayama to Kamioka and here to download the schedule for the Yama-no-mura bus.

Level of difficulty: 4 out of 5 (elevation change ~1800m)